
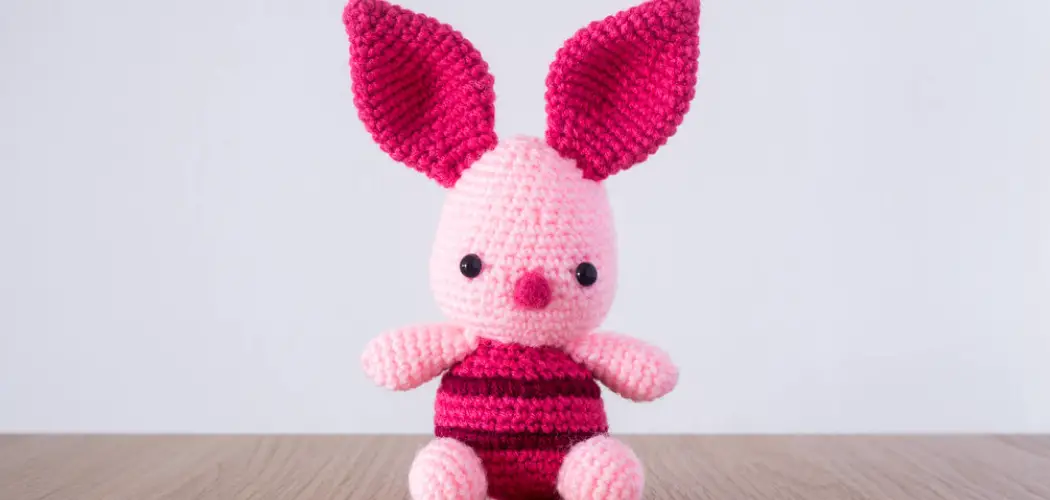
Are you looking to learn how to crochet piglet? Crochet is an enjoyable and creative hobby that anyone can do. It requires patience, concentration, a few materials, and of course practice. Crafting your own piglet might seem impossible or daunting at first, but with the right instructions and understanding of its essential elements it can be a fun and rewarding creative experience.
Here, I’ll walk you through all of the tools needed for crocheting your very own Piglet along with simple tips and tricks on how to create activities like changing colors when stitching back-and-forth rows or making design features like eyes on your finished project. So get ready to bring some adorable creativity into your home!

If you’ve ever wanted to create your own cuddly stuffed animal friend, look no further – with a few simple materials and some crochet know-how, you can make your own Piglet (or any other favorite stuffed friend)! The process of crocheting Piglet isn’t difficult or time-consuming if you have the right tools and techniques. We’ll walk through the steps from gathering your supplies to finishing touches so that within just a few hours –possibly even less– you can be snuggling up with your newest furry family member!
Why May You Want to Crochet Piglet?
There are many reasons why you may want to crochet Piglet! Such as:
1. Adds a Touch of Whimsy
One of the best things about crocheting Piglet is that it adds a touch of whimsy to any project. Whether you’re making a baby blanket, scarf, or even an afghan, the addition of Piglet will make your project stand out among others!
2. It’s Fun
Crocheting Piglet can be incredibly fun and engaging! With its cute and whimsical design, it’s sure to bring a smile to your face as you work on the project. So if you want a fun and unique crafting experience, Piglet is a perfect choice!
3. Great for All Skill Levels
Whether you’re an experienced crocheter or just starting out, Piglet can be adapted to fit any skill level. With easy-to-follow instructions and diagrams, you’ll be able to create your own Piglet no matter how experienced you are.
4. Perfect for Decorations and Gifts
Piglet makes for a great decoration or gift for any occasion! With its adorable design, it’s sure to be loved by the recipient and make any project look even more special. So if you’re looking for something special to give as a present or decoration, then Piglet is definitely the way to go!

5. A Great Way to Learn How to Crochet
Learning to crochet can be daunting, but Piglet is a great way to start. With its relatively simple pattern and design, it’s a great starter project for anyone wanting to learn crocheting basics. So if you want the chance to learn something new without the frustration of complicated projects, Piglet is definitely a great option.
So if you’re looking for something fun and unique that can be adapted to any skill level, then crocheting Piglet is an excellent option. It’s sure to make your project extra special and bring a sense of whimsy to any decoration or gift! All you need to do is follow the instructions of How to Crochet Piglet, and you’ll be well on your way to creating something amazing. Good luck!
How to Crochet Piglet in 6 Easy Steps
Step 1: Gather the Necessary Materials
The very first step is to gather all of the necessary materials. You will need a size G crochet hook, worsted weight yarn in pink and yellow (or any other color combination you want!), scissors, and a yarn needle.
Step 2: Make the Body & Legs
You will begin by making the body of your piglet first. To do this, create a chain of 8 stitches and then join it together with a slip stitch to form a circle. Then, single crochet around the circle for 4-5 rounds. After you’ve finished crocheting the body, move on to making the legs. To do this, begin by making a chain of 10 stitches and then joining them together with a slip stitch to form a circle. Single crochet around the circle for 3-4 rounds, then fasten off.
Step 3: Make the Ears & Snout
Now it’s time to make the ears and snout of your piglet. To start, make two circles of 4 single crochets each. Then, attach them to the sides of your piglet’s head. Next, make a snout by crocheting two single crochets in one stitch and then joining them together with a slip stitch.

Step 4: Attach the Legs & Ears
Once you’ve finished making all the pieces, it’s time to assemble them. Use your yarn needle and some scrap yarn to attach the legs to the body of your piglet. Make sure to stuff each leg before attaching it, as this will help keep their shape. Then, use the same method to attach the ears to the head of your piglet.
Step 5: Add Details
To finish your piglet, add details to give him a more realistic look. Using the yarn needle, you can embroider on eyes and nostrils with some scrap yarn. You can also use pink or yellow yarn scraps to make a curly tail for your piglet.
Step 6: Double Check
The last step is to double-check all your stitches and ensure everything looks how you want it. Once everything looks good, fasten off and weave in any loose ends. And that’s it! You’ve successfully crocheted a piglet! Enjoy your new creation!
Some Tips to Crochet Piglet
1. Do Not Rush
When crocheting a piglet, it is important to take your time. The more patient you are, the better the result will be. Taking breaks in between can help keep you focused and prevent mistakes from happening. Also, take the time to check your work and make sure everything is correct before moving on.

2. Get the Right Supplies
For crocheting a piglet, you will need yarn, crochet hooks, scissors, stuffing, needle, and thread. The best kind of yarn to use for projects like this one are cotton or wool varieties because they are more durable and easier to work with. The size of the hooks you need will depend on the size of your piglet, so make sure to get the correct ones for your project.
3. Make a Sample First
Before starting on your final product, making a sample piece for practice is important. This way, you can make sure that the stitches and techniques used are correct. It is also a great way to test out different color combinations or patterns before committing to them on your final project.
4. Take Your Time with Details
Details are very important when crocheting a piglet, so taking your time with them is important. Make sure to carefully embroider the nose and eyes and any other details you want to add. This is also a great opportunity to customize your piglet by adding different colored yarns or buttons.
5. Don’t Forget the Ears
The ears are probably one of the most important parts of a piglet, so make sure you don’t forget them! They can be crocheted separately and then attached to the body with a needle and thread. You can also choose to crochet the ears directly onto the body if you prefer.
6. Stuff It Properly
It is important to stuff your piglet correctly so that it looks full and fluffy. You should use loose stuffing for the bigger parts of the body, such as the head and legs, and then use something firmer for the smaller details like the ears and nose.

7. Avoid Common Mistakes
When crocheting a piglet, it is common to make mistakes. To avoid this, try counting each stitch and double-checking your work before moving on. If you find that you have made a mistake, it’s best to undo the stitches and start again rather than trying to fix it with additional stitching.
With these tips, you can easily crochet your own piglet! Have fun and get creative with the colors and patterns – you’ll be sure to have a one-of-a-kind creation in no time. Good luck!
Frequently Asked Questions
What Precautions Should I Take When Crocheting a Piglet?
When crocheting a piglet, be sure to use caution and avoid using sharp crochet hooks. Additionally, it is important to ensure that the yarn or other material used for the project is safe for any small children who may come in contact with the finished product.
Furthermore, make sure to keep the finished product away from pets and other animals that may be tempted to chew on it. Finally, always use safety eyes or embroidery when creating facial features, as buttons, beads and other small items can present a choking hazard to young children.
What Materials Should I Use To Crochet a Piglet?
A basic crochet Piglet pattern requires worsted-weight yarn and a corresponding crochet hook size. Other materials needed to create the perfect Piglet include stuffing, safety eyes (or embroidery for facial features), scissors, a tapestry needle for seaming and tying off ends, stitch markers, and pins (optional). Additionally, it is helpful to have access to internet tutorials or instructional books to ensure that the pattern is followed correctly.

What Steps Do I Need To Take When Crocheting a Piglet?
When crocheting a piglet, it is important to follow the instructions of the chosen pattern carefully. Generally speaking, this includes starting with creating the body and head of the piglet, securing the safety eyes and facial features, stuffing the body of the piglet, and finally, crocheting all of the other details, such as ears and a tail. Additionally, it is important to tie off all yarn ends securely when finishing the project.
What Are Some Tips for Crocheting a Piglet?
When crocheting a Piglet, it is helpful to use stitch markers throughout the process so that you can easily keep track of which rows have been completed and where the pattern should continue. Additionally, practice patience when crocheting with finer yarns, as this type of work tends to take longer than projects made with thicker materials. Finally, if possible, enlist the help of a more experienced crocheter to ensure that all techniques are being used correctly.
Where Can I Find Patterns To Crochet Piglets?
Patterns for crochet Piglet projects can be found online on craft sites and blogs or in print from books available at most bookstores and libraries. Additionally, some yarn stores offer classes or private tutoring sessions that can help teach the basics of crochet. No matter where you find your pattern, read it thoroughly before beginning and ensure you have all the necessary materials on hand.
How Long Does It Take To Crochet a Piglet?
The amount of time required to complete a Piglet project can vary greatly depending on the pattern’s complexity and the crocheter’s skill level. Generally, a basic Piglet project can take between two to four hours to finish, while more complex projects may take longer. Additionally, larger versions of a Piglet may require additional supplies and more time to complete.

Conclusion
Congratulations! If you’ve followed the steps correctly, you should now know how to crochet piglets! Whether you choose to crochet it as is or spruce it up with different colors and patterns, the possibilities are endless when it comes to customizing your crochet toy. This activity is a great way to spend quality time with friends and family while teaching little ones to get creative.
You can even consider taking your skills further by creating a collection of rare, unique amigurumi (crochet animals). Who knows – maybe someday your work will be on display in museums! No matter the project, having an understanding of how to crochet piglet opens the door for limitless designs and enjoyable experiences.