
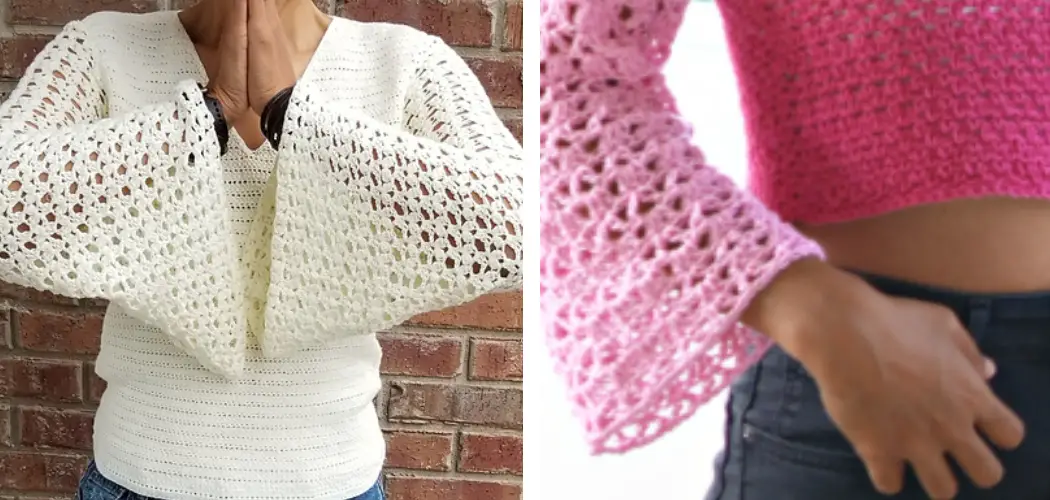
Are you looking to learn how to crochet bell sleeves? Then you’ve come to the right place. Bell sleeves are a popular style of sleeve that can be crocheted onto any type of garment.
Crochet bell sleeves are the perfect accessory for adding a touch of on-trend style to any outfit. Whether you’re looking to add some extra warmth to your favorite cardigan or adorning an army jacket with a handmade crochet design, these billowy sleeves offer plenty of visual interest that catches the eye and gets noticed.

In this blog post, we’ll show you step by step how to create your own beautiful bell sleeve pattern – no matter what type of garment it’s going on! So grab your yarn and needles, and let’s get started!
What is a Bell Sleeve?
Bell sleeves are flared out or wide at the bottom, with a shape similar to that of a bell. They are typically attached at the shoulder and can come in all different lengths, from just below the elbow to wrist length.
Originally popularized in the 1960s and 70s, bell sleeves have made a comeback in recent years as a bohemian and retro-inspired fashion trend. They can add drama, femininity, and a touch of whimsy to any outfit. And best of all, they are relatively easy to crochet!
It’s important to note that there are different types of bell sleeves. While some patterns will refer to all flared sleeves as bell sleeves, others may specify a certain shape or style, such as trumpet sleeves or ruffle sleeves. In this tutorial, we’ll focus on the classic bell sleeve design.
Why Should I Crochet Bell Sleeves?
Crocheting your own bell sleeves has many advantages. Firstly, you get to customize the size and shape of the sleeve to fit your personal style and preferences. You can choose the yarn type, color, and stitch pattern to create a truly unique piece.
Additionally, crocheting your own bell sleeves allows you to add a handmade touch to your wardrobe. It’s a great way to express your creativity and stand out from the crowd with a one-of-a-kind garment.
Plus, crocheting is a relaxing and therapeutic hobby that can help reduce stress and anxiety while also producing a beautiful end result. So not only will you have stunning bell sleeves, but you’ll also enjoy the process of creating them.
What Will You Need?
For this project, you’ll need the following:
Yarn (in the Color of Your Choice):
Choose a yarn that is soft and comfortable to wear, as well as in the color of your choice. You can use either wool or acrylic yarn – whichever you prefer.
Crochet Hooks:
You will need a set of crochet hooks in various sizes depending on the type of yarn you choose to work with. We recommend having at least three sizes on hand for this project.
Scissors:
You’ll need scissors to cut the yarn as you work on your project. Make sure they are sharp and easy to handle.
Measuring Tape:
A measuring tape is essential for determining the length of your bell sleeve. This will ensure that both sleeves are symmetrical in size.
Stitch Markers:
Stitch markers help you keep track of where you are in your pattern and make it easier to count stitches.
10 Easy Steps on How to Crochet Bell Sleeves:
Step 1: Measure Your Sleeve
The first step is to measure the sleeve of the garment in which you plan to add crochet bell sleeves. Measure from your shoulder to where you want the bell sleeve to end, and ensure you have enough yarn for your project. Be careful not to cut the yarn too short! You can always trim it down later. It’s better to have extra yarn than not enough.
You can also use a measuring tape to determine the circumference of your arm. This will help you create an accurate-sized bell sleeve.
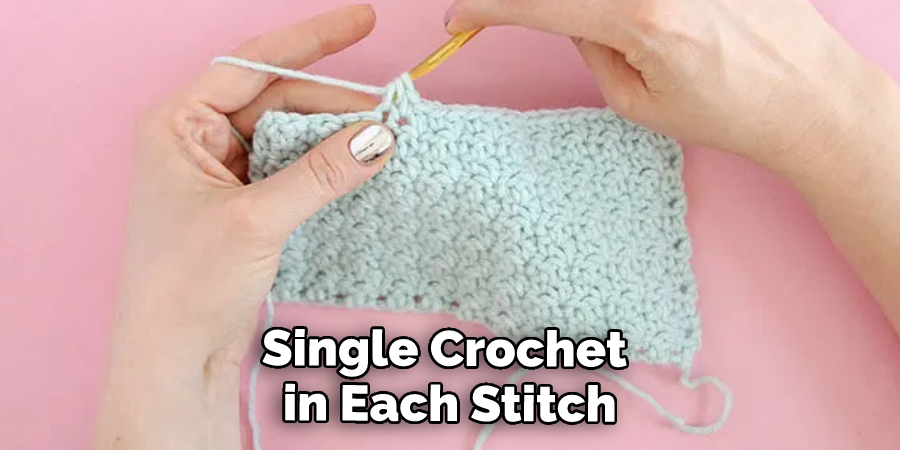
Step 2: Single Crochet
Starting at the cuff, chain 20 stitches. Then, single-crochet each stitch across until you reach the other side of the cuff. When you’ve finished this row, turn your work and repeat this process until the desired length is reached. But remember – your sleeve must be longer than the desired length as you need to account for the bell shape at the end.
You can experiment with different crochet stitches for your bell sleeve, but the single crochet stitch is easy to work with and creates a dense and sturdy fabric.
Step 3: Increase Stitches
Once your desired length has been achieved, it’s time to increase stitches to create a bell shape for your sleeve. To do this, single crochet two stitches into the second stitch from the hook and then single crochet in each remaining stitch. This will increase your total number of stitches by one. It’s important to do this in every row until you reach the end. This will create a gradual bell shape.
The number of increases you make in each row will depend on the size of your sleeve and the desired shape. Experiment with different numbers until you get the perfect bell shape.
Step 4: Increase Stitches Again
To create a more bell-shaped sleeve, you’ll need to increase your stitches again. To do this, single crochet two stitches into every other stitch across the row until the desired length is reached. Don’t forget to turn in your work and repeat this process until the end of the row!
It’s essential to remember the number of increases you make in each row so your sleeve is symmetrical on both sides. You can use stitch markers to keep track of your increases.
Step 5: Decrease Stitches
Once you reach the desired length for your bell sleeve, it’s time to decrease your stitches to create an even shape at the top of your sleeve. To do this, single crochet together two stitches at a time until only three or four remain. Cut off excess yarn and weave in the ends.
Although it may seem counterintuitive to decrease the number of stitches after increasing them, this will create a more balanced and symmetrical bell shape. It also helps to shape the sleeve into a subtle flare rather than a drastic one.
Step 6: Attach Sleeve To Garment
Now that you’ve completed your bell sleeve, it’s time to attach it to the garment of your choice. Using a needle and thread, sew the sleeve onto the garment in small stitches around the edge. Make sure to secure each stitch before moving on to the next one.
You can also use a crochet hook to attach the sleeve, but sewing it on by hand will give you more control and a neater finish.
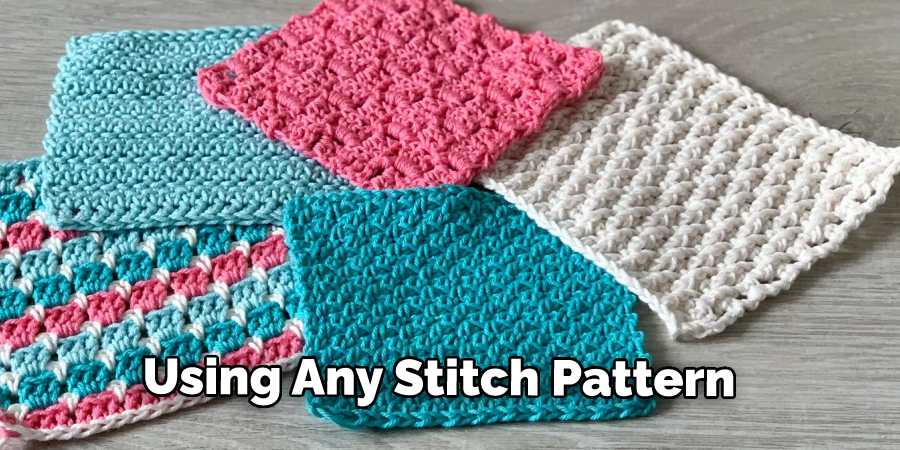
Step 7: Add Decorative Edging (Optional)
If desired, add an extra touch of detail by crocheting a decorative edging around the cuff of your bell sleeve. This can be done using any stitch pattern you prefer – from scallop shells to popcorn stitches! Experiment with different patterns until you find something you love. But remember, less is more – don’t go overboard with the decoration as it can take away from the overall look of the sleeve.
Step 8. Weave in Ends
When you’ve finished adding your decorative edging, it’s time to weave in any remaining ends. Use a tapestry needle and thread to secure the yarn tails into the back of your work. This will help ensure that your bell sleeve looks neat and tidy when worn. It’s essential to weave in the ends properly so your sleeve doesn’t unravel with wear.
You can also use this same method to attach any loose ends from where you increased or decreased stitches in your sleeve.
Step 9: Block Your Work (Optional)
Once you’ve completed all stitching and weaving, block your work. This is an optional step, but it can be beneficial for giving your work a professional finish. Pin down the sleeve edges with pins or T-pins before spritzing or steaming lightly with warm water. Allow cooling completely before unpinning and wearing!
The blocking process will help to flatten and stretch out any uneven parts of your work, giving it a more polished appearance. You can also use a steam iron on low heat to press the sleeve if preferred.
Step 10. Enjoy!
Congratulations, you’ve made a beautiful bell sleeve pattern! Now, all that’s left to do is enjoy your new creation and show it off in style. Whether you wear it to the office or out for dinner, this unique piece of crocheted apparel will make any outfit look special. Happy crocheting!
By following these ten easy steps, you’ll be able to crochet beautiful bell sleeves in no time! You can create any design or pattern you dream up with patience and practice. So grab your yarn and needles and get crafting!
5 Additional Tips and Tricks:
1. Make sure to use the same size crochet hook throughout the project, as this will ensure consistency in stitches.
2. Before starting your sleeves, practice making the stitch a few times and make sure that it is correct even before beginning.
3. Use pins or stitch markers to keep track of how many rows you have done so far.
4. When working on the cuff of the sleeve, remember to pull tight after each row so that the fabric doesn’t stretch out while crocheting.
5. If you are having trouble understanding any part of the pattern or technique, don’t be afraid to research online or ask someone with more experience for help!
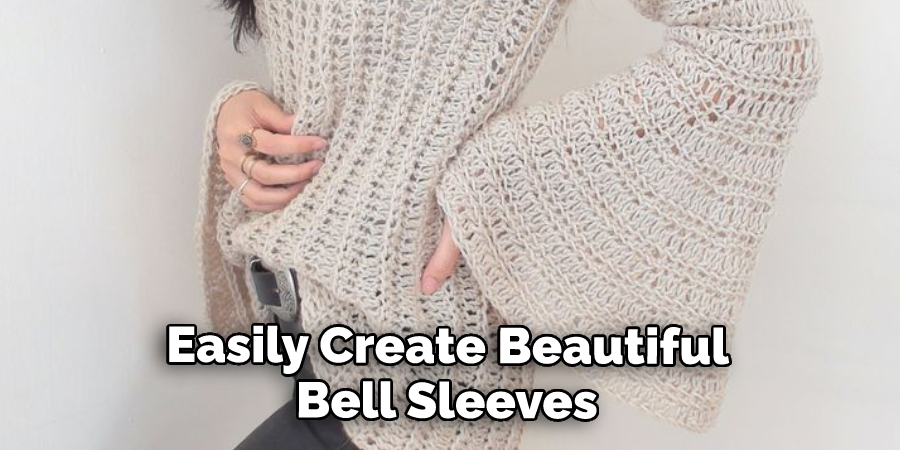
With some patience and practice, you can easily create beautiful bell sleeves! Follow the steps and tips above to get started on your crocheting journey. Happy crafting!
5 Things You Should Avoid:
1. Don’t make your sleeve too short: If it is too short, it won’t create the bell shape you’re looking for. Aim for a length that reaches just above the wrist, and be sure to check how it looks when worn.
2. Avoid using too small of a hook size: Using too small of a hook size can make your bell sleeves look stiff and inflexible rather than soft and flowing as they should be. Try using a slightly larger hook size to ensure you get the desired effect.
3. Don’t skimp on yarn: You need to use enough yarn so that your bell sleeves look full and voluminous. Otherwise, they won’t give off any drama or flair.
4. Don’t forget to try it on Not trying on the bell sleeves while you are making them can lead to a poor fit and an unflattering silhouette. Make sure you check how they look when worn- don’t just trust your eyes!
5. Avoid rushing: Taking your time when crocheting bell sleeves is important, as this will ensure that every stitch looks perfect and even. Rushing through can result in uneven edges or sloppy stitches, so make sure to slow down and take your time with each process step.
With these tips and tricks in mind, you’ll be able to create beautiful bell sleeves easily! So grab your yarn and needles and get crafting!
Are Bell Sleeves Out of Fashion?
The short answer is no! Bell sleeves are definitely not out of fashion and have been popular for years. In fact, they have recently made a bit of a comeback, with many celebrities and influencers sporting them in their outfits. This trend can easily be worked into both casual and formal looks – perfect for any occasion!
While bell sleeves may take some time to make, the effort will be worth it when you see how unique and stylish your creation is. So don’t worry about following trends- bell sleeves are always in style!
Bell sleeves are easy to make and look great on any outfit. With these tips, you’ll be able to create a beautiful pair of bell sleeves in no time! So grab your yarn and needles and get crafting! Happy crocheting!
What Fabrics Are Best for Making Bell Sleeves?
When it comes to fabrics, there are several options that work best for creating bell sleeves. Natural fibers such as cotton and linen are lightweight and breathable, so they are perfect for summer months when you want to keep cool. Wool is also a good choice because it’s durable and warm- great for winter outfits!

You can also experiment with different weights of fabrics like jersey or silk if you’re looking for something more special. These materials are lightweight and have a drapey quality, which will help the bell sleeves look soft, voluminous, and flowy. Whatever fabric you choose, make sure it is flexible enough to move easily with your body movements!
With these tips in mind, you’ll be able to find the perfect fabric for your bell sleeve project. So don’t be afraid to experiment and have fun with it! Happy crafting!
Frequently Asked Questions:
Q: Can I Use a Different Crochet Stitch for the Bell Sleeves?
A: Absolutely! While the double crochet stitches are commonly used, you can experiment with different stitches like half-double or triple crochet to achieve a unique look. You can also combine different stitches to create interesting textures and patterns on your bell sleeves. Just make sure to adjust the stitch count accordingly to maintain the desired shape and length.
Q: How Do I Make Sure My Bell Sleeves Fit Properly?
A: The key is to take accurate measurements before starting your project. Measure your arm’s circumference at the widest part, then measure from your shoulder to where you want the sleeves to end. This will help you determine the number of rows and stitches needed for your specific measurements. Additionally, trying on the sleeves as you go can also help ensure a proper fit.
Q: Can I Add Embellishments to My Bell Sleeves?
A: Absolutely! Adding embellishments like beads, buttons, or embroidery can add an extra touch of personality and uniqueness to your bell sleeves. Just make sure to secure them properly and evenly distribute them throughout the sleeves for a balanced look. Have fun with it and let your creativity soar! Overall, don’t be afraid to experiment and make your bell sleeves as unique and personalized as you want.
Conclusion:
It can be tough to create the right size and length of sleeves. However, crocheting bell sleeves gives you the creative freedom to make them as unique or basic as you wish. When executing this pattern, ensure that the fabric is not too tight and your crochet techniques are correct. There is a variety of options when it comes to stitching techniques and yarns to use for crocheted bell sleeves.
Even if it’s daunting at first, with practice comes perfection. With patience and creativity, crafting your bell sleeves can be easily achievable. Whether you make them for yourself or someone close to you, creating beautiful designs will bring joy in any situation.
Hopefully, these tips and tricks on how to crochet bell sleeves have been helpful in creating the perfect bell sleeves. So don’t forget to have fun and get creative with your design! Good luck, and happy crocheting!
You Can Check It Out to Block Crochet Cotton