
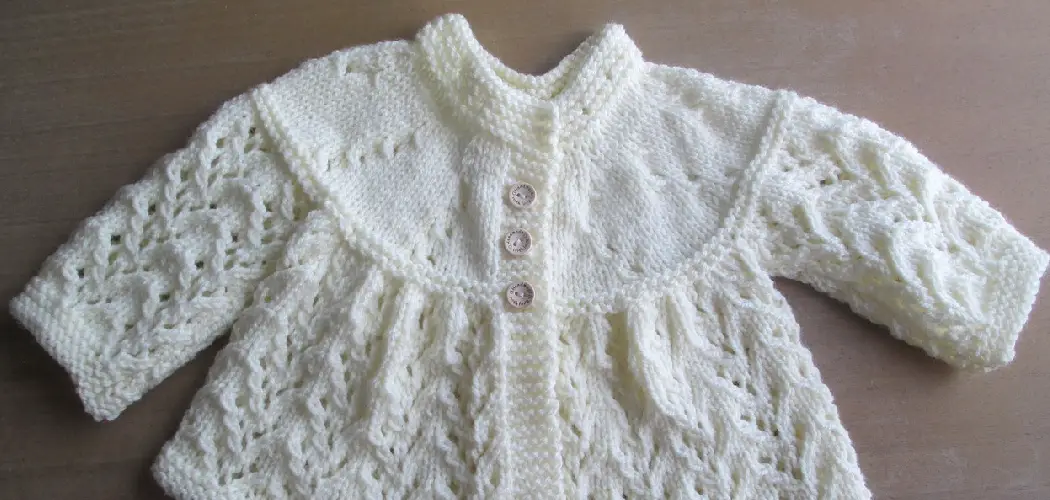
For those pursuing the wonderful craft of crocheting, learning how to crochet a toddler sweater is an exciting and rewarding experience. Whether you’re a first-time or experienced crocheter, this tutorial will explain everything you need to know about creating your very own cozy handcrafted garment for babies and toddlers.

With only basic supplies required, plus some patience and lots of love, we’ll in this article about how to crochet a toddler sweater for beginners, we will show you how easily and quickly it can be done using simple tutorials that are perfect for beginners. So grab some yarn and a crochet hook because here at Boho Crochet Circle, we want to get those tiny hands into something warm!
How Long Does It Take to Crochet a Toddler Sweater?
The amount of time it takes to crochet a toddler sweater depends on several factors, such as the size of the sweater, pattern complexity, and the crocheter’s skill level. For most beginner projects, a simple baby or toddler-sized sweater can be completed in 4-5 hours.
More complex patterns can take up to 10 hours or more to complete. Additionally, experienced crocheters may find that they are able to work faster than beginners, completing sweaters in less time.
When first starting out, it is recommended to budget your time accordingly by allowing extra time for learning how to read the pattern and mastering new stitches. This will help you avoid any delays due to unexpected challenges along the way!
No matter how long it takes you to complete your toddler sweater, the most important thing is to enjoy the process and take pride in what you create! With enough practice, soon enough, you will become an expert crocheter!
10 Methods How to Crochet a Toddler Sweater for Beginners
1. Choose the Right Yarn
The first step in learning how to crochet a toddler sweater is to choose the right yarn. You’ll want to choose a yarn that is soft and comfortable, as well as easy to care for. Acrylic yarns are a good choice for beginners, as they are inexpensive and easy to work with. However, there are many other types of yarns available, so feel free to experiment until you find one that you like.

If you’re working with a pattern, make sure to use the same type of yarn that it specifies. While you can use a different type of yarn, this may affect the finished size and look of your sweater. However, if you’re using a simple stitch pattern and don’t need to worry about exact measurements, you can use any yarn of your choice.
2. Choose the Right Size Hook
The next step is to choose the right size hook. The size of your hook will determine the gauge of your sweater, so it’s important to choose a size that is appropriate for the yarn you’re using. If you’re not sure which size to use, consult a crochet pattern or ask someone at your local yarn shop for help.
Generally, a hook size of G-6 (4 mm) to H-8 (5 mm) is suitable for most baby and toddler sweaters. Once you have chosen your hook size, it’s time to start crocheting! While you can use any stitch pattern to make your sweater, we recommend using a basic single crochet (sc) for your first time.
3. Make a Gauge Swatch
Before you start crocheting your sweater, it’s important to make a gauge swatch. This will help you ensure that your finished sweater will be the correct size. To make a gauge swatch, simply crochet a small square using the stitch and hook size you plan to use for your sweater. Then, measure the square and compare it to the gauge listed in your pattern.
If your square is larger or smaller than the gauge, adjust your hook size accordingly. Though it may seem like a tedious task, making a gauge swatch is essential for getting the perfect finished product. Make sure you do this step before getting into full production mode!
4. Start Crocheting the Body of the Sweater
Once you’ve chosen the right yarn and hook and made a gauge swatch, you’re ready to start crocheting the body of the sweater. Most sweaters are worked in rounds, so you’ll need to join your yarn with a slip stitch in order to start crocheting in the round.

Once you’ve joined your yarn, simply crochet around and around until your work measures the desired width. Be sure to keep track of your stitches so that your work remains even. To make sure that your work measures accurately, measure it regularly while crocheting. Once the body is complete, you’re ready to move on to the next step.
5. Work the Neck Opening
Once you’ve reached the desired width, it’s time to work the neck opening. To do this, simply crochet a few rows without increasing or decreasing any stitches. This will create an opening at the center front of your sweater where the neck will go. Be sure to leave enough space for your child’s head to fit through comfortably.
Try to keep the neck opening consistent for all sizes—about 4-5 inches should suffice. While you’re working, make sure to leave a long enough tail at the beginning of each row so you can use it for sewing later. Additionally, for the smaller sizes, you may need to make the neck opening a little wider by increasing stitches at the edges. This will help ensure there is enough space for your child’s head.
6. Work The Sleeves
The next step is to work the sleeves. Most sweaters have set-in sleeves, which means they are worked separately from the body of the sweater and then sewn into place later on. To work a set-in sleeve, begin by crocheting a small rectangle that measures the desired width and length of your sleeve.
Once you’ve reached the desired dimensions, simply sew the rectangle onto each side of the sweater body at the armholes. If you’re a beginner, you may want to add some extra stitches along the edges of the rectangle before sewing it in place. This will give your sleeve a bit more shape. Once your sleeves are securely in place, you’re ready to move on to the next step – attaching the collar and hem!
7. Finish The Neckline And Armholes
Once you’ve attached all of your sleeves, it’s time to finish off the neckline and armholes. To do this, simply single crochet around each opening until it is closed off completely. Finish off and secure the yarn at the end.

You can also add decorative trim to the neckline, such as a ribbed band or scalloped edge for a more finished look. Finally, weave in the ends and your crochet toddler sweater is complete! Additionally, if you want to make sure your sweater fits perfectly, consider using a ribbon tie at the back of the neck instead of sewing buttons or snaps.
8. Add Buttons Or Zippers
Finally, you can add buttons or zippers to the sweater for a finished look. This is completely optional, but it adds a great touch. Make sure you choose buttons or zippers that match the yarn and color of your sweater, as well as being age-appropriate for your toddler.
Button or zipper holes can be created by making chain stitches, then stitching them in the appropriate place with a yarn needle. If you choose to put zippers in the sweater, be sure to make the holes wide enough so they don’t rip or tear while opening and closing.
9. Enjoy Your Creation
Once you’ve added your buttons or zippers, pat yourself on the back! You have just finished crocheting a beautiful sweater for your toddler. With a little bit of practice, you can make more sweaters in no time.
Don’t be afraid to experiment with different colors, stitch patterns and embellishments. If you ever need help, there are plenty of resources available such as books, websites and YouTube channels dedicated to crochet for beginners. To wear your new sweater with pride, simply hand wash it in cold water and lay flat to dry. Congratulations on your creation! You did it!
What Are the Easiest Clothes to Crochet?
The easiest clothes to crochet are typically smaller items, such as hats and scarves. Children’s garments, like sweaters and dresses, are also easier to complete than those for adults because of their size. For a beginner crocheter looking to make a crochet item of clothing for their child or grandchild, crocheting a toddler sweater is an excellent choice.
With just a few basic stitches and a couple of hours, you can complete a stylish sweater for your little one.

Conclusion
With the tips in this blog post, you now have the knowledge and confidence to crochet a toddler sweater. Remember that if you get stuck, many online tutorials are available to help guide you through the process.
With some perseverance, your hobby will become an enjoyable activity that produces satisfactory results! If you feel inspired and motivated to give your DIY skills a go – start crocheting a toddler sweater today – How to Crochet a Toddler Sweater for Beginners.