
Embark on a delectable crochet adventure as we explore the art of crafting a sweet and charming strawberry. Perfect for adding a touch of whimsy to your crochet repertoire, learning how to crochet a strawberry is a delightful endeavor that combines creativity with a dash of fruity flair.

In this comprehensive guide, we’ll unravel the steps involved in bringing this iconic berry to life, from selecting the perfect yarn hues to mastering the art of shaping and detailing.
Whether you’re a crochet enthusiast seeking a delightful amigurumi project or simply yearning to create whimsical accessories, join us on this journey through stitches and loops as we cultivate a crochet strawberry that’s as irresistible as the real thing. Get ready to infuse your handmade projects with a burst of fruity charm, one crochet stitch at a time.
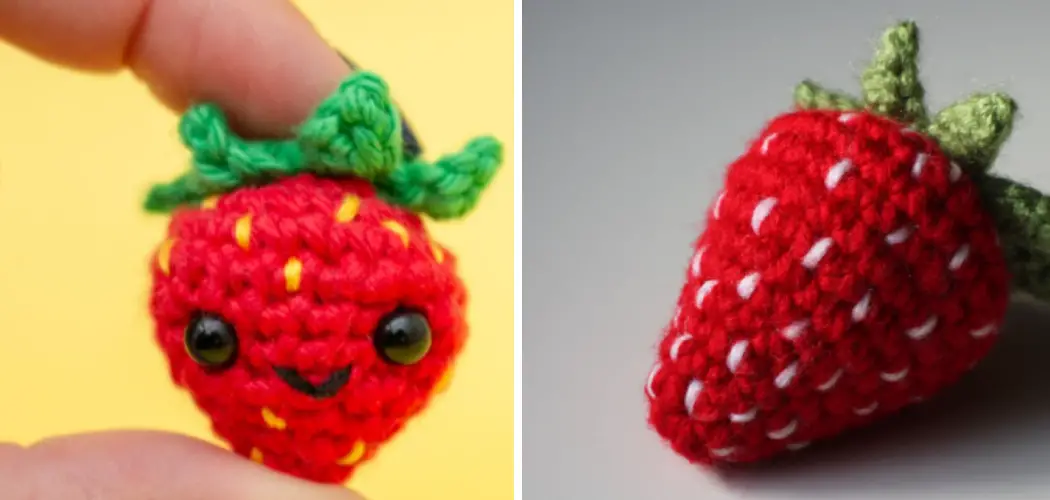
Selection of Yarn Colors (Red, Green, and White)
Before we begin, let’s discuss the importance of selecting the right yarn colors for your crochet strawberry. While there are endless possibilities when it comes to color combinations, a traditional strawberry typically features three main shades: red, green, and white.
For the body of the berry, opt for a vibrant shade of red that mimics the rich hue of a ripe strawberry. This could be in the form of solid-colored yarn or a variegated option with varying shades of red. Next, choose a muted green for the stem and leaves to provide contrast and bring dimension to your strawberry. Finally, white is essential for adding detail and creating the signature seeds on the surface of the berry.
Materials and Tools
To start, let’s gather all the materials and tools that we will need to crochet our strawberry. Here is a list of items that you will need:
- Yarn (in red and green colors for the strawberry)
- Crochet hook (size G or 4mm)
- Scissors
- Tapestry needle
- Stitch marker (optional)
Basic Crochet Stitches
Crocheting is a popular hobby that involves using a hook and yarn to create various fabric items. There are many different types of crochet stitches, but in this article, we will focus on the basic stitches that every beginner should know.

Chain Stitch
The chain stitch is the foundation for all crochet projects. To start, make a slip knot on your hook and then wrap the yarn over the hook from back to front. Pull this loop through the slip knot and continue pulling loops through until you have reached your desired number of chain stitches.
Single Crochet
The single crochet stitch is one of the most commonly used stitches in crochet projects. To begin, insert your hook into the second chain from the hook and then pull up a loop. Yarn over and pull through both loops on the hook to complete the stitch.
Half Double Crochet
The half double crochet stitch is slightly taller than the single crochet stitch, making it great for adding texture to your project. To start, yarn over and insert your hook into the third chain from the hook. Pull up a loop and then yarn over again. Pull through all three loops on the hook to complete the stitch.
Double Crochet
The double crochet stitch is great for creating a looser and airier fabric. To begin, yarn over and insert your hook into the fourth chain from the hook. Pull up a loop and then yarn over again. Pull through two loops on the hook, yarn over again, and pull through the remaining two loops to complete the stitch.
Triple Crochet
The triple crochet stitch, also known as the treble crochet, is one of the tallest basic stitches. To start, yarn over twice and then insert your hook into the fifth chain from the hook. Yarn over and pull up a loop, then yarn over again and pull through two loops on the hook three times to complete the stitch.

10 Methods How to Crochet a Strawberry
1. Choose Your Materials
To crochet a strawberry, you will need yarn in red, green, and white colors, a crochet hook, scissors, and a tapestry needle. The thickness of the yarn and size of the hook will determine the size of your finished strawberry.
2. Start with a Magic Ring
To begin crocheting your strawberry, create a magic ring by wrapping the yarn around two fingers twice and pulling one loop through the other. This will create a secure base for your stitches.
3. Work in Rounds
Crocheting in rounds means that you will continuously work in a circular pattern without turning your work. This is how you will create the shape of your strawberry. To crochet in rounds, you will need to use a stitch marker. This can be a simple piece of yarn or a specialized stitch marker that you can purchase at any craft store.
4. Single Crochet Stitches
The majority of your strawberry will be made using single crochet stitches. These are simple stitches where you insert your hook into the designated stitch, wrap the yarn over the hook, pull it through, and then wrap again to pull through both loops on the hook.
5. Increase Stitches
As you work in rounds, you will need to increase stitches to make your strawberry wider at the base and narrower at the top. To do this, simply add two single crochet stitches into one stitch from the previous round.

6. Decrease Stitches
To make your strawberry more tapered at the top, you will need to decrease stitches by combining two single crochet stitches into one stitch from the previous round. To do this, insert your hook into the first stitch, yarn over and pull up a loop. Then, insert your hook into the next stitch, yarn over and pull up a loop. Yarn over again and pull through all three loops on your hook to create one single crochet decrease.
7. Use Different Colors for Texture
To add texture to your strawberry, use different colors for each round or section of stitching. For example, use green for leaves at the top and white for seeds on the red body. This will make your strawberry look more realistic and visually appealing.
8. Stuff with Filling
Once you have completed crocheting your strawberry body, stuff it with filling such as polyester fiberfill or cotton batting to give it shape and volume. This will also make your strawberry look more realistic and feel soft to the touch.
9. Close off with Slip Stitch
When you have reached the desired size for your strawberry body, close off the top by making a slip stitch into each stitch around. This will create a smooth, rounded top for your strawberry. Once you have completed the slip stitch round, fasten off your yarn and weave in any loose ends.
10. Add Finishing Touches
To complete your crocheted strawberry, add a small green stem at the top and sew on any additional details such as white seeds or embroidered features. Your strawberry is now ready to be displayed or used as a cute decoration!
Maintaining Even Tension for a Uniform Appearance
One of the key elements in crocheting a strawberry is maintaining an even tension throughout the project. This not only ensures that your stitches are consistent and neat, but it also helps create a uniform appearance for your finished strawberry.

Adjusting Your Grip
The first step in maintaining even tension is to make sure you have a comfortable grip on your crochet hook. You want to hold the hook with a relaxed but firm grip, using your thumb, index, and middle fingers. Avoid gripping too tightly as this can cause tension on your stitches.
Finding Your Tension Style
There are several ways to hold your yarn while crocheting, and it’s important to find a method that works best for you. Some common techniques include holding the yarn between your index and middle fingers, using a yarn guide on your finger, or wrapping the yarn around your pinky.
Experiment with different techniques to see what feels most natural and comfortable for you. This will help you maintain even tension throughout your project.
Consistent Yarn Tension
In addition to maintaining an even tension in how you hold the hook and yarn, it’s also crucial to keep the yarn tension consistent throughout your project. This means using the same amount of pressure and pulling on the yarn for each stitch.
Inconsistencies in yarn tension can result in varying stitch sizes, which will affect the overall appearance of your strawberry. Practice keeping a steady and uniform tension as you work through your project.
Things to Consider When Learning How to Crochet
If you are thinking about learning how to crochet, there are a few things you should consider before getting started. Crocheting is a popular hobby that has been around for centuries, and it continues to grow in popularity.

With the rise of social media and online communities, it’s now easier than ever to find inspiration and connect with other crocheters. However, before you dive into the world of crochet, here are some key things to keep in mind.
1. Choosing the Right Materials
One of the first things you will need to do when learning how to crochet is choose the right materials. There is a wide variety of yarns and hooks available, each with its own characteristics and uses. It’s important to understand the different types of yarns, such as acrylic, wool, and cotton, as well as the various hook sizes and materials.
2. Starting with Basic Stitches
Once you have your supplies ready, it’s time to learn the basic stitches. The most common stitches in crochet are the chain, single crochet, double crochet, and treble crochet. These stitches form the foundation of almost all crochet patterns.
3. Understanding Crochet Patterns
One of the unique aspects of crocheting is following patterns. Patterns provide instructions on what stitches to use, how many stitches to make, and where to place them. They can be written or in the form of charts, so it’s important to understand how to read both types. As you become more experienced in crochet, you can also start creating your own patterns.
Common Mistakes to Avoid When Crocheting a Strawberry
When it comes to crocheting a strawberry, there are certain mistakes that beginners often make. These mishaps can result in an uneven or misshapen strawberry, making it less realistic and visually appealing. In this section, we will discuss some common mistakes to avoid when crocheting a strawberry.
Not Using the Right Yarn
One of the most common mistakes when crocheting a strawberry is not using the right yarn. The texture and weight of the yarn play a crucial role in achieving the desired shape and appearance of your strawberry. Using a thick or chunky yarn may result in a larger and bulkier strawberry, while using a thin or delicate yarn may make it look smaller and less defined.

Not Tensioning Correctly
Tension refers to the amount of pressure applied on the yarn while crocheting. When crocheting a strawberry, it is crucial to maintain an even tension throughout the project. If your tension is too tight, the stitches will be smaller and tighter, resulting in a smaller strawberry.
Not Counting Stitches
Counting stitches is an essential aspect of crocheting any project, especially a detailed one like a strawberry. Not counting stitches can result in skipping or adding stitches, leading to an uneven and distorted strawberry. It is crucial to count your stitches at the end of each row and make sure they match the number required by the pattern.
Conclusion
In conclusion, learning how to crochet a strawberry is not just about creating a cute and fun item for your projects. It’s also about the joy of the process and mastering a new skill. With this guide, you now have all the steps and tips you need to make your very own crocheted strawberry in no time. So go grab your yarn, hook, and needle and let your creativity flow!
Don’t be afraid to experiment with different colors or sizes to truly make it your own unique creation. And don’t forget to share your strawberry creations with us on social media with the hashtag #CrochetWithFruit. Together, let’s spread the love for crocheting and inspire others to pick up this wonderful hobby. Thank you for reading and happy crocheting!
Expertise:
Crafting expert with a focus on innovative techniques and diverse materials.
Specialization:
- Textile arts (weaving, embroidery, and fabric dyeing)
- Woodworking and furniture design
- Mixed media and upcycling projects
Recognition:
- Featured in local art exhibits showcasing innovative craft projects
- Collaborated with community organizations to promote crafting workshops
- Received accolades for contributions to sustainable crafting initiatives
Mission:
- To inspire and empower crafters of all levels to discover their creative potential
- Encourages experimentation and self-expression through hands-on projects