
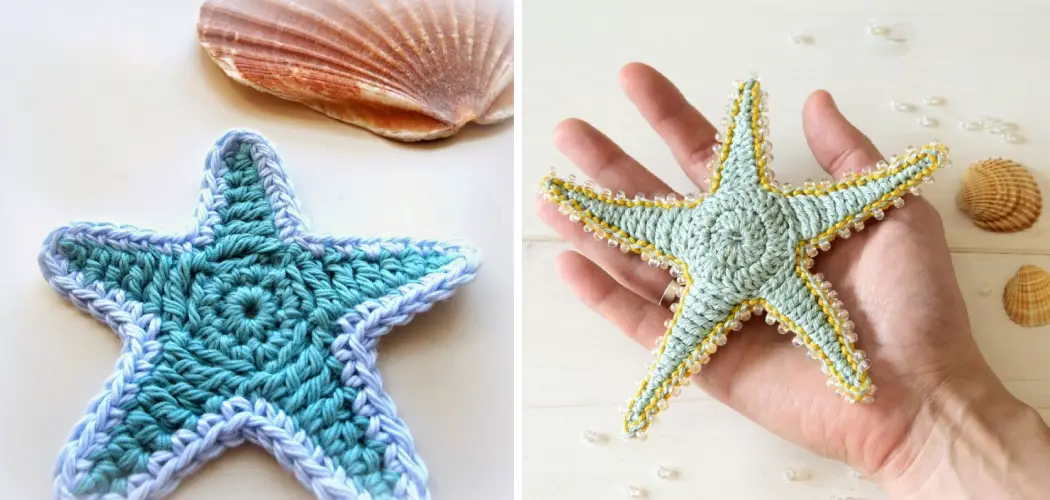
Bringing the beauty of the ocean into the realm of crochet, crafting a starfish can be a delightful and imaginative project. Crocheting a starfish allows you to capture the intricate textures and unique charm of these fascinating sea creatures.
Whether you’re a crochet enthusiast looking to expand your repertoire or a beginner eager to embark on a creative journey, crocheting a starfish offers a wonderful opportunity to hone your skills and create a whimsical piece of art.

From selecting the right yarn to mastering the stitches required for realistic shaping, this article will guide you through the step-by-step process of how to crochet a starfish. As you dive into this project, you’ll discover the joy of transforming simple strands of yarn into a captivating representation of the underwater world, infusing your crafting experience with the magic of the sea.
The Appeal of Crocheting Starfish as a Decorative Item
Crocheting starfish is an enjoyable craft that yields a charming decorative piece for any home. Starfish are popular because of their diverse shapes, sizes, and colors. Whether you’re decorating your living room or bedroom, these crocheted stars will certainly add a touch of fun and whimsy to the space. Plus, they make great gifts for your friends or family members!
However, before you start crocheting starfish, it’s important to know the basics of crochet. If you don’t know how to crochet yet, there are plenty of tutorials online that you can watch and follow along with. Once you have a firm grasp on the basics, here is a simple guide to making your own crocheted starfish!
Choosing Appropriate Yarn Colors and Hook Size
Once you have chosen a pattern, the next step in learning how to crochet a starfish is to select your yarn. The best way to determine the right color for your project is by looking at images of starfish and seeing what colors they naturally occur in. In addition to matching the natural colors found in nature, keep in mind that different yarns can create unique effects when used to crochet a starfish.
For instance, a bulky yarn will create an extra-thick and fluffy starfish, while a thinner yarn can give the project more delicacy and grace. Choose colors that coordinate with your pattern for best results.

The size of the crochet hook you use is also important when crocheting a starfish. Select a crochet hook that is easy to handle and one that fits the type of yarn you’re working with. The size of the hook should match the weight of the yarn, so if you are using chunky or super bulky yarn, opt for an N/10mm hook size. Consider using a single-strand hook as well this ensures even tension in each stitch.
Now that you’ve selected your yarn and hook size, it’s time to get started on learning how to crochet a starfish! Make sure to read through the pattern instructions completely before beginning as this will help ensure success with your project. Also, create a test swatch first for practice before working the entire starfish.
10 Steps How to Crochet a Starfish
Step 1: Gather Your Supplies
Before diving into the project, gather all the necessary supplies: appropriate yarn in your preferred color (cotton yarn works well for its durability and texture), a crochet hook suitable for the yarn weight, fiberfill or stuffing material, and a yarn needle. Though starfish may seem intricate, you can make them with just one crochet hook and a few basic materials.
Step 2: Choose Your Yarn Color
Decide on the color that best suits your vision for the starfish. You can opt for a realistic shade of tan or beige, or explore imaginative color combinations to create a whimsical effect. Remember that the thinner your yarn, the more delicate and intricate details you’ll be able to achieve. However, if you are just starting out, choose a thicker yarn for more durability.

Step 3: Start with the Center
Begin by crocheting a magic ring with your chosen yarn color. Crochet a series of single crochet stitches into the ring. This will serve as the center from which the starfish’s arms will radiate.
Once you have worked a few single crochets, close the ring with a slip stitch. While crocheting the center make sure to keep your stitches even and tight as it will be difficult to adjust later.
Next, work an increase round by working two single crochets in each stitch from the previous round. This should give you a total of twice the amount of stitches that you had before. You can then take this opportunity to check if all your stitches look even and adjust as needed.
Step 4: Shape the Center Circle
Continue crocheting in rounds, gradually increasing the number of stitches in each round to create a circular shape for the starfish’s center. The size of this circle will determine the overall dimensions of the starfish. Once you reach the desired size, stop increasing stitches and begin decreasing a few rounds later.
This will give your starfish’s center an even more round shape. When you’re happy with the final results, fasten off your yarn and weave in any loose ends.
Step 5: Begin the Starfish Arms
To create the arms, crochet individual chains of varying lengths, leaving a loop at the end of each. Connect these loops to the outer edge of the center circle, ensuring even spacing. This will form the starfish’s arms. Secure the arms to the center of the starfish by crocheting each arm to the circle.
Continue adding details to your starfish, such as eyes or patterns on its body. You can use different colors of yarns for these details if desired. When you are happy with how your starfish looks, finish it off by tying a knot at the end of the yarn. Your crochet starfish is now complete and ready to display!
Step 6: Add Texture with Stitches

Use different crochet stitches to add texture and depth to the arms. Alternating between single crochet, half-double crochet, and double crochet stitches can mimic the starfish’s natural texture. You can also add a few bulky stitches to the arms for extra texture.
Once you have completed all of the steps, your starfish is finished. Have fun adding it to your favorite crochet projects or gifting it to friends and family!
Step 7: Shape the Arms
Gradually taper the arms by decreasing the number of stitches in each round. This will give the arms a tapered appearance that mimics the shape of a real starfish. You’ll want to make sure the arms are long enough so that they can be bent into a realistic starfish form.
Step 8: Join the Arms
Once you’ve completed the arms, you can join them together in the center using slip stitches or single crochet stitches. This will give the starfish its characteristic radial symmetry. The number of stitches you use to join the arms together will depend on your preference.
Some people prefer four, while others prefer five or six. Experiment with different numbers until you find what works best for you.
Step 9: Add Final Details
Use a yarn needle to weave in any loose ends and secure them. If desired, you can add further texture by using the needle to create raised stitches or loops on the surface of the starfish. Finally, you can add a loop or ribbon on the back to make it easier to hang your starfish as wall art.

Step 10: Finishing and Blocking
Give your starfish a polished look by blocking it. Gently wet the starfish and shape it to ensure that all the stitches lay flat and the arms are evenly spaced. Allow it to dry completely before displaying or using it as desired.
If you’re feeling extra creative, you can add small embellishments to your starfish. Some great options are buttons for eyes or pom-poms as tentacles. There’s no end to the possibilities!
Conclusion
Learning how to crochet a starfish is an enjoyable skill that can be used to make beautiful items, from wall art to home decor. What’s more, it’s an achievable task for all levels of crafters as there are many helpful tutorials and tips available online. With the right yarn, crochet hook and basic knowledge of the fundamentals, you can master the process of crocheting your own starfish in no time.
Be sure to take your time, trust yourself and challenge yourself with ever-more complex patterns as you gain skills and experience.
As always, if you get lost along the way or have any questions, don’t hesitate to reach out for help from experienced crafters – there’s nothing that can’t be accomplished through practice! So why not give it a go today and start crafting beautiful starfish-shaped creations? It’s sure to bring lots of joy!