
Are you looking to break free from the routine of half double crochets, single crochets and bobbles? Then a star blanket might be just the thing for you! Star blankets are a great way to add some extra flair to your finished projects. Not only do they look beautiful, but they’re not as overwhelming as many other crochet patterns which can sometimes take hours to complete.
In this post we’ll cover all the basics – from understanding the materials needed, going through different techniques and troubleshooting tips – so that by the time you’ve completed reading it, you will have learned how to make one amazing starblanket of your own.

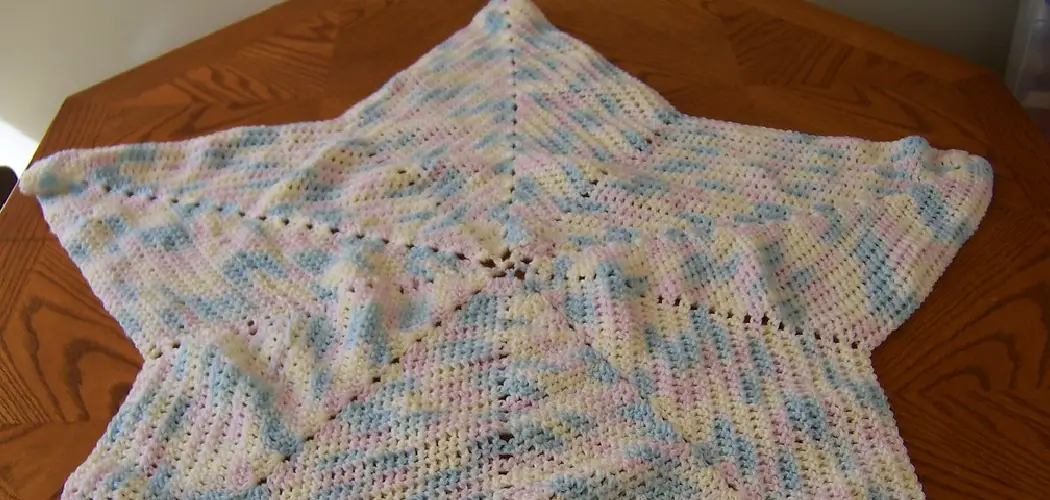
If you’re looking for a unique and eye-catching craft project, crochet star blankets may be a perfect choice. Star blankets blend bold geometric designs with soft materials, creating an artful yet cozy combination. Plus, anyone can make their own with the correct supplies and instructions! Here , we’ll discuss how to crochet a star blanket – from choosing the right yarns and colors to stitching each panel together – so that you, too, can enjoy this beloved craftwork in no time.
How to Crochet a Star Blanket in 6 Easy Steps
Step 1: Gather Your Materials
The first step is to ensure you have all the materials you need for your project. You will need a crochet hook, yarn, scissors, and a tapestry needle. So if you want to make a star blanket, make sure you have these items ready and close by.
Step 2: Prepare the Yarn
Next, you need to prepare your yarn. How much yarn you need depends on how big your project will be. For example, if you are making a baby-size blanket then 1 skein of yarn should be enough. If you are making a larger blanket, then it will require more yarn. Once you have the correct amount of yarn, make sure to roll it into a ball and cut off any knots or tangles in the thread.
Step 3: Make the Chain Stitch
When crocheting a star blanket, your first task is to make the chain stitch. This is done by looping the yarn around your crochet hook, then pulling the threaded end through each loop of the yarn. You should continue making these chains until you have created a row that is 4 inches long or 20 chains in total.
Step 4: Create a Star Pattern
Once you have made your chain stitch, you can begin creating the star pattern. This is done by making an sc (single crochet) into each chain along your row. Once you reach the end of the row, make a slip stitch and then another single crochet into the last chain. After this, move on to the next row and repeat these steps until you have created eight rows.

Step 5: Finish the Blanket
The last step is to finish off your star blanket. To do this, make a slip stitch at the end of each row and then weave in any remaining ends using your tapestry needle. Finally, trim any excess yarn, and you’re finished! You now have a beautiful star blanket!
Step 6: Double Check Your Work
It’s always a good idea to double-check your work before you finish. Make sure that each row and stitch looks neat and tidy and that you didn’t miss any steps along the way. This will help ensure that your star blanket looks as good as it can!
And that’s it! With these steps, you now know how to crochet a star blanket. So grab your materials and get started on creating this unique craftwork today! Happy crocheting!
Some Additional Tips to Crochet a Star Blanket
1. Use the Same Weight Yarn Throughout Your Project
This is important for the overall look of your blanket. Choose a yarn weight that’s appropriate for the size you want to make, or use multiple weights to give it texture and depth. Also, consider the yarn color carefully, as this will help create the star pattern.
2. Make Sure You Have Enough Yarn to Finish Your Blanket
Before you start your project, ensure you have enough yarn to complete it so that all your stars look uniform. Consider the full size of your blanket when calculating how much yarn you need.

3. Use a Larger Hook for Better Stitches
Using a larger crochet hook when creating your blanket will make the stitches look better and more even and make it easier to count your stitches. Start with an H/5 mm or I/6 mm hook size, depending on the weight of your yarn.
4. Keep the Tension Even
As you crochet, make sure that your tension is even and consistent. If it’s too tight or loose, your stitches won’t look nice even when finished, which will affect the overall look of your blanket.
5. Count Your Stitches as You Go Along
Counting your stitches is very important to make sure that each star looks the same. Keep track of how many stitches you have in each round and make sure it’s the same for every single one. This will help ensure that all of your stars look uniform.
6. Weave in Ends as You Go Along
Weaving in your yarn ends as you go will save time and frustration in the end. Take the time to weave in your ends after each star so that everything looks neat and tidy when it’s finished. Make sure to cut off the extra yarn so that it doesn’t unravel.

7. Block Your Work
When you’re finished with your blanket, make sure to block it properly. This will help even out any wonky stitches and give your blanket a nice, even finish. Blocking also helps to settle the yarn fibers into place for a smoother look.
8. Avoid Crocheting Too Tight
This is especially important when creating the stars, as crocheting too tight can cause your blanket to become bunched up and distorted. Keep your stitches loose enough so that you can easily see the pattern of each star.
9. Do Not Rush Your Work
It may be tempting to rush through your project, but taking your time and doing it right is important. This will help ensure that each star looks neat and even when finished. Enjoy the process of crocheting, and don’t forget to have fun!

By following the tips above, you should have all the information you need to create an amazing star blanket you can be proud of! It may take some time and effort, but the end result will definitely be worth it. You’ll have something unique and personal that you can use or give as a gift. So, grab your crochet hook and some yarn and start creating your beautiful star blanket! Good luck!
Frequently Asked Questions
What Precautions Should I Take Before Crocheting a Star Blanket?
It’s important to have the right materials for crocheting a star blanket. Use an appropriate crochet hook size, yarn weight, and color, and any special stitches necessary for your project. Ensure you have enough yarn to complete the project without running out in the middle! Additionally, ensure you have the right amount of tension while crocheting, and always check your stitches to ensure they are even. Additionally, use a pattern or chart to help guide you if needed.
What Is the Best Way to Make a Star Blanket?
The best way to make a star blanket is to use an established pattern that other crocheters have tried and tested. This ensures the star blanket will turn out correctly with even stitching and uniform stars. Additionally, use the same number of stitches for each round or row so your stars will look consistent. Some star blanket patterns also suggest using a graph pattern to ensure the stars are evenly spaced.
Can I Crochet a Star Blanket Without a Pattern?
Yes, it is possible to crochet a star blanket without using a pattern. However, it’s important to remember that you will be responsible for creating even stitches and evenly-spaced stars. To do this, use stitch markers to help keep track of your rounds or rows as you go along. Additionally, use a counting chart to help you keep track of your stars.

What Are Some Ideas for How to Use a Finished Star Blanket?
There are several ways to use a finished star blanket. It can be used as a decorative throw over furniture, hung on the wall as artwork, or even given as a gift. Additionally, it can be used to warm up a baby’s crib, or as a lap blanket for when you’re watching TV. A star blanket can also be used as an accessory in the bedroom, such as draped over chairs, beds, or dressers.
Finally, it makes an excellent conversation piece for any room of your home. Regardless of how you choose to use a star blanket, all will surely enjoy it!
Should I Weave in Ends When Crocheting a Star Blanket?
Yes, it is important to weave in the ends of your star blanket when you are finished crocheting. This will help keep the project looking neat and professional and prevent any loose threads from unraveling over time. Putting a knot at the end of each thread can also help secure them for extra security. Additionally, weaving in the ends will make your star blanket look more polished and finished.
How Can I Care For My Crocheted Star Blanket?
Your crocheted star blanket should be cared for by hand washing or gentle machine washing in cold water. Avoid using hot water or drying on high heat as this may cause the fibers to shrink. After washing your star blanket, lay it flat to dry in a well-ventilated area away from direct sunlight and heat sources.
Spot clean any stains or dirt if necessary, but do not use bleach or harsh detergents as this could damage the fabric. Finally, make sure to store your crocheted star blanket in a cool and dry place to keep it looking great for years to come.
Should I Block My Star Blanket After Crocheting It?
Blocking your star blanket can help the fabric look neat and uniform and make the stitches appear even. Blocking also helps the stars stay in place so they don’t become distorted over time. To block your star blanket, lay the fabric out on a flat surface and use pins to hold it in place. Then, steam or spritz the blanket with water for a few minutes before allowing it to dry completely. Once the star blanket is dry, unpin and enjoy!

The finished product of crocheting a star blanket is sure to be a beautiful and unique addition to any home. With the right pattern, materials, and care, you will have a stunning piece of artwork that can be enjoyed for many years. Good luck!
Conclusion
This unique star blanket is the perfect project for someone looking to add a little sparkle and coziness to their home. Finish it off with some extra frilly edges or keep it classic and bold. The possibilities are endless! It’s safe to say, you will be sure to impress any crochet enthusiast with your star blanket masterpiece. So go ahead, get crocheting, enjoy every stitch along the way, and celebrate the final result—a cherished piece of art that will bring light and warmth into your space. Have fun crafting your very own star blanket!
Now you know how to crochet a star blanket! After gathering the necessary materials, you can begin making your star blanket by starting with a chain stitch and then creating the first round of single crochet stitches. Increase your rounds to form a larger circle before adding five double crochet stitches in each corner of the last round. Finally, complete the blanket by crocheting one continuous round on the outside edge.