
Preparing your yarn before you start crocheting is important for a couple of reasons. First, it helps you ensure that the yarn is suitable for crochet projects. Crochet projects require different types and weights of yarn, depending on the type of stitch used in the pattern. Making sure that you have the right type and weight of yarn is essential for a successful project.

One major advantage of preparing yarn for crocheting is that it provides a way to get your crochet projects started faster. Prepping the yarn beforehand allows you to quickly move through the project without having to stop and unravel knots or search for dropped stitches.
Additionally, taking time beforehand to wind yarn into balls can help you pick up your project faster, as you won’t need to stop and search for the right color or length of yarn. In this blog article, you can find step-by-step instructions on how to prepare yarn for crocheting.
Step-by-step Instructions for How to Prepare Yarn for Crocheting
Step 1: Inspect Your Yarn
The first step in preparing yarn for crocheting is to inspect it. Look closely at the label and check that you have chosen the correct type of yarn for your project. Make sure there are no knots, tangles, or damaged parts.
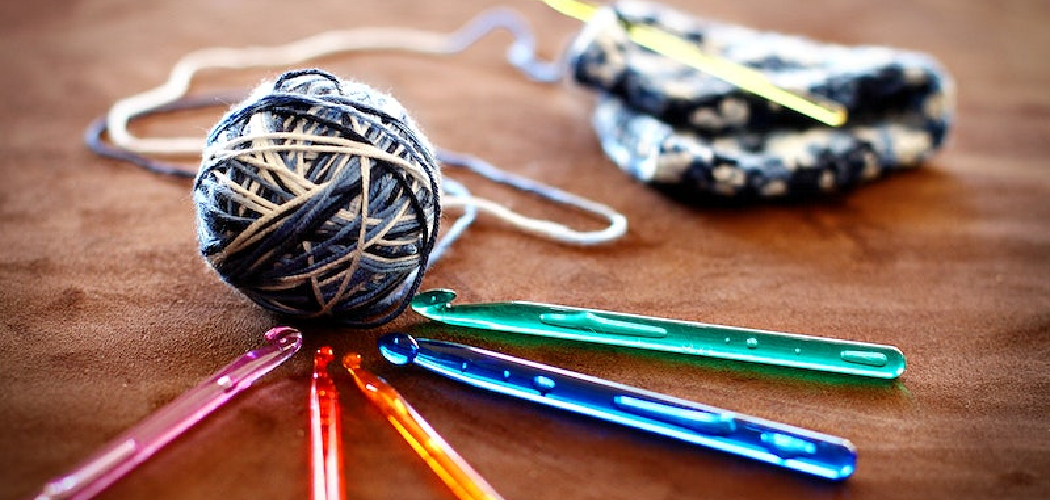
Step 2: Wind Your Yarn Into a Ball
To prevent tangles and knots from forming, it is important to wind your yarn into a ball. You can use a yarn swift or an empty toilet paper roll as improvised tool for this step. If your yarn is tightly wound, you may need to loosen and soften it before starting your project. Doing so will make it easier to work with the yarn and allow your stitches to flow more freely.
Step 3: Join Ends of Yarn Together
When you have used up one ball of yarn, you’ll need to join the ends together so that you don’t have a break in your project. To do this, tie the new end of yarn around the old end and then weave in the ends to secure them.
Step 4: Check for Length and Measure Yardage
Lastly, measure your yarn to ensure you have enough material for your project. You can do this by wrapping it around a ruler or measuring tape. This way, you’ll know exactly how much yarn you’ll need for your project.
By following these four simple steps, you are now ready to start crocheting! You can begin by making a slip knot and then continue using the stitches of your choice. With practice, you will master the art of preparing yarn for crocheting and be able to create beautiful projects with ease.

Precautions for How to Prepare Yarn for Crocheting
To ensure success when crocheting, taking proper care of your yarn is essential. Here are some tips to help you prepare your yarn for crocheting:
- If the yarn is wound in a ball or skein, untangle it and wind it into a cake or ball. This will help prevent tangles and make it easier to crochet.
- To ensure the yarn is in good condition, check for signs of damage, such as knots, fraying, or discoloration. Discard any damaged bits before using.
- Make sure your yarn is wound tightly and not loosely; overly loose strands can cause issues with tension when crocheting.
- When using multiple colors of yarn, ensure that the ends are secured tightly and tucked away so they don’t get tangled up in your work.
- Finally, it is important to check for pesky knots that may have formed during winding or storage; undoing these can be time-consuming and might need to be done more than once.
Properly preparing your yarn can help prevent frustration and make crocheting a much more enjoyable experience. Follow these guidelines, and you will succeed in your projects.
How Should You Store Your Yarn to Keep It From Tangling?
Proper storage of yarn is essential to ensure that it is in good condition when you are ready to use it. Before crocheting, you should make sure to wind the yarn into a ball or cake and store it properly. You can purchase a yarn winder for winding your skeins into cakes quickly and accurately. When storing, keep the yarn away from light and high heat sources.
Additionally, you can store your yarn in clear plastic containers with tight-fitting lids to protect it from dust and insects. If the yarn is likely to tangle, wrap each ball of yarn individually in tissue paper and then place them in the container. For extra protection, use acid-free tissue paper. Finally, if the yarn is particularly valuable or delicate, store it in a sealed bag that contains cedar chips to protect against pests and moths.

How Can You Prevent the Yarn From Fraying While Crocheting?
- Check the label on your yarn for any care instructions provided by the manufacturer. If you encounter any specific directions, follow them before starting to crochet with the yarn.
- Test a small portion of your yarn for strength and elasticity by pulling it between two fingers and gently tugging at it until it forms a loop. If the yarn frays easily when you do this, it may indicate that it is old and needs to be replaced.
- Secure any loose ends on your yarn by tying knots in them or using a crochet hook to wrap the end around itself. This will help prevent unraveling while you’re crocheting.
- Cover your yarn spindle with a piece of fabric or other material to prevent the fibers from becoming entangled as you work.
- When crocheting, make sure to always keep tension on the yarn by pulling it lightly and evenly through each loop. This prevents the loops from forming unevenly, which could cause fraying.
- Wind the yarn into small bundles of no more than 50 yards or so each and store them in a clean, dry place when not in use. This will keep the individual fibers from becoming tangled and fraying over time.
- After you’ve finished crocheting, hand wash your project with warm water and mild soap. Then, roll it in a towel to remove any excess water and air dry it flat. This will help ensure that your project looks its best without fraying or wearing.

Following these steps can help you prepare yarn for crocheting and prevent the fibers from unraveling or fraying while you work. With a little extra preparation and care, you can ensure your yarn projects look their best for years to come.
How Do You Fix Mistakes in Your Crochet Work?
- Start by identifying the mistake in your crochet work. This could be a loose stitch, dropped stitches, patterns not matching up, etc.
- Once you have identified the mistake, assess whether it can be fixed without having to undo your work.
- If the mistake is minor, try fixing it by working a few more stitches around that area or crocheting over the mistake.
- If the mistake is more significant, you may have to take out some of your work to repair it. To do this, carefully undo the stitches until you reach the area where the mistake occurred.
- Once you have reached the mistake, use a crochet hook or tapestry needle to pull out the stitches until you reach the mistake carefully.
- Now that you are at the mistake assess how many rows and stitches are affected. If necessary, undo more of your work until you can fix it.
- Fix the mistake and slowly begin to re-stitch the area.
- Once you have finished repairing the mistake, make sure to check your work again for any additional errors.
- Finally, weave in any ends that may have been created due to undoing the stitches. This will help keep your crocheted piece looking neat and professional.

Following these steps can help you fix any mistakes that may occur in your crochet work. With patience and practice, you should be able to repair any errors that arise while crocheting.
How Do You Make Sure That Your Finished Project Looks, Professional?
Once you have selected the yarn and type of fiber, it is time to prepare the yarn for crocheting. To make sure that your finished project looks professional, pay attention to a few important details as you are getting ready to begin.
The first step in preparing yarn for crocheting is to check for knots or tangles. If you find any, gently undo them. You can also use a yarn swift accessory to unwind the skein or ball of yarn and make it easier to manipulate without tangles and knots.
It is also important to take note of the direction in which your yarn was wound. It will likely have been twisted into a figure eight on the skein or ball. It is important to preserve this direction while you are crocheting, as it will give your finished project a neater and more even look. When using multiple yarn colors in one project, ensure that you always pull from each strand from the same side.
This will help keep the tension even between the different strands and make sure the design looks professional. Finally, always keep track of how much yarn you are using.

If you are working with multiple skeins or balls of yarn in one project, ensuring they all match each other perfectly is especially important. Make sure your gauge matches the pattern specifications so that you will end up with the desired result.
Conclusion
In conclusion, preparing yarn for crocheting is a relatively easy process. It doesn’t take long to wind the yarn into a ball or cake, as well as to cut it into workable lengths, but it can make all the difference in your crochet project. Winding yarn into balls or cakes helps reduce tangling and enables you to keep track of the amount used.
Lastly, cutting the yarn into manageable lengths helps you track how much yarn is left and makes it easier to work with. Preparing your yarn for crocheting is an important step in any project, so take a few extra minutes to prepare the yarn before starting your project to ensure everything goes smoothly.
I hope reading this post has helped you learn how to prepare yarn for crocheting. Make sure the safety precautions are carried out in the order listed.
You Can Check It Out to Fasten off Crochet