
Are you a fan of spooky decor? Do you want to learn how to crochet something unique and stylish? Crafting can be enjoyable, creative, and challenging all at the same time – especially when it comes to crocheting intricate projects like skulls.

With some colorful yarn and hook, you can create an artistic and unique crochet piece to help spruce up your home decor or wardrobe. The best part? Even if you are new to crocheting, this tutorial will have easy-to-follow steps that allow anyone – even beginners – to succeed with their project.
In this blog post, we’ll explain step-by-step instructions on how to crochet a skull. Follow along with us as we guide you through each stage of the process, from choosing your materials up to attaching your finished product! So if you’re ready for a new crafting challenge, sharpen those needles and get started today!
What Will You Need?
Before getting started, you will need to make sure that your supplies are ready. To complete this project, you’ll need the following materials:
- Yarn in desired colors
- Crochet hook (size G or H)
- Scissors
- Tapestry needle for weaving in ends
- Stuffing (optional)
Once you have the supplies ready, we can begin!
9 Easy Steps on How to Crochet a Skull
Step 1. Make a Magic Circle
Start off by making a magic circle. This is how you will begin each crochet project, allowing the piece to have an even shape while crocheting around the ring.
To make a magic circle, wrap your yarn around your fingers twice, leaving a loop in the middle of your finger. Take the first wrap and thread it onto your hook, and then pull it through the second wrap before tightening it into a loop. Make sure that it’s tight enough, so there’s no slack in your yarn!
Step 2. Single Crochet 8 Times Into Circle
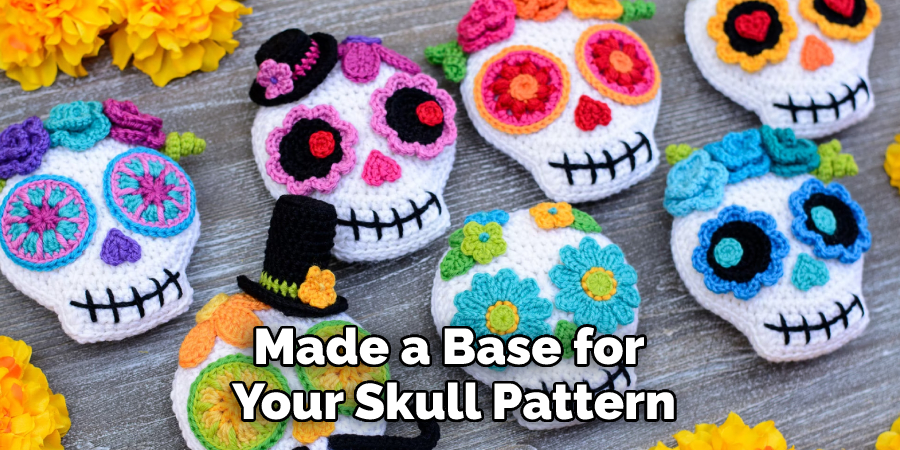
Now that you have made a base for your skull pattern, single crochet eight times into the center of your circle. To do this, insert your hook into the middle of your circle, yarn over, and pull up a loop before finishing with a single crochet.
Continue doing this until you have eight stitches in total. Join them together with a slip stitch at the end, then chain 1 to start your next round.
Step 3. Double Crochet In Each Stitch Around
Now we’re going to increase our number of stitches by double crocheting in each stitch around. To do this, insert your hook into the first stitch from your previous row and yarn over before pulling up a loop and completing with a double crochet. Continue doing this until you finish one whole round, then join it together with a slip stitch at the end and chain 1 to start another row.
Step 4. Increase By Single Crocheting Every Other Stitch
The next step is to increase the size of your skull by single crocheting every other stitch around. To do this, insert your hook into the first stitch from your previous round and yarn over before pulling up a loop and completing with a single crochet. Continue doing this until you finish one whole round, then join it together with a slip stitch at the end and chain 1 to start another row.
Continue repeating Steps 3-4 until the desired size is achieved or how many rounds you want for your skull pattern. Then, fasten off and weave in the ends.
Step 5. Stuffing (Optional)
At this stage, you can stuff your skull with polyester fiber fill if desired. To do this, insert a teaspoon into the center of your work until it’s firm but not too tight. Be careful not to overstuff it, as this can cause your skull to lose its shape.
Step 6. Begin Decreasing
Once you have achieved the size of your skull, it’s time to begin decreasing. Start off by double crocheting every other stitch around before joining together with a slip stitch at the end, then chain 1 to start another row.
Continue repeating Steps 5-6 until the desired size or number of rounds you want for your skull pattern. Then fasten off and weave in ends. You now have a complete crochet skull!
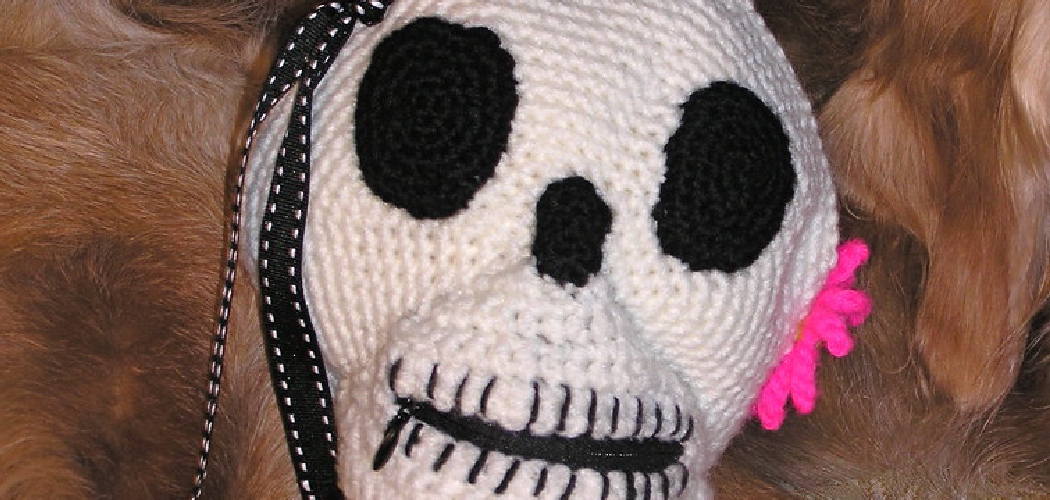
Step 7. Attaching Features (Optional)
Now that your skull is complete, you can add features to make it more realistic. To do this, use black yarn and attach eyes, nose, and mouth using basic embroidery stitches. You can also add accessories such as hats or scarves for extra detail.
Step 8. Finishing Touches
Once you are happy with how your skull looks, you can finish it off by adding the final touches. This includes weaving in any remaining ends and sewing pieces together if necessary. You can also add a ribbon or yarn to hang it up if desired.
Step 9. Enjoy!
You have now successfully crocheted a skull – congratulations! Now all that’s left is to sit back and admire your work of art before showing it off to friends and family. Remember, with a bit of patience and practice, you can create amazing crochet pieces. Enjoy!

Now that you know how to crochet a skull, why not try creating other fun amigurumi characters? You can create anything from teddy bears to cats and dinosaurs with the same techniques and stitches. Get creative with different colors of yarn and accessories – the endless possibilities! Have fun crafting your own unique projects.
5 Additional Tips and Tricks
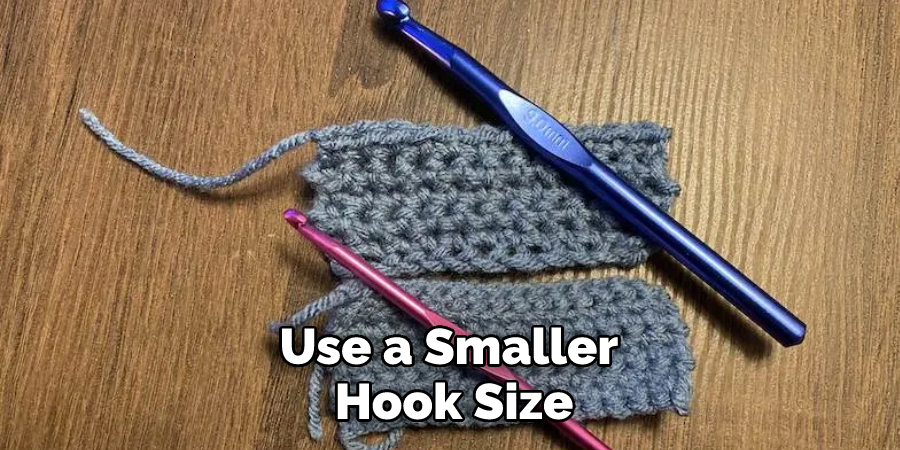
- Use a smaller hook size than recommended for the yarn you are using. This will help to ensure that your skull is tight and well-formed.
- Add extra stuffing to the head of your skull to make it sturdier and keep its shape better.
- When starting a new row, join the two ends with a slip stitch before crocheting in the round – this will help create smoother edges and avoid gaps.
- Use contrasting colors for each part of the skull, such as eyes, nose, teeth, etc. This will give it more character and definition!
- Don’t be afraid to experiment with how you want your skull to look – use different yarns or try out new stitches! Crocheting is all about having fun and creating something unique that reflects your style.
With these tips and tricks, you’re now ready to start crocheting a skull of your own. Have fun and happy crafting!
5 Things You Should Avoid
1. Not Using the Correct Hook Size: Hook size can greatly impact how your skull turns out. If it is too large, you will end up with gaps in between stitches, and it could be difficult to get the structure of a skull shape.
2. Trying to Crochet Without Any Guidance: If you are just starting out, following a tutorial or pattern can make all the difference when crocheting a skull. There are many tutorials online that offer detailed instructions for crocheting a skull – so make sure to check them out!
3. Not Paying Attention to Tension: When crocheting, maintaining proper tension throughout your project is essential. If your stitches are too tight, they won’t look as good and may not come out how you intended them to.
4. Not Checking Your Gauge: Gauge is the number of stitches and rows per inch, so you must check this before starting any project. Without checking your gauge, it can be difficult to determine how big or small your skull will end up being – so make sure to take the time and get an accurate measure!
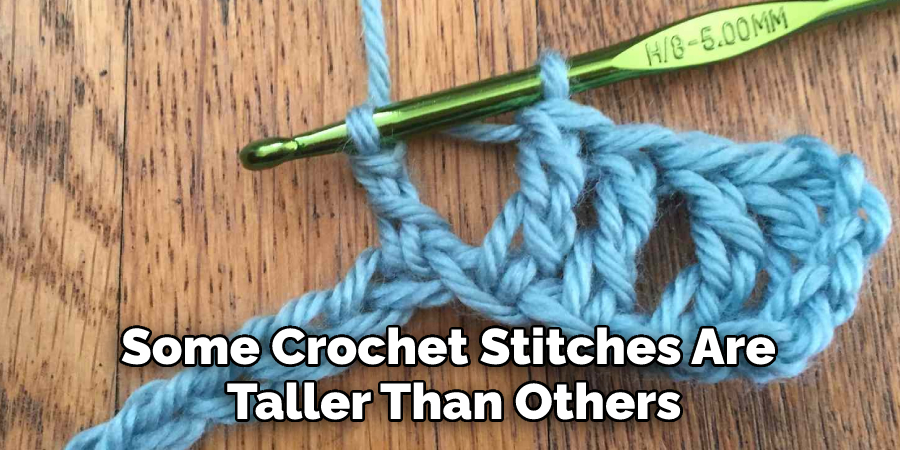
5. Not Accounting for Stitch Height When Counting Stitches: Some crochet stitches are taller than others – which means they may not “count” as one stitch when counting how many you need for a row or round.
Be sure to account for this by adding extra stitches to ensure your skull turns out just how you want it! These are some of the most important things to keep in mind when crocheting a skull. With practice and patience, you’ll be able to create some amazing pieces!
Conclusion
Crocheting a skull is a great way to inject some fun and creativity into your crafting projects. With just a few simple steps and techniques, you can create amazing pieces of art that you can be proud to show off. Be sure to keep these in mind tips and avoid the pitfalls, and you’ll be able to create your own unique crochet skulls in no time!
So, there you have it—a comprehensive guide on how to crochet a butterfly top. With these simple instructions and some practice, you’ll be able to create this beautiful garment in no time. And once you’ve mastered the butterfly top, who knows what other Crochet creations you can tackle? The sky’s the limit! Thanks for reading!
We hope you enjoyed this tutorial on how to crochet a skull. Now that you know the basics, you can get creative and make your own custom skulls. Experiment with different colors and patterns to create unique designs. Happy crocheting!
You Can Check It Out to Figure Out Yarn Weight