
Are you looking for a new and fun crafting project to sink your teeth into? Knitting is becoming more popular than ever before, but how about switching it up with something slightly different? Crochet! This craft has been around for many years and is perfect for those who want to exercise their creative muscles while learning a new skill. Today we will show you step-by-step how to crochet a round dish scrubber that’s functional, unique, and stunning! So, grab your needles, and let’s get started on this scrupulous crafty adventure!

Crocheting is an excellent way to create useful and stylish items around your home. From afghans and pillows to practical projects like dish scrubbers, crocheting is a fun and creative way to make something with lasting value. In this post, we’ll take you step-by-step through the process of creating a round dish scrubber using crochet techniques. Not only will you have an awesome new cleaning tool for the kitchen but you’ll also gain the satisfaction of knowing that you created it yourself!
Why May You Want to Crochet a Round Dish Scrubber?
You may want to crochet a round dish scrubber for many reasons. Such as:
1. To Add a Unique, Handmade Touch
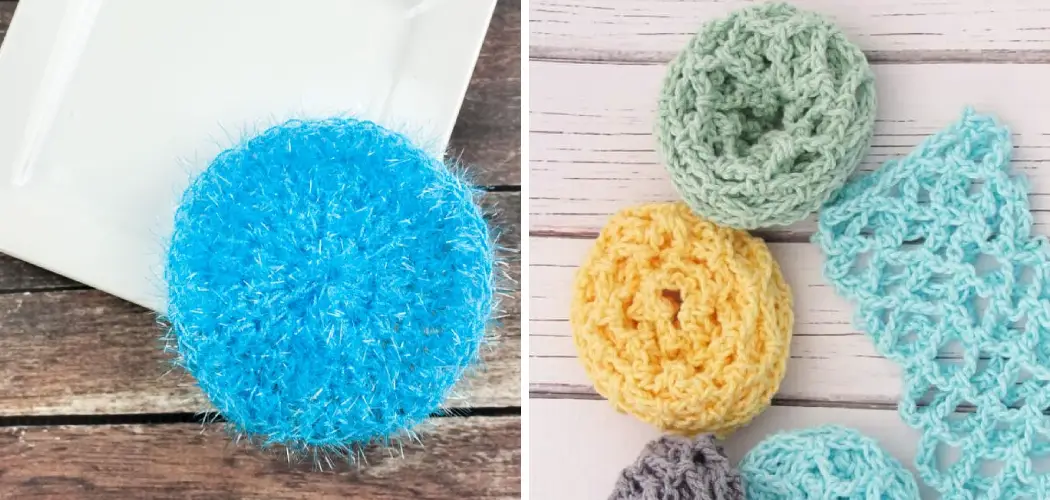
One of the main reasons for crocheting your own round dish scrubber is to add a unique, handmade touch to your kitchen. These scrubbers can be made in a variety of colors and styles, allowing you to create something that truly stands out and adds character to the space.
2. To Reduce Waste
Another benefit of crocheting your own dish scrubber is that it can reduce waste. By making your own, you will be avoiding the plastic packaging and materials used in store-bought scrubbers and instead using natural materials like cotton yarn or even recycled t-shirt fabric.
3. To Save Money
Finally, crocheting your own dish scrubber can also save you money. Unlike store-bought scrubbers, making your own is relatively inexpensive and can easily be done with just a few supplies from the craft store.
With all these benefits – plus the added satisfaction of creating something unique and special – crocheting a round dish scrubber may be the perfect project for anyone looking to add a touch of handmade charm to their kitchen.
How to Crochet a Round Dish Scrubber in 7 Easy Steps
Step 1: Gather the Supplies
The first step is to get all the supplies you need to make your round dish scrubber. You will need a size H (5.00mm) crochet hook, a pair of scissors, and any type of cotton yarn. Also, make sure to have a yarn needle on hand for sewing the edges of the dish scrubber.

Step 2: Make a Slip Knot and Chain Nine Stitches
Make a slip knot on the crochet hook to start your scrubber and chain nine stitches. It is very important to make sure that you chain the stitches tightly. Make sure there is no space between the stitches.
Step 3: Double Crochet in Each Stitch of the Chain Row
Now, you will begin to crochet your round dish scrubber. To do this, work a double crochet stitch into each stitch from the previous row until you have reached the end. You should have nine double crochet stitches in total.
Step 4: Make Your First Round of Stitches
After you have finished the chain row, it’s time to make your first round of stitches. To do this, you will need to work a double crochet stitch into the same stitch from the previous row and then work a double crochet stitch into each remaining stitch of the row. This will create a round shape for your dish scrubber.

Step 5: Make Your Second Round of Stitches
Now, continue to work double crochet stitches into each stitch from the previous row until you reach the end of the round once again. Keep repeating this pattern until you have reached your desired size for your scrubber.
Step 6: Cut and Tie Off the Yarn
Once you have reached your desired size, it’s time to cut the yarn and tie off the end. This will help secure all of your stitches so they won’t unravel. You have to be careful when cutting the yarn, as it can be quite sharp.
Step 7: Sew in Ends and Block
The last step is to sew in all of the ends with a yarn needle so they don’t unravel. You may also want to block your dish scrubber by pinning it out on a flat surface or blocking board. Blocking helps to even out the stitches and ensure that your scrubber is the size you intended.
Once you have completed these steps, your round dish scrubber is ready to be used! With a little bit of practice, you’ll be able to make many more of these handy kitchen tools in no time. Enjoy!
Some Additional Tips to Crochet a Round Dish Scrubber
1. Do Not Overstuff the Dish Scrubber
This is very important, as overstuffing your scrubber can make it hard to close the round. You want to stuff it just enough so that each stitch is filled and the shape of the scrubber remains intact. Also, make sure that you use the same amount of stuffing throughout.
2. Choose a Suitable Yarn That is Durable
When you crochet a dish scrubber, it must be strong and durable to withstand regular washing and cleaning. Therefore, choose a suitable yarn that is resistant to water and wear or consider using multiple plies of yarn for extra strength.

3. Invest in the Right Crochet Hook Size
This is important because the size of the hook will determine how tight your stitches are and how firm your scrubber will be. A smaller hook will make it easier to close the rounds, while a larger hook can create a bigger, looser dish scrubber.
4. Secure the Ends Well
Make sure that you secure all ends well so they won’t come loose after washing and cleaning with your scrubber. You can use a knot or stitch marker to secure the ends so they don’t unravel. Also, make sure to weave in all the stray strands when you’re done.
Frequently Asked Questions
What Precautions Should You Take When Crocheting a Round Dish Scrubber?
When cropping a round dish scrubber, you should ensure that the yarn or material you choose is 100% cotton and machine-washable. It’s important to check the label of any yarn or material before using it for this project, as some materials may not be suitable for use in a dish scrubber.
You should also use an appropriate-sized crochet hook – most patterns suggest using size G or H hooks, but it’s best to double-check your pattern before starting. Additionally, you should ensure that the yarn is tightly woven together so it won’t fray easily when wet. Finally, be sure to stay consistent with your tension and stitches so that you create a durable scrubber.
What Are the Benefits of Crocheting a Round Dish Scrubber?
Crocheting a round dish scrubber is a great way to save money while creating something practical and useful. It’s also an environmentally friendly option, as you can use any leftover yarn or material that you have on hand. Additionally, crocheting is a great way to stay creative and hone your skills as a crafter. Finally, crocheted dish scrubbers are often much softer than store-bought options, making them gentler on your dishes.
How Do You Fasten Off When Crocheting a Round Dish Scrubber?
Once you’ve completed your round dish scrubber, it’s important to fasten off properly so that your stitches don’t unravel. You should cut the yarn to do this, leaving a 4-6 inch tail. Then thread the tail onto a tapestry needle and weave it through the last few stitches of your round. Finally, pull the yarn tight to secure the end before trimming any excess yarn. Also, make sure to weave in all the stray threads when you’re finished.

Conclusion
Now you know how to crochet a round dish scrubber, and you can make as many of them as you like! With just a few supplies and basic crochet skills, you have all the tools to create a useful and beautiful item. Get creative with colors, patterns, and textures – these scrubbers are the perfect project for beginners and advanced crocheters alike.
Ultimately, fixing peeling leather shoes takes considerably more effort than replacing them, but with the right tools and know-how you can restore your beloved pair of shoes to like-new condition. The method is simple, but the process takes patience and will require some elbow grease. However, if you follow these steps carefully, you’ll be proud of your work in no time!
You Can Check It Out To-Crochet a Twist Headband