
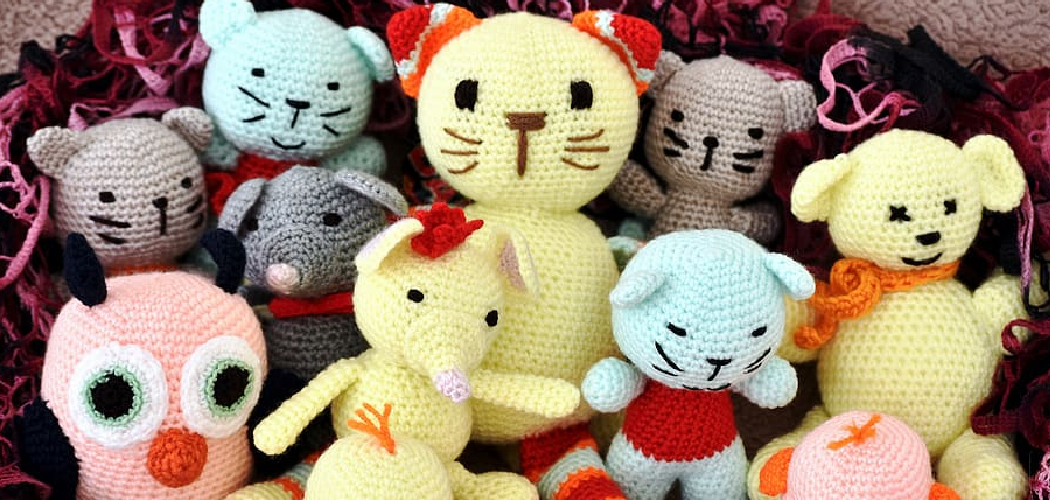
Are you looking for a special way to show your love and affection towards that special someone in your life? Or just wanting to find a new hobby and make something with your own two hands? If so, crochet is the perfect activity for you – especially when it comes to creating unique loveys.

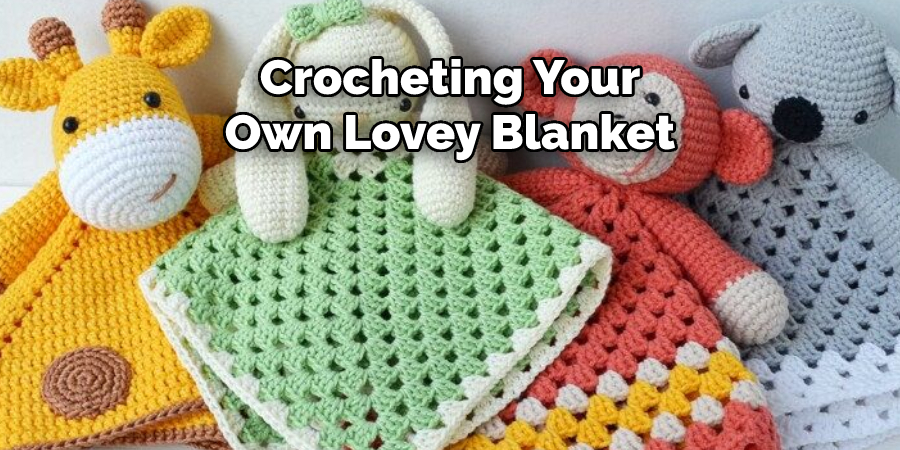
Loveys are plushies or other small items attached to a security blanket, making them the ideal handmade keepsake gift! Crafting a lovey from scratch can be daunting, but luckily, this blog post will walk you through each step of how to crochet a lovey. Keep reading to learn about all the supplies and techniques needed for crafting this sweet homemade gift.
What Is a Lovey Crochet Blanket?
A lovely crochet blanket is a small and comforting item for children. It’s usually composed of soft, colorful yarn and designed with a face on the front that can be used as a security blanket or toy. With its simple yet intricate design, it makes an excellent gift for any occasion. Crocheting your own lovey blanket allows you to customize the colors and design to your preference, making it unique and special for each individual child. Whether you’re starting from scratch or want to recreate one of the many patterns online, crocheting a lovey is relatively easy, and even beginners can make one in no time!
Once you’ve gathered all the necessary materials, the first step to making your crochet lovey is to create the face. Depending on the pattern, you will either crochet or embroider designs onto the front of your blanket. You can also customize it with buttons and other embellishments for a unique look.
The body of a crochet lovey is usually made using single crochet stitches in rounds to form a square or rectangular shape. This shape is then filled with stuffing, giving it a plush feel that babies and children love. Once stuffed, close off the blanket by slip-stitching into each loop around the edge until only one remains open. From here, you can choose how to finish off your lovey – whether you want to add fringe, tassels, or an additional row of stitches for decoration are all up to you!
With just a few simple steps and some creative thinking, you can make your own unique crochet lovey for any special little one in your life. With its comforting and cuddly design, the lovey is sure to put a smile on their face!
Needed Materials:
Yarn of Your Choice
First and foremost, you will need yarn to crochet your lovey. The type of yarn you choose will determine the softness, thickness, and overall look of your finished product. You can find a variety of yarn options at your local craft store or online.
Crochet Hook
A crochet hook is needed to create the stitches that make up the body of your lovey. The size of the hook will vary depending on the type of yarn you choose and your personal preference.
Stuffing
The stuffing is what gives your lovey its plush feel. You can find polyester fiberfill or other types of stuffing at any craft store or online.
Embroidery Thread & Needle
Depending on the pattern, you may need embroidery thread to create the face of your lovey. You will also need a needle to embroider or attach any embellishments.
Scissors
Scissors are essential for cutting yarn and trimming off excess thread. Make sure to have a sharp pair for clean cuts.
Stitch Markers
Stitch markers are used to keep track of your stitches and rounds. You can use special markers or simply use a piece of scrap yarn or paper clip.
9 Methods How to Crochet a Lovey
1. Choose the Right Yarn
The first step in crocheting a lovey is to choose the right yarn. You’ll want to use a soft, lightweight yarn in a color that you love. Baby-safe yarns are a good choice for this project. Avoid thick, stiff, or scratchy yarns, as they may not be comfortable for your little one.
To get the most out of your yarn, buy enough to finish the entire project. If you don’t know how much to buy, check the pattern or contact a yarn store. While you’re at the store, pick up a crochet hook that matches your yarn weight. This will help you get an even stitch gauge.
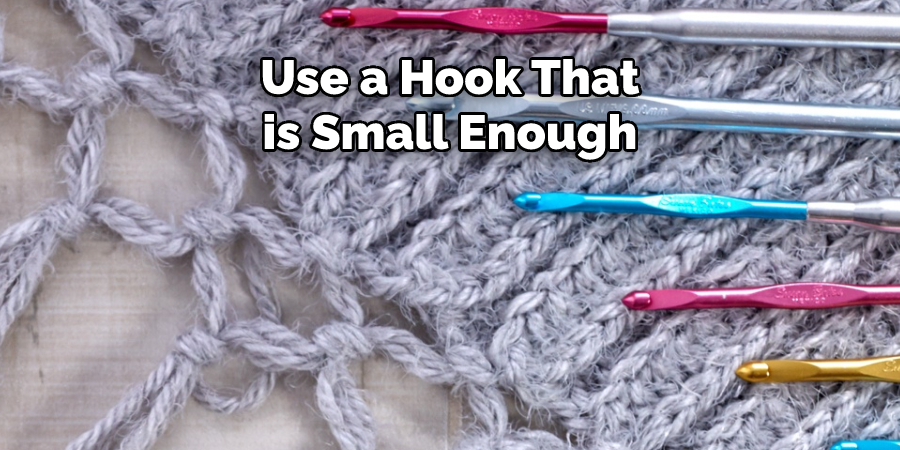
2. Choose the Right Hook
The second step is to choose the right hook. You’ll want to use a hook that is small enough so that the stitches are tight and not too loose. A size E or F hook should work well for this project. When you’ve chosen your hook, thread it with yarn.
Be sure to pull the yarn nice and tight so that it won’t slip while you’re crocheting. To start your project, create a slip knot by looping the yarn around your fingers and twisting it twice. Now, you’re ready to begin crocheting.
However, before you start, it’s important to make sure that you understand the basics of crochet stitches. Make sure that you practice the stitches needed for this project a few times before you begin.
3. Make a Magic Ring
The third step is to make a magic ring. To do this, wrap the yarn around your finger and insert the hook into the loop. Draw the yarn through the loop and pull tight. This will create an adjustable ring that you can use to start crocheting your lovey.
Start crocheting around your ring, and make sure to keep the stitches tight. For a small lovey, you can start with 12-15 double crochet stitches. Increase the number of stitches if you intend to make a larger lovey.
Continue crocheting in a spiral, as this will create a more uniform texture. When you have reached the desired size of your lovey, slip the stitch into the first stitch of the round and tie off the end.
4. Crochet 6 Single Crochet Stitches into the Ring
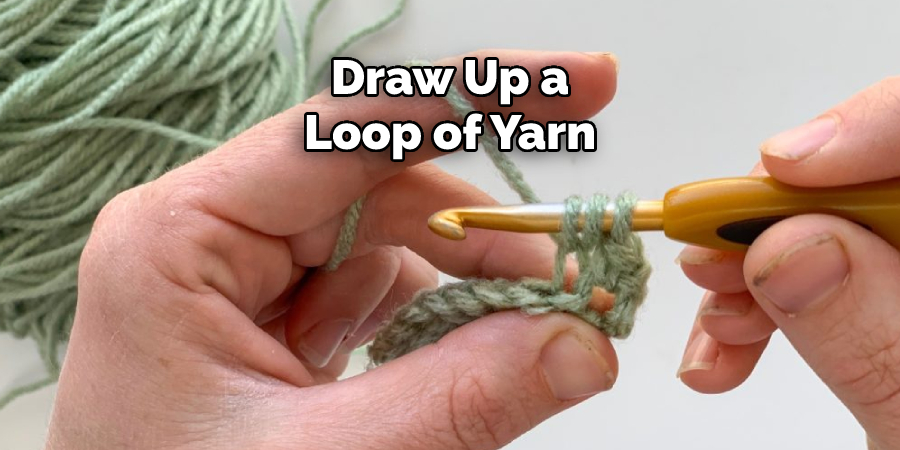
The fourth step is to crochet 6 single crochet stitches into the ring. To do this, insert the hook into the ring, draw up a loop of yarn, and then draw through both loops on the hook. Repeat this 5 more times until you have 6 single crochet stitches in the ring.
Make sure to pull the thread taut after every stitch. After you have all 6 single crochet stitches, pull the tail end of your yarn to close the ring. You should now have a circle of 6 single crochet stitches. However, do not fasten off the yarn yet. This circle will be the base of your lovey.
5. Join with a Slip Stitch
The fifth step is to join with a slip stitch. To do this, insert the hook into the first single crochet stitch, draw up a loop of yarn, and then draw through both loops on the hook. This will join the last stitch with the first stitch and close up the ring.
This is a crucial step to ensure that the lovey does not unravel. Try to keep the tension on the yarn even while completing this step. However, the slip stitch should not be too tight because it will make it difficult to work in the next round. Try to keep the tension loose enough that the next round is not too tight to work.
6. Crochet 2 Single Crochet Stitches in Each Stitch Around
The sixth step is to crochet 2 single crochet stitches in each stitch around. To do this, insert the hook into the next stitch, draw up a loop of yarn, and then draw through both loops on the hook. Repeat this in each stitch around until you have 12 stitches total.
This increases your stitch count so that the lovey will be nice and chunky. However, if you would like a smaller lovey, simply increase the stitch count in steps 4 and 6 as desired. To finish the round, slip stitch into the first single crochet to join.
7. Join with a Slip Stitch
The seventh step is to join with a slip stitch as before and then cut the yarn, leaving a long tail for sewing later on. Make sure to keep your stitches tight so that the lovey looks neat and uniform. Try to secure the yarn by weaving in and out of the stitches before cutting.
Although this step can be a bit tedious, it is necessary to make sure the lovey looks its best when finished. To join with a slip stitch, insert your crochet hook in the next nearest loop, then wrap the yarn over and pull it through both loops. You have now completed the last round. Make sure to count your stitches in the last round again.
8. Stuff the Lovey
The eighth step is to stuff the lovey. You’ll want to use the soft, lightweight stuffing for this project. Be sure to stuff the head and legs fully, but leave some room in the body so that it’s still squishable. The amount of stuffing will depend on your personal preference and the size of your lovey.
Make sure to get any lumps out of the stuffing by smoothing it with your hands. Once you’ve stuffed it to your liking, finish off the opening with a slip stitch and weave in the end. However, if you don’t want the Lovey to be too stuffed, you can skip this step and just move on to finishing it off. Although, you’ll want to make sure the Lovey is still squishable.
9. Crochet a Final Round
The ninth step is to crochet a final round of 12 single crochet stitches around the edge. This will help to create a nice finished edge. To do this, insert the hook into the first stitch of the previous round and make a single crochet. You can then continue around the edge, making one single crochet stitch in each of the remaining stitches.
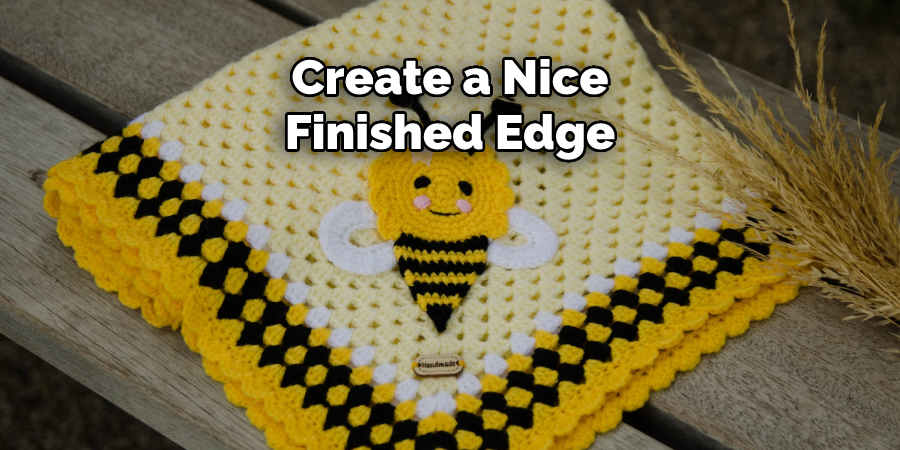
Repeat this process 11 on how to crochet a lovey more times until you reach the end of the previous round. Finish off by making one slip stitch in the last stitch and cutting the yarn tail, leaving around 6 inches for sewing.
Additional Tips:
- What Type of Crochet Hook Should I Use for This Project? Use a Stitch Marker to Keep Track of Your Rounds, Especially When Working in a Spiral.
- Choose Soft and Hypoallergenic Yarn for the Best Result. This Will Make the Lovey Safe for Babies and Children to Play With.
- If You’re Making a Larger Lovey, Consider Adding Safety Eyes Instead of Crocheting Them on. This Will Make the Lovey More Secure and Durable.
- Experiment With Different Colors and Patterns to Make Your Loveys Unique and Personalized. You Can Also Add Embellishments Like Bows, Buttons or Felt Shapes to Give Them a Special Touch.
- Don’t Be Afraid to Play Around With Different Stitches, Such as the Popcorn Stitch or Shell Stitch, to Create Interesting Textures on Your Lovey.
- Have Fun and Enjoy the Process of Creating Something Special With Your Own Hands. Your Loveys Will Make Wonderful Gifts for Friends and Family, or Even for Charity Donations. Keep Practicing and Trying New Techniques to Perfect Your Crochet Skills! Happy Crocheting! So Go Ahead and Start Making Your Very Own Adorable Lovey Today!
Do You Need to Get Help From a Professional?
If you are new to crocheting or are having trouble with any steps, do not hesitate to seek the help of a professional. You can find many tutorial videos online or take classes at your local craft store. Don’t be afraid to ask for assistance and tips from experienced crocheters as well. With a little patience and practice, you will soon be creating beautiful loveys in no time! So don’t give up. Keep practicing and have fun with this rewarding and relaxing hobby. Crocheting is a wonderful way to express your creativity and make something special for yourself or loved ones.
How Much Could It Cost to Buy a Similar Lovey?
The cost of a similar lovey can vary depending on factors such as the materials used, size, and where you purchase it from. Handmade loveys can range from $10 to $50 or more, while store-bought ones can range from $15 to $30. It ultimately depends on your budget and personal preferences. However, making your own lovey not only allows you to customize it to your liking, but it can also save you money in the long run.
Plus, the joy and satisfaction of creating something with your own hands is priceless! So why not give crocheting a try and make your very own lovey today? You won’t regret it! Keep practicing and have fun with this rewarding and relaxing hobby. ! So don’t give up, keep practicing and have fun with this rewarding and relaxing hobby. Crocheting is a wonderful way to express your creativity and make something special for yourself or loved ones. Happy crocheting!
Frequently Asked Questions:
Q: What Type of Crochet Hook Should I Use for This Project?
A: A size E or F hook is recommended for this project to ensure a tight and even stitch gauge. You can also adjust the hook size to fit your desired outcome.
Q: How Do I Start My Crochet Project?
A: To start, create a slip knot and then crochet around it. Make sure to keep your stitches tight and practice the necessary stitches before beginning.
Q: What is a Magic Ring in Crocheting?
A: A magic ring is an adjustable ring that is used to create a tight and seamless starting point for crocheting in the round. It is commonly used in amigurumi and other small projects. By using a magic ring, you can avoid having a hole in the center of your work.
Q: Can I Customize My Lovey?
A: Yes, you can customize your lovey by using different colors of yarn, adding embellishments, or changing the size. You can also experiment with different stitch patterns to create a unique lovey. Just make sure to adjust your stitch counts accordingly. Enjoy getting creative with your crochet project!
Q: Can I Use This Pattern to Make Other Crocheted Items?
A: Yes, you can use this pattern as a base to make other crochet items such as stuffed animals or blankets. Just adjust the size and number of stitches accordingly. Have fun experimenting with different projects! Keep practicing and have fun with this rewarding and relaxing hobby!
Conclusion:
Whether you give it away or keep it for yourself, crocheting a lovey requires only basic proficiency with the crochet hook and provides immense joy. With this guide, anyone can learn how to crochet a lovey! Don’t wait any longer – grab some soft yarn and start crocheting today. Take this opportunity to show yourself some appreciation or share something truly unique with someone special. Give it a try and make your own cozy lovey – you’ll be so glad you did!