
If you’ve ever wanted to make a unique and beautiful crochet project, then learning how to crochet a large leaf may be the perfect choice for you! With just basic supplies and stitches, you’ll be able to create a decorative piece that will stand out among all your crocheted items.
Whether it’s used as an accent piece or even hung on the wall as art, this one-of-a-kind design will add texture and color to any room.

In this blog post, we’ll go over all of the steps involved in making such a detailed item, from selecting the best materials to finishing off with sewing techniques. So whether you’re an experienced crocheter or are just beginning your journey, come along with us as we explore crocheting a large leaf!
Capturing the Elegance of Nature with Crocheted Leaves
Crocheting is an art form that can be used to create a wide variety of items. From blankets and sweaters to jewelry and decorative objects, crochet is the perfect medium for expressing creativity. One of the most beautiful projects you can make with crochet is a large leaf.
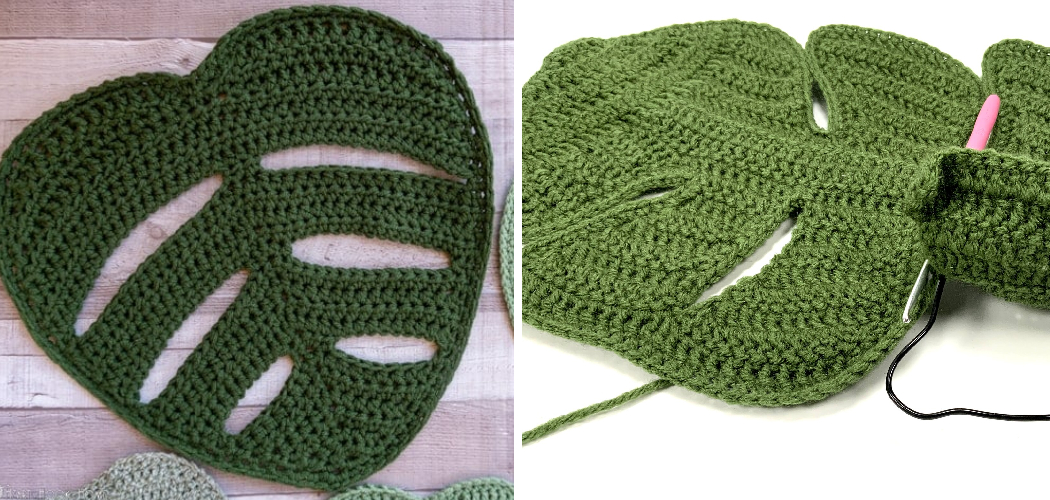
Crocheted leaves are eye-catching and intricate works of art that bring nature indoors. They are incredibly beautiful and add a touch of elegance to any room. Not only that, but they also make excellent gifts for any occasion.
Making crochet leaves is relatively easy and can be done with just a few basic supplies: yarn, a crochet hook, scissors, and an optional tapestry needle. You’ll also need some basic knowledge of how to read crochet patterns and the stitches used in making your leaf.
Crochet leaves typically use single crochets (sc), double crochets (dc), half-double crochets (hdc), treble crochets (trc) or slip stitches (sl). With these supplies and skills in hand, you’re ready to start creating!
Materials Needed for Crocheting a Large Leaf
To crochet a large leaf, you’ll need the following materials:
- A size G or H crochet hook
- Medium weight yarn in a color of your choice
- Tapestry needle for sewing in ends
- Scissors
Once you have all the supplies gathered, you’re ready to start crocheting! Before starting, make sure to familiarize yourself with basic crochet stitches such as single crochet (sc), double crochet (dc), and half double crochet (hdc). This will help ensure your leaf turns out correctly. Now that you’re prepared let’s begin!

10 Steps How to Crochet a Large Leaf
Step 1: Gather Materials
Before starting your crocheting project, gather all the necessary materials. You will need a crochet hook (size G or H works well for medium-weight yarn), yarn in a suitable color for the leaf (green is popular), scissors, and a yarn needle.
Step 2: Make a Slip Knot
To begin crocheting the leaf, make a slip knot by creating a loop with the yarn, then inserting the end of the yarn through the loop. Pull the yarn to tighten the loop around the hook. This is the first chain stitch of the leaf. Though the chain stitch is often used to create a foundation row, in this case it will form an integral part of the leaf.
Step 3: Chain Stitch Foundation
Create a chain stitch foundation by yarning over (bringing the yarn over the hook) and pulling it through the slip knot loop on the hook. Continue this process to make a chain of desired length, which will determine the length of your leaf. A chain of about 12 stitches is a good starting point for a large leaf. Although the chain stitch foundation is a single row, it will provide the base for your leaf.
Step 4: Double Crochet in Fourth Chain
Yarn over, then insert the hook into the fourth chain from the hook. Yarn over again and pull through the chain stitch. Yarn over once more and pull through the first two loops on the hook. Yarn over again and pull through the remaining two loops. This is a double crochet stitch. This stitch will serve as the first leaf vein.
Step 5: Double Crochet in Next Chain
Continue working double crochet stitches in each chain stitch across the row, skipping one chain between each stitch. This will create a row of double crochet stitches that form the central vein of the leaf.
When you reach the end of the row, chain 1 and turn your work around to start on a new row. However, before doing this, count the number of stitches you have made. This will be the mid-point of your leaf and you need to keep track of how far you go on each side of it.
Step 6: Work V-Shaped Increases
To create the widening shape of the leaf, work V-shaped increases at the edges of each row. To do this, make three double crochet stitches in the last chain stitch of the row. This will create an increase that helps the leaf curve outward. After making the stitches, chain one and turn your work. This will be the start of the next row. Repeat this step until you have achieved the desired size of the leaf.

Step 7: Repeat Rows
Repeat the previous steps, working double crochet stitches along the central vein and increasing at the edges, for the desired number of rows. The number of rows will depend on the size and shape of the leaf you want to create. Aim for a gradual widening shape as you work each row.
Although the beginning few rows will be quite straight, by the time you reach the fourth or fifth row, you should start to see a leaf-like shape forming. Once you’ve crocheted the required number of rows, fasten off by cutting the yarn and knotting it securely around the last stitch.
Step 8: Decrease Stitches
To shape the tip of the leaf, you will need to decrease stitches gradually. To do this, double crochet two stitches together by inserting the hook into the first stitch, yarning over, and pulling through.
Then insert the hook into the next stitch, yarning over, and pulling through. Yarn over again and pull through all loops on the hook. Repeat this decrease stitch every few stitches until you have decreased enough to form a pointed tip.
Step 9: Fasten Off
Once you have reached the desired pointed tip, fasten off your yarn. Cut the yarn, leaving a tail of a few inches. Pull the tail through the last loop on the hook to secure it. Weave in any loose ends using a yarn needle to ensure a tidy finish. If desired, add a few stitches of embroidery for extra embellishment. Make sure to tie a tight knot in the end of the embroidery thread.
Step 10: Block and Shape the Leaf (Optional)
To enhance the shape and definition of the leaf, you can block it by lightly wetting it, shaping it to the desired form, and allowing it to dry flat. This step is optional but can add a polished look to your crocheted leaf. Once the leaf is dry, you can use a steam iron to press it for an even more defined shape. And that’s it! You now have a beautiful crocheted leaf to add to your project.

Things to Consider When Crocheting a Large Leaf
When crocheting a large leaf, there are certain things to consider to ensure your project comes out looking the best it can. Here are a few tips to help you achieve the perfect large leaf.
1. Choose the Right Yarn:
For crocheting a large leaf, it’s important to choose the right yarn for your project. You want something that is lightweight and has good drape, so look for cotton or linen blends in particular. Additionally, depending on what type of leaf you are trying to create, it can also be helpful to select a variegated yarn with multiple colors that blend together for greater visual interest.
2. Select a Crochet Hook:
Start by selecting the right crochet hook size for your project; this will depend on how thick your chosen yarn is as well as the desired size of your leaf. A smaller hook will create a more delicate and detailed leaf while a larger hook will provide a looser, fuller look.
3. Practice the Pattern:
Make sure you are comfortable with the pattern before starting your project to ensure that you can make it work without any issues. Start by practicing on some scrap yarn or an inexpensive piece of fabric so you can get the hang of it before investing in your chosen materials.

Following these tips should help you achieve success when crocheting a large leaf! With care and practice, you’ll be able to create beautiful, intricate designs for your projects.
Conclusion
Crafting a large leaf is a great way to showcase your crocheting skills, whether you’re an experienced crocheter or a beginner. Once you have practiced and perfected the different stitches used for this type of work, you will be able to make a unique large leaf without breaking a sweat.
Understanding the pattern and how it works will also help ensure that your project turns out the way you want it. From slip stitches to chain loops, knowing these techniques will make for easy and stress-free work. You also need to keep in mind the materials needed when creating large leaves as they vary depending on size.
Therefore, make sure to choose high-quality yarns and other supplies before starting. Hopefully, this has given you an understanding of how to crochet a large leaf and inspire you to start working on your own fantastic craft! If not, no worries – come back here anytime for any tips or tricks needed.