
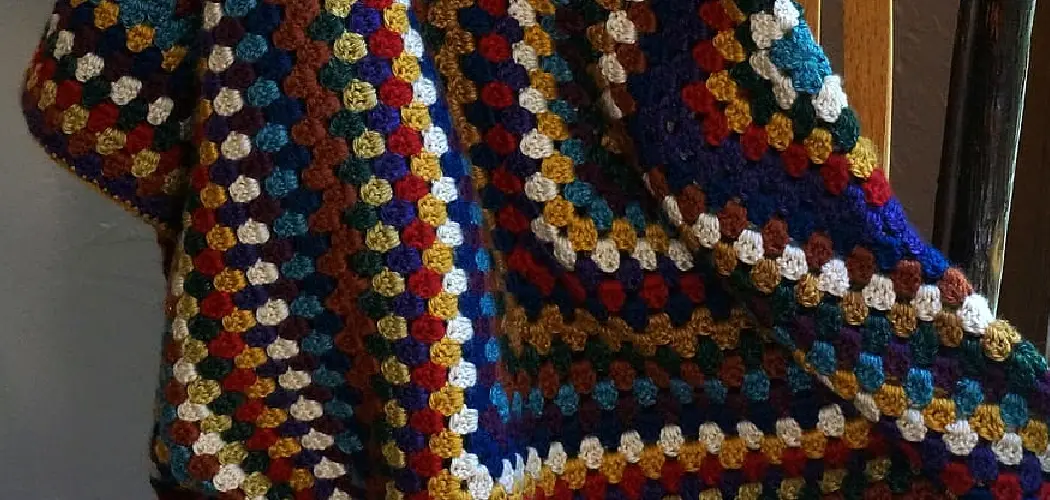
Crocheting is a great hobby for people who enjoy creating beautiful things with their hands. One of the most popular crochet patterns is the granny square, which is a classic design that can be turned into anything from blankets to clothes. If you’re a beginner, however, full granny squares can be intimidating to tackle all at once. That’s where the half granny square comes in!

A half granny square is a simpler version of the full granny square that uses fewer stitches and is quicker to finish. In this guide, we’ll show you how to crochet a half granny square step by step so you can create your own stunning crochet projects.
Can You Crochet a Half Granny Square?
Are you tired of the typical square granny pattern? Why not switch things up and try a half granny square instead? With its unique shape, this crochet pattern is perfect for creating a variety of different projects, from blankets to scarves and everything in between.
Whether you’re an experienced crocheter or just starting out, the half granny square is a great option for adding some texture and interest to your projects. So grab your hook and yarn and give it a try – you might just find your new favorite crochet pattern!
Why Should You Crochet a Half Granny Square?
Crocheting a half granny square may seem like a small project, but it can have a big impact on your crafting skills. Whether you’re a beginner or more experienced, this project gives you a chance to practice your stitches and experiment with different color combinations.
You can use half granny squares to make scarves, shawls, and blankets or even stash them away for future projects. Plus, the best part about crochet is that there’s no wrong way to create something beautiful. So indulge your creativity and give the half granny square a try!
How to Crochet a Half Granny Square: A Beginner’s Guide
Step 1: Start with The Foundation Chain
To begin, create a foundation chain of any odd number of stitches. This will be the base of your half granny square. You can make it as long or as short as you like, depending on the size of the square you want to make.

Step 2: Add the First Row of Stitches
Once you have your foundation chain, it’s time to add the first row of stitches. Begin by double crocheting in the fourth chain from your hook. Continue to double-crochet in each chain across until you reach the end of the row.
Step 3: Create the Corners
To create the corners of your half granny square, you’ll need to chain two and then double crochet in the same stitch as the previous double crochet. Then, chain one and double crochet in the next stitch. Repeat this pattern (chain two, double crochet in the same stitch, chain one, double crochet in the next stitch) until you reach the end of the row.
Step 4: Add Additional Rows
To continue your half granny square, repeat step three for as many rows as you’d like. Each row will create an additional corner and side of the square. When you’ve reached the desired size, fasten off and weave in the ends. Congratulations, you have now completed your half granny square!
Step 5: Joining Multiple Half Granny Squares
If you would like to create a larger project using multiple half granny squares, you can easily join them together. Simply line up the sides of the squares that you want to connect and use a slip stitch to join them together. This will create a seamless look for your project.
Step 6: Adding a Border
To add a finishing touch to your half granny square, you can choose to add a border. This can be done by single crocheting around the entire edge of your square or by using a different stitch, such as the shell stitch or picot stitch. Get creative and experiment with different border options to find one that complements your project.

Step 7: Creative Uses for Half Granny Squares
While half granny squares are commonly used to create blankets and afghans, there are many other ways you can use them in your crochet projects. They can be used as motifs in clothing, such as on a sleeve or pocket, or even in home decor projects like coasters or wall hangings. The possibilities are endless, so don’t be afraid to incorporate half granny squares into your next crochet project.
With these seven easy steps, you now know how to crochet a half granny square. Whether you’re a beginner or an experienced crocheter looking for a new technique, half granny squares are a fun and versatile addition to any project. So grab your hook and yarn, and start creating beautiful half granny squares today!
5 Considerations Things When You Need to Crochet a Half Granny Square
1. Yarn and Hook Size
The yarn and hook size you choose will greatly impact the size and drape of your half granny square. If you want a smaller, tighter square, use a smaller hook and thicker yarn. For a larger, looser square, use a larger hook and thinner yarn. It’s important to experiment with different combinations to find the right one for your project.

2. Starting Chain
When crocheting a half granny square, the starting chain will determine the number of stitches in each row. The more stitches in the starting chain, the longer the rows will be and the wider your square will become. It’s important to keep this in mind when planning out your project and adjust accordingly.
3. Turning Chain
The turning chain is an essential part of creating a half granny square as it creates height for each row. However, it’s important to pay attention to how many turning chains are needed for each row, as this can affect the overall shape and evenness of your square.
4. Color Changes
One of the unique aspects of crocheting a half granny square is incorporating color changes into your design. This can add visual interest and depth to your project but also requires careful planning to ensure that colors are placed strategically for the desired effect.
5. Blocking
Blocking is an important step when crocheting any type of square, including half granny squares. This involves wetting or steaming your finished piece to help even out stitches and give it a more polished look. It’s especially important if you plan on joining multiple squares together for a larger project, as blocking helps ensure all squares are uniform in size and shape.

Benefits of Crochet a Half Granny Square
Crocheting a half Granny Square may seem intimidating at first, but once you get the hang of it, you’ll realize how versatile and fun this stitch pattern can be. One of the greatest benefits of crocheting a half Granny Square is that it can be used in various projects.
From blankets and scarves to bags and kitchen towels, this stitch pattern can add a pop of color and texture to any item. Plus, since it only uses half of the Granny Square pattern, it works up faster than a full square, making it a great choice for last-minute gifts or projects you want to finish quickly. So next time you’re looking for a new crochet stitch to try, don’t overlook the humble half Granny Square – it just might become your new favorite!
4 Common Mistakes People Make When Trying to Crochet a Half Granny Square
1. Not Understanding the Pattern
One of the most common mistakes people make when trying to crochet a half granny square is not fully understanding the pattern. It’s important to carefully read and follow the instructions, as even a small mistake can throw off the entire square. Before starting, take some time to familiarize yourself with the pattern and make sure you understand each step.
2. Incorrect Stitch Counts
Another common mistake is not keeping track of your stitch counts. Half granny squares require a specific number of stitches in each row to maintain its shape. If you accidentally add or skip stitches, it can result in a wonky square that doesn’t lay flat. Make sure to count your stitches at the end of each row and double-check that they match the required amount.
3. Using the Wrong Yarn or Hook Size
The type of yarn and hook size used can greatly affect the outcome of your half granny square. If you use a thicker yarn or larger hook than what is recommended in the pattern, your square may turn out too big and loose.
On the other hand, using a thinner yarn or smaller hook can result in a tight and stiff square. Be sure to follow the suggested materials listed in the pattern for best results.
4. Not Blocking the Finished Square
Many people skip this step, but blocking is an important part of crocheting a half granny square correctly. This involves wetting and shaping your finished square to ensure it lays flat and all sides are equal in length. Skipping this step can result in an unevenly shaped square that may be difficult to join with other squares later on in your project. Take the time to block your squares for a more polished finished product.
Conclusion
There you have it – a simple and easy guide to crocheting a half granny square! With just a few stitches, you can create a beautiful base for all kinds of projects. Whether you’re a beginner or an experienced crocheter, half granny squares are a fun and versatile pattern to work with. So grab your hook and some yarn, and start creating! Thanks for reading our post about how to crochet a half granny square.
Expertise:
Crafting expert with a focus on innovative techniques and diverse materials.
Specialization:
- Textile arts (weaving, embroidery, and fabric dyeing)
- Woodworking and furniture design
- Mixed media and upcycling projects
Recognition:
- Featured in local art exhibits showcasing innovative craft projects
- Collaborated with community organizations to promote crafting workshops
- Received accolades for contributions to sustainable crafting initiatives
Mission:
- To inspire and empower crafters of all levels to discover their creative potential
- Encourages experimentation and self-expression through hands-on projects