
Have you ever wanted to crochet something round or circular but needed help with how to start without things curling in on themselves? You’re not alone – crocheting flat circles can undoubtedly be tricky! You need those circular shapes to lay flat for many crochet projects like pillows, blankets, bags, and more.

In this tutorial, I will walk you through my favorite methods for crocheting circles that lie perfectly flat every time. Whether you’re a beginner learning to crochet or an experienced hook wielder looking to expand your skills, the techniques I’m about to share will surely become your new go-to for creating lovely flat circles you can be proud of.
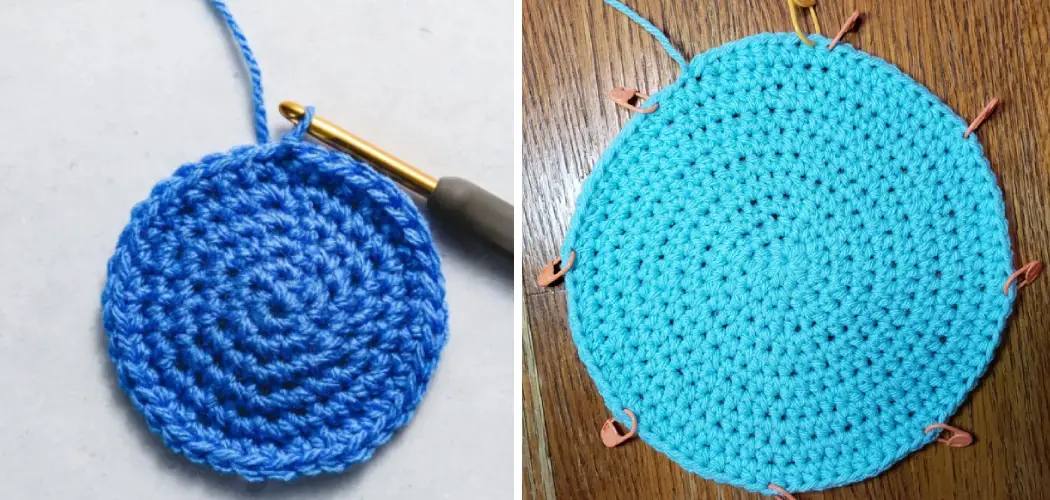
Keep reading to learn how to crochet a flat circle that doesn’t roll up on the edges.
What Will You Need?
Before we dive into the techniques, let’s take a quick look at what you’ll need to get started. If you’re new to crocheting or just starting your collection of supplies, don’t worry – there isn’t much you need for this project. Here’s a simple list of everything I recommend having on hand:
- Yarn (of course!)
- Crochet hooks (I suggest using at least two different sizes for this project)
- Scissors
- Stitch marker (optional but highly recommended)
- Tapestry needle
Now that you have everything you need, let’s start crocheting a flat circle.
10 Easy Steps on How to Crochet a Flat Circle
Step 1. Start with a Magic Circle:
Begin by making a magic circle. This technique creates a neat and tight center for your process, perfect for keeping those pesky holes closed. To make the magic circle, wrap the yarn around your fingers twice, insert the hook under both loops and pull up a loop.

Step 2. Chain Stitches:
The next step is to chain stitches, which will serve as the foundation for the rest of your circle. First, chain two stitches. These are going to be the height of the first round. Now, we’ll start crocheting into the magic process. Remember to keep the tail end of the yarn in your hand while you’re working with the loop. This will allow you to pull it tight and close the circle’s center once you’ve made a few stitches.
Step 3. Single Crochet Into the Circle:
Now, we’ll start to create the base for your flat circle. Work nine additional single crochet stitches into the center of the magic circle. Counting the chain stitches as one, this step should give you 10 stitches in the first round of your circle.
As you’re working, keep your tension steady and consistent. Consistent pressure is critical to creating a circle that lays flat. Once you’ve completed these stitches, pull the tail end of the yarn to close up the center of the circle.
Step 4. Join the Round:
The next step in crocheting a flat circle is to join the round. To do this, insert your hook into the top of the first chain you made. Then, create a slip stitch by yarning over and pulling through both loops on your hook. You should now have a completed circle. If you are using a stitch marker, this is the time to place it. It will help you track each round’s start and end.
Step 5. Start the Second Round:
Now that you’ve completed the first round of your flat circle, it’s time to begin the second. Start this round by chaining two stitches, just like you did at the beginning of your first round. This will serve as your first stitch for the second round.

Make sure to count this as a stitch as you go on. Now, work two single crochet stitches into each stitch around the circle. By the end of this round, you should have 20 stitches. Remember to maintain a steady tension to keep your circle flat.
Step 6. Start the Third Round:
For the third round, you will need to continue expanding your circle. Begin by chaining two stitches. These count as your first stitch. In the next stitch, work two single crochets (this means you’re increasing). In the stitch after that, work one single crochet.
Continue this pattern—two single crochets in one stitch, one single crochet in the next—around your circle. By the end of this round, you should have a total of 30 stitches. Don’t forget to maintain even tension to ensure your circle remains flat.
Step 7. Continue with Consecutive Rounds:
As you progress to the fourth and consecutive rounds, the increasing stitches continue to expand your circle and keep it flat. Start each round by chaining two stitches (which count as your first stitch). In the next two stitches, work one single crochet each. In the third stitch, work two single crochets (this is your increase).
Continue this pattern—one crochet in the next two stitches, followed by two single crochets in the third stitch—around your circle. This pattern increases by ten stitches each round. For example, by the end of the fourth round, you should have a total of 40 stitches. Maintaining consistent tension is critical to ensuring your circle remains flat. Adjust your hook size if needed to help manage your tension.
Step 8. Finishing the Circle:
Once you’ve reached your desired size for the crochet flat circle, you’ll need to finish it off. This involves stopping the increases and maintaining the same number of stitches for each consecutive round. This step will help your circle to lay flat without curling up at the edges.

Start your game as usual by chaining two stitches (which count as your first stitch). Then, work one single crochet into each stitch around your circle. When you reach the end of the round, join it with a slip stitch just like you did before. Repeat this process for as many games as necessary until your circle lies flat. Remember, it’s essential to maintain even tension throughout the process.
Step 9. Ending Your Work:
After you’ve created a flat circle of your desired size and completed your final round, it’s time to finish your work. Cut the yarn, leaving a tail long enough to weave in with a tapestry needle. Then, pull the yarn through the loop on your hook.
This is known as fastening off. Next, thread the tail of your adventure through the tapestry needle and weave it into the back of your work to hide it. Ensure you weave in different directions to secure the thread properly. Trim any excess yarn. Congratulations, you’ve successfully crocheted a flat circle!
Step 10. Care and Maintenance:
Now that you have a beautifully crocheted flat circle, it’s essential to know how to care for it to ensure it retains its shape and beauty. Most crochet items can be gently hand-washed with a mild detergent. After washing, always lay the thing flat to dry, reshaping it as necessary.
Avoid wringing it out, as this can distort the shape of your flat circle. Always check the yarn label for specific washing instructions for items made from specialty yarn. Regular maintenance will keep your crochet flat circle looking its best for years.

By following these steps, you can easily create a flat circle using crochet techniques. Whether you use it as part of a larger project or on its own, this versatile shape is a staple in crocheting.
5 Additional Tips and Tricks
- Maintain Consistent Tension: Maintaining consistent tension in your yarn will ensure that your flat circle remains even. Too tight or loose, your circle will either cup or wave.
- Count Your Stitches: It’s easy to lose track of your stitches when crocheting in the round. Always count your stitches at the end of each round to ensure you’re increasing correctly.
- Use a Stitch Marker: To quickly identify the start and end of each round, use a stitch marker. This can be especially helpful when working with larger flat circles.
- Choose the Right Hook Size: The size of your crochet hook can significantly impact the flatness of your circle. If your circle starts to cup, try using a larger theme. If it starts to wave, switch to a smaller one.
- Block Your Finished Circle: Once you’ve finished crocheting your flat circle, block it to give it a perfectly flat and professional finish. This involves wetting your finished piece, pinning it to a flat surface, and allowing it to dry in the desired shape.

With these additional tips and tricks, you can easily crochet flat circles every time. Remember to maintain consistent tension, count your stitches, use a stitch marker, choose the right hook size, and block your finished circle.
5 Things You Should Avoid
- Avoid Rushing: Crocheting a flat circle requires careful attention to your stitches and maintaining even tension. Rushing through the process can lead to inconsistent stitch sizes and a less-than-perfect circle.
- Don’t Neglect Counting Stitches: It may be tempting to skip counting your stitches, especially as your circle gets more prominent. However, this could lead to an uneven circle. Always make sure to count your stitches at the end of each round.
- Don’t Ignore Your Hook Size: As noted before, the size of your hook plays a significant role in the success of your crochet project. Remember signs that your hook size may need to be adjusted.
- Avoid Using Different Yarn Types: Different types of yarn have different stretch and tensile strength properties. Mixing yarn types in the same project can produce uneven finished products.
- Don’t Skip Blocking: It may seem like an unnecessary extra step, but blocking your finished circle can significantly improve its shape and final appearance. Avoid the temptation to skip this step.
You can crochet flat circles like a pro by avoiding these common mistakes. Remember to take your time, count your stitches, pay attention to your hook size and yarn type, and permanently block your finished product. With practice and patience, you’ll soon master the art of crocheting flat circles.

Why is My Crochet Circle Not Flat?
If you’re having trouble creating a flat circle with your crochet, don’t worry – you’re not alone. Here are some of the most common reasons why your crochet circle may be coming out uneven or misshapen:
- Uneven Tension: As mentioned before, maintaining consistent tension is crucial when crocheting a flat circle. If your pressure varies throughout your project, it can lead to an uneven circle.
- Incorrect Stitch Count: If you need to count your stitches correctly or forget to increase them evenly, it can result in a wonky circle. Make sure to always count and double-check your stitch count at the end of each round.
- Using the Wrong Hook Size: The size of your hook dramatically affects the shape and flatness of your crochet circle. If you’re using a too large hook, your circle may start to cup or ripple.
- Not Blocking the Finished Product: As mentioned before, blocking is essential in creating a flat crochet circle. Skipping this step can result in a distorted final product.
By identifying and addressing these common mistakes, you can troubleshoot any issues with your crochet circles and achieve a flat result. With practice and patience, you’ll soon master the art of crocheting flat circles every time.
Conclusion
In conclusion, how to crochet a flat circle may seem daunting at first, but with practice and patience, it becomes second nature. We’ve covered the steps and techniques to achieve a perfect flat circle every time.
From choosing the suitable yarn and hook size to understanding the importance of starting with a magic ring, you now have all the tools to create beautiful and versatile crochet projects. Remember to take breaks when needed and enjoy the process of creating something unique.
Keep going even if your first attempt is not as flawless as you hoped. Just keep practicing,; soon enough, you’ll share your patterns with others! So grab your yarn and hook, put on some relaxing music, and let your creativity flow. Share your creations on social media using #crochetflatcircle to connect with other passionate crocheters and inspire each other.
So, let’s keep those hooks busy and continue spreading the joy of crocheting one stitch at a time. Happy crocheting!
Expertise:
Crafting expert with a focus on innovative techniques and diverse materials.
Specialization:
- Textile arts (weaving, embroidery, and fabric dyeing)
- Woodworking and furniture design
- Mixed media and upcycling projects
Recognition:
- Featured in local art exhibits showcasing innovative craft projects
- Collaborated with community organizations to promote crafting workshops
- Received accolades for contributions to sustainable crafting initiatives
Mission:
- To inspire and empower crafters of all levels to discover their creative potential
- Encourages experimentation and self-expression through hands-on projects