
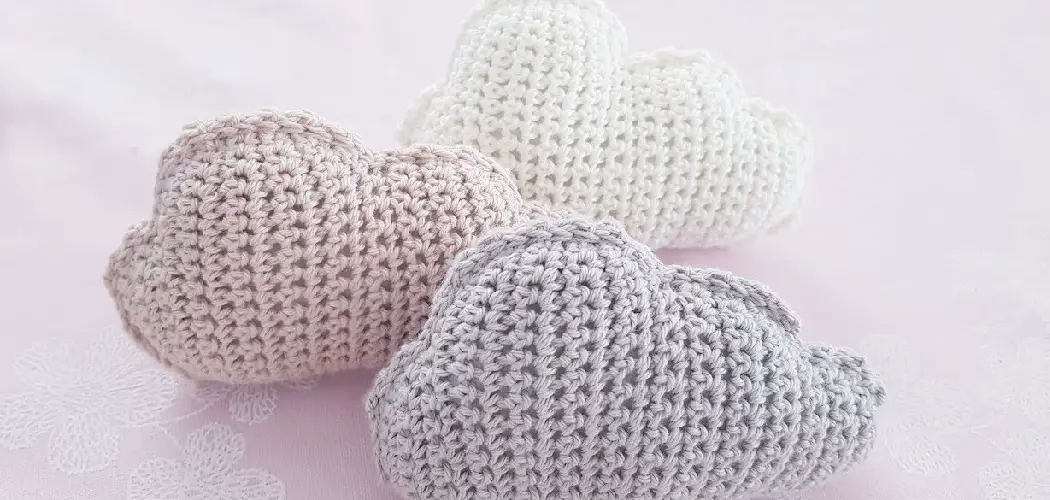
If you’ve ever wanted to make a cuddly pillow out of this world, look no further! Crocheting your cloud pillow is the perfect project for experienced and beginner crocheters alike. From crafting an ethereal design with white yarn to making cute accents with colorful variegated threads, creating your own cloud pillow will be an amazing crafty experience.

By following carefully explained step-by-step instructions, even friends who have never used a crochet hook before can create these fluffy pillows in two different sizes.
Whether you’re making one as a gift for someone special or just want to add some dreamy decor to your bedroom – get ready to bring softness and wonder into your home with our latest tutorial on how to crochet a cloud pillow!
What are the Uses of a Cloud Pillow?
A cloud pillow can bring comfort and softness to any room. Whether decorating a nursery or sprucing up your bedroom, these pillows are perfect for bedroom décor, snuggling on the couch, or even using as an accent indoor cushion.
Additionally, they make perfect gifts for your loved ones. Imagine how excited your friends and family will be when they receive a handmade cloud pillow – just in time for the holidays!
You can also give them away as thoughtful gifts, or if you’re feeling extra generous – make a bunch of them to bring some cheer and comfort to those in need.
What You Will Need
- Worsted weight yarn (2 skeins for small pillow & 3 skeins for large pillow)
- Crochet hook size 5 mm/H8
- Tapestry needle
- Polyfill stuffing
- Scissors
Once you have gathered all the necessary supplies, it’s time to start crocheting.
8 Easy Steps on How to Crochet a Cloud Pillow
Step 1: Making the Cloud Pillow Base
Start by making a chain of 32-40 stitches for the small pillow or 50-60 for the large pillow. Make sure each stitch is tight and even before moving on to a single crochet (sc). Try to keep these stitches as even as possible, as this will ensure that your pillow looks nice and neat.
Step 2: Creating the First Row
In the second chain from the hook, make a single crochet (sc). Continue to sc in each chain across the row. At the end, you should have a total of 31-39 stitches for a small pillow or 49-59 for a large one. Be sure to count your stitches to make sure you have the right amount. Once you’ve completed the first row, turn your work to begin the next row.

Step 3: Forming Subsequent Rows
For the second row, chain one, then single crochet into the first stitch and each stitch across the row. You should have the same number of stitches as your initial row. To maintain the shape of the cloud, repeat this step for as many rows as necessary to reach your desired size.
Make sure to keep your edges straight by counting your stitches at the end of each row. Once your cloud base has reached your preferred size, cut your yarn – leaving a long tail – and pull through the last stitch, tightening to create a knot. This completes the main part of your cloud pillow.
Step 4: Creating the Cloud Bumps
The next step is to create the cloud bumps that will give your pillow its unique shape. Start by tying a slip knot on your crochet hook and chain 15 stitches. Make a single crochet in the second chain from the hook, then continue to single crochet in each chain across the row. You will have a total of 14 stitches.

For the second row and onwards, chain one, then single crochet into the first stitch and each across the row. You should have the same number of stitches as your initial row. Repeat this step until you have completed four rows, then cut your yarn, leaving a long tail, and pull through the last stitch, tightening to form a knot.
This forms your first cloud bump. Repeat this process to create three more bumps. Once all four bumps are done, proceed to the next step.
Step 5: Assembling the Cloud
Once you have crocheted the main part of the cloud and the four cloud bumps, it’s time to assemble your pillow. Position your cloud bumps along the edges of the main part of the cloud, adjusting them until you are satisfied with their placement.
Using your tapestry needle and the long tail left from each bump, sew each bump onto the cloud base. Make sure to secure each bump properly so that it doesn’t come loose. Once all bumps are sewn on, your cloud pillow should start to take shape! This completes the assembling of the cloud pillow.
Step 6: Stuffing the Pillow
After assembling all the parts, it’s time to stuff your pillow. Start by cutting a long piece of yarn and threading it onto your tapestry needle. Sew around the edge of the cloud, leaving a small gap for stuffing. Now, take your Polyfill stuffing and begin to fill the pillow, making sure to get into all the corners and cloud bumps.

Fill the pillow until it has reached your desired level of softness and fullness. Once you’re happy with the stuffing, sew up the gap you left open. Your cloud pillow is now stuffed and ready!
Step 7: Finishing Touches
With your pillow now taking shape, it’s time to add the final touches. You can add embellishments like facial features or decorative accents to personalize it further. To add a face to your cloud pillow, take a contrasting color of yarn and your tapestry needle and embroider a pair of closed eyes and a happy smile onto one side of the pillow.
Alternatively, you can use felt cut-outs and fabric glue for the same purpose. You have now successfully completed crocheting a cloud pillow! It is a cute addition to your home decor and a testament to your crafting skills.
Step 8: Care and Maintenance
Like any other handmade item, your cloud pillow requires proper care to maintain its charm and longevity. Machine wash on a gentle cycle using cold water is typically safe. It’s best to lay the pillow flat and reshape it as necessary to dry.

Avoid bleaching, as it can harm the fabric and fade the colors. Always follow the washing instructions the yarn manufacturer provides for the best results. Now, you can enjoy your handmade cloud pillow for years to come!
By following these instructions, you can create a cozy cloud pillow of your own. With the right supplies and a few tips from us, you are sure to make something magical.
5 Additional Tips and Tricks
- When crocheting a cloud pillow, you should vary your stitches. The puff stitch is the easiest to use for this type of project, but experienced crocheters may want to try alternating between double and half double crochet stitches to give their pillow more dimension.
- To make sure your project looks its best, take some time to block your pillow shape before stuffing. This will ensure that all your stitches are even and create a perfect pillow shape.
- When stuffing the pillow, use small pieces of leftover yarn or wool stuffing to add weight and make sure it’s evenly distributed throughout the project.
- To achieve maximum fluffiness, crochet two separate rectangles for the pillow and attach them together using a simple whip stitch.
- For an extra touch of luxury, consider adding some faux fur to the cloud pillow for added texture. This will also help keep your project warm and cozy!
With these tips and tricks in hand, you’re now ready to create your own unique cloud pillow!
5 Things You Should Avoid
- Avoid using tight stitches. Crocheting too tightly can lead to a stiff and uncomfortable pillow. Keeping your stitches loose and airy is better to create a soft, fluffy cloud pillow.
- Don’t rush the stuffing process. Distributing the stuffing is crucial to prevent any lumps or bumps evenly. Take time with this step to ensure your cloud pillow is as comfortable as it looks.
- Refrain from using rough yarn. The texture of the yarn makes a big difference in the comfort of the pillow. Opt for a soft, smooth yarn to enhance the overall feel of your cloud pillow.
- Avoid using a single piece of yarn for the entire project. This could lead to potential stretching or warping of your pillow.
- Pay attention to the cleaning instructions of your chosen yarn. Some materials may need special care or may need to be machine washable. Always check the washing instructions beforehand to ensure your cloud pillow remains in its best condition for as long as possible.
With these tips in mind, you can create a beautiful cloud pillow that will last for years!
Conclusion
There you have it – the full step-by-step guide on how to crochet a cloud pillow that’s perfect for cuddling up with. It’s a super easy project that can be completed quickly, and no prior crochet experience is needed!
Hopefully, this post gave you some tips and inspired your creativity to create something unique and personalized.
This project can also be easily customized to fit your style and preferences. Whether you add faux fur for a luxurious touch or leave the pillow plain, it’s sure to make any room feel instantly cozier and more inviting. So what are you waiting for? Grab some yarn and start crocheting your cloud pillow today!