
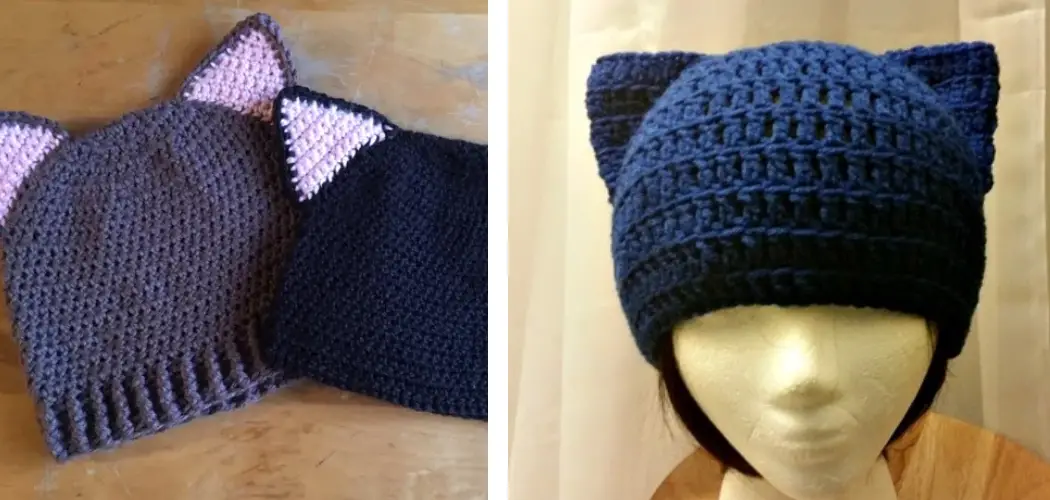
This project makes an interesting fashion statement and provides the perfect opportunity to practice your crocheting skills. The design of the hat allows for endless possibilities when it comes to color combinations and patterns. Plus, it’s a great way to get creative and make something unique and one-of-a-kind. Crocheting a cat ear hat offers a few advantages over other types of hats.

First, crocheting is a fairly quick and easy craft that doesn’t require any special tools or skills. As long as you have some basic knowledge of crochet, you should be able to complete this project in just a few hours.
Second, the end product will be unique and custom-made, so you can be sure that nobody else will have the same hat. You can find step-by-step instructions on how to crochet a cat ear hat in this blog article.
Step-by-step Instructions for How to Crochet a Cat Ear Hat
Step 1: Inspect the Crochet Hook and Yarn
Before you begin, ensure the crochet hook size is appropriate for the yarn being used. Make a loop with the yarn and slide it onto the hook. Pull one of the tails to tighten the knot.
Step 2: Start Crocheting the Hat
Chain (ch) a few stitches until it becomes a circle. The number of chains you make will depend on your desired size but aim for an average of 25. Slip stitch (sl st) into the first chain to create a loop. This will be the back center of the hat. Make a single crochet in each chain around until you reach your desired size. Join with a slip stitch to create another loop.
Step 3: Make the Cat Ears
Make four chain stitches and wrap them around the top of the hat. To make a triangular shape, slip stitch in each of the four chains. Continue making single crochets until you reach your desired size for the ear.
Step 4: Add Details to the Cat Ears
Finish off with a slip stitch, then add details to each ear. For example, use an additional color of yarn or add buttons and bows. To make stripes on the ears, work one row of single crochet stitches in the desired color before continuing with the original color.
Step 5: Finish Off the Hat
Slip stitch around the entire hat to connect all edges. To make a brim, single crochet in each stitch around and add extra stitches for more length. Finally, weave in any loose ends, and your cat ear hat is finished.

By following these steps, you will have created a unique and adorable cat ear hat. Have fun customizing it with different colors and patterns to make yours stand out from the rest.
Precautions for How to Crochet a Cat Ear Hat
- Read the instructions thoroughly before attempting to crochet a cat ear hat. Familiarize yourself with the pattern, and double-check for any mistakes or adjustments that need to be made beforehand.
- Be sure you have all of the necessary supplies on hand; yarn, hook, tapestry needle, scissors, etc.
- Work in a well-lit and clutter-free area, which helps produce a more accurate and neat product.
- If you use multiple colors of yarn within the hat, keep track of which color is used for each row; this will help you avoid mistakes or confusion later on.
- If a project requires multiple pieces, be sure to use stitch markers to identify where each piece begins and ends.
- Pay attention to the gauge; this is the number of stitches used per inch or cm of fabric. Maintaining consistent gauges throughout the project will help ensure that all pieces fit together properly when assembled.
- It is important to practice the stitches and techniques used in the pattern before attempting the actual project; this will help you become comfortable with how the stitch should look and feel.
- When using a hook, be sure that your fingers are placed properly on it not accidentally to slip and cause injury.

How Long Does It Take to Crochet a Cat Ear Hat?
The amount of time it will take to crochet a cat ear hat depends on the complexity of the pattern, your skill level, and how quickly you work. On average, most cat ear hats can be crocheted in two or three hours. It might take longer if you are a beginner as you become familiar with the stitches used in the pattern. If you are an experienced crocheter, the project might go faster.
Additionally, it will take more time to complete the project if you add embellishments such as ears or bows. Considering all these factors, it is best to allow yourself at least a couple of hours to crochet your cat ear hat.
The process will become easier and faster with practice and patience as you get better at crocheting. In conclusion, it takes an average of two to three hours to crochet a cat ear hat, but the time may vary depending on your skill level, the complexity of the pattern, and the type of yarn and hook size used.
How Should You Care for Your Finished Cat Ear Hat?
- After completing your cat ear hat, be sure to hand wash it in cold water using a mild detergent.
- Once the hat is sufficiently washed, rinse off any remaining soap residue and then hang it up to dry or lay it flat on a drying rack until fully dry.
- To ensure that your cat ear hat maintains its shape and design, store it in a cool, dry place that is free from dust and pet hair.
- To avoid damage or to stretch to the hat, use caution when styling the ears and avoid pulling them too far out of shape when trying on or adjusting the hat.
- Periodically check for any loose stitches that may need to be re-tied, and if necessary, add a few extra stitches for durability.
- With proper care, your cat ear hat will last for years and continue to bring joy.

There you have it—you now know to Crochet a Cat Ear Hat and How you Should Care for Your Finished Cat Ear Hat! With these tips, you can ensure that your cat ear hat will look great and last a long time.
How Do You Make Sure the Edging of Your Cat Ear Hat Looks Professional and Neat?
Once you have finished crocheting the body of your cat ear hat, it’s time to make sure the edging looks professional and neat. This is an important step, as this will ensure that your hat looks great when you give it as a gift or wear it yourself.
One simple way to tidy up the edges of your cat ear hat is to add a few rows of single crochet stitches around the edge. Single crochet has a neat, uniform look that will make your hat look professionally finished. You can also use slip stitches if you want a neater finishing touch.
In addition to using single or slip crochet stitches, you can also use other decorative stitches to edge your cat ear hat. For instance, you can use a shell stitch around the hat’s brim for a pretty, textured look.
You can also make a round of popcorn stitches for a more playful feel. Whatever type of decorative stitches you decide to use, be sure to choose ones that complement your cat ear hat’s overall look and design.
How Do You Give Your Cat Ear Hat a Unique and Creative Look?
- Start by choosing a unique color of yarn. You can find many interesting colors in craft stores, including different shades of red, purple, blue, and even rainbow-colored yarns.
- Once you have chosen the yarn for your cat ear hat, decide on an overall design for the hat’s shape. Consider the length, width, and height of the hat and add any decorative details you would like.
- After creating your design, use a crochet hook to make the first row of stitches. This will form the foundation for your cat ear hat. The number of stitches should correspond to your desired width and circumference of the hat.
- Start adding the cat ear shape to the hat. This will require a series of single and double crochet stitches, which should be worked in rounds around the edge of your hat.
- Once you have finished creating the cat ear shape, it’s time to add details such as stripes, polka dots, or flower appliqués. You can also use different yarn colors to create a more interesting look.
- Once all the details are finished, it’s time to sew the two sides of your cat ear hat together using a tapestry needle and strong thread. Finally, weave in all loose ends, and you’re done! Your unique and creative cat ear hat is ready to wear.

With just a few simple steps, you can create a one-of-a-kind cat ear hat that will stand out in any crowd. Now, all that’s left to do is show off your new creation and let everyone admire your handiwork.
Conclusion
In conclusion, crocheting a cat ear hat is a fantastic project for all levels of crocheters. It requires minimal supplies and a few basic stitches, and it’s great fun to make! With the right materials, patience, and practice, you can create a unique, one-of-a-kind hat that your friends and family will admire.
So grab your yarn, hook, and stitch markers and get crocheting! Who knows, you might even make a few cats jealous with this costume hat. I hope reading this post has helped you learn how to crochet a cat ear hat. Make sure the safety precautions are carried out in the order listed.
You Can Check It Out to Embroider on Denim