
Are you looking for a way to create something unique and special? Crocheting is a wonderful hobby that can be both relaxing and rewarding. This post will provide step-by-step instructions on how to crochet a bonnet, complete with beautiful patterns and edging.

You’ll be able to make this adorable piece of headgear in no time! Whether you are an experienced crocheter or just starting out, I hope you’ll find this tutorial helpful and inspiring. So grab your crochet hook and yarn, pick out a lovely pattern, and let’s get started!
Can You Crochet a Bonnet at Home?
Yes, you can absolutely crochet a bonnet at home. All you need are the right materials and tools, some basic knowledge of stitches, and a bit of patience! In addition to yarn and a crochet hook, you will also need a pair of scissors, a tapestry needle for weaving in ends, and a measuring tape or ruler. When it comes to choosing the correct size of yarn, opt for either medium-weight (4) or double-knit (8ply) yarn for best results.
Before starting on your bonnet, familiarize yourself with the different types of crochet stitches as well as their abbreviations; single crochet (sc), half double crochet (hdc), double crochet (dc), slip stitch (sl st), chain (ch) and so on. Once you are comfortable with the basic stitches, it’s time to start your bonnet!
Begin by creating a chain of stitches that is as wide as you want your finished product to be. You can then start crocheting in rows or rounds, depending on the type of bonnet you are making. When it comes to increasing or decreasing stitches to achieve the desired shape, remember to do this evenly across each row/round; this will ensure that your work remains symmetrical throughout.
Once you have reached the desired length, finish off the final round or row with a slip stitch, cut off extra yarn and neatly weave in any loose ends using a tapestry needle. Congratulations – you now have a completed crocheted bonnet!

9 Methods How to Crochet a Bonnet
1. Basic Crochet Bonnet:
This is a simple bonnet pattern that works up quickly and can be customized with different yarn colors and edgings. If you’re a beginner at crocheting, this is an easy way to make a stylish accessory. To get started, you’ll need a size K crochet hook, about 200 yards of medium-weight yarn, and a tapestry needle.
Begin by making a chain of 52 stitches. Make sure not to twist the chain and join it into a ring with a slip stitch. Next, work in single crochet stitches around the ring, making one stitch into each chain. Join the round with a slip stitch and work 3 more rounds of single crochet.
Continue working in the round until the bonnet measures 7 inches from the top of your head. Now it’s time to begin shaping the crown. To do this, make a decreased stitch at the beginning and end of each row. Make one decrease stitch every other row until there are only 8 stitches left on your hook.
2. Granny Square Bonnet:
Use the traditional granny square pattern to create a sweet and colorful bonnet. Keep going with this pattern until it covers the top of your head. Make sure you crochet enough granny squares to cover your whole head.
To attach the granny square pieces together, single crochet each one together and add a border around the entire bonnet using slip stitches or reverse single crochets. You can also add an edging such as a scalloped edge or ruffles.
This is a great way to make a unique bonnet that stands out! If you’d like to get creative, you can use multiple colors for the granny square pieces or add appliques such as buttons or bows.
3. Shell Stitch Bonnet:
The shell stitch creates a delicate, lacy look that is perfect for a baby’s bonnet. To make this bonnet, you will need yarn and a size G crochet hook.

Begin by chaining 16 stitches to create the base of your bonnet. Make sure that the last stitch is pulled tight so that it doesn’t unravel during crocheting.
Next, chain two and turn your work. Work into the third stitch from the hook. Make your first shell stitch by double crocheting five times into one stitch, then chain two and skip the next stitch. This will create a half-shell pattern in which you have created a knot with five double crochets and skipped a single chain.
4. Tunisian Crochet Bonnet:
Tunisian crochet is a versatile technique that can create a range of stitch patterns, including a lovely textured bonnet. To get started, you’ll need a Tunisian crochet hook and some yarn. Begin by casting the desired number of stitches to your hook with a basic slip stitch.
Then, work in the forward pass, moving left to the right across the row. As you move along each row, pick up the loops onto your hook before working them off in the reverse pass, moving right to left. Continue working forward and back passes until you reach your desired size.
End the last row by tying off with a slip knot. To finish, add embellishments of your choice, such as ribbons or flowers. With just a few simple steps, you’ll be able to crochet a beautiful bonnet that is sure to keep your little one warm and cozy all winter long.
5. Cluster Stitch Bonnet:
The cluster stitch is a fun and easy way to create a textured and cozy bonnet. To start, chain 83 stitches. Now you’ll be working in a round, so join the end of your chain to the first stitch with a slip stitch. Single crochet into each stitch around until you reach the desired height. When it is long enough, switch to double-crochet stitches and continue in rounds until it is wide enough to fit around your head.

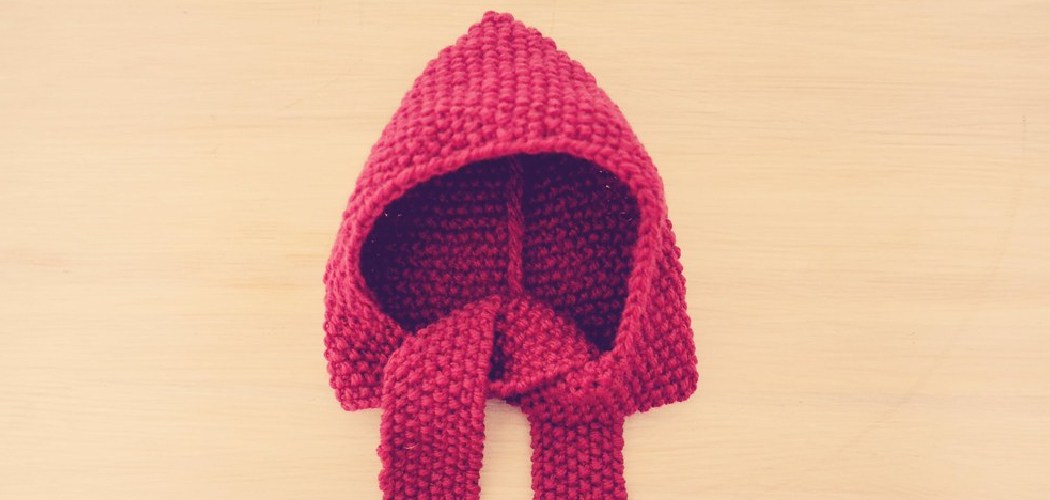
6. Hooded Bonnet:
Crochet a hooded bonnet for extra warmth and coverage. Start by chaining a multiple of 5 stitches plus an additional 4. Turn and single crochet in the second stitch from the hook, then work a single crochet in each chain across to the last 3 chains. Chain 3 turning chains, then double crochet in each stitch across for the first row.
For subsequent rows, you will alternate between single crochets and double crochets. Work a single crochet in the same stitch as the turning chain, then double crochet in each of the next 2 stitches, skip a stitch, and single crochet in the following 3 stitches.
7. Flower Bonnet:
Add a touch of whimsy to your bonnet by crocheting a flower on the side or top. You can use any kind of yarn or hook for this project, but make sure that the flower matches the color and style of your bonnet. To start, chain five stitches.
Slip the stitch back in the first stitch to create a circle. Single crochet seven times into each of the five chains, then slip stitch again into the beginning chain. Chain three, then double crochet twice into the same stitch.
Double crochet three times into each of the remaining stitches in the circle, and slip the stitch back into the first chain at the end. Cut off excess yarn and weave ends through to secure. Attach the flower to the bonnet with a few additional stitches around the edge.
8. Pom Pom Bonnet:
Make a cute and playful bonnet by adding pom poms to the ear flaps or ties. To make the pom poms, wrap yarn around two fingers 10 to 15 times. Slide off your fingers and tie a long piece of yarn tightly around the middle of the loops.

Cut all sides to fluff out the pom pom and trim if necessary. Sew on securely with a needle and thread or attach them using crocheted ties. Slip stitch your pom poms on the front side or ties of your bonnet. You can use one large pom pom, two medium sizes, or a few small ones to decorate your bonnet as desired.
9. Striped Bonnet:
Play with different yarn colors to create a bold and colorful striped bonnet. Start by chaining 30 stitches. You can work with one color for four rows and then change to a different color, repeating until your bonnet reaches the desired length. Once you have achieved the length of your bonnet, fasten off your last stitch.
To create a border, join your last stitch to the first one with a slip stitch. Keep in mind that you should work two single crochet stitches around each stitch of the previous row. Finally, fasten off the last stitch and weave in all the ends.
Conclusion
In conclusion, crocheting a bonnet is a wonderful way to express your creativity and create a unique fashion piece of your own. With the right materials, step-by-step instructions, and lots of patience and practice, it’s entirely possible to craft the perfect bonnet.
By breaking down the steps into small achievable goals, you can make sure that you’re able to create something that you can proudly wear or give as a gift. And even if there are mistakes in the process, they make it all your own! So pick up your hook and get ready to be creative – learning how to crochet a bonnet is waiting for you!