
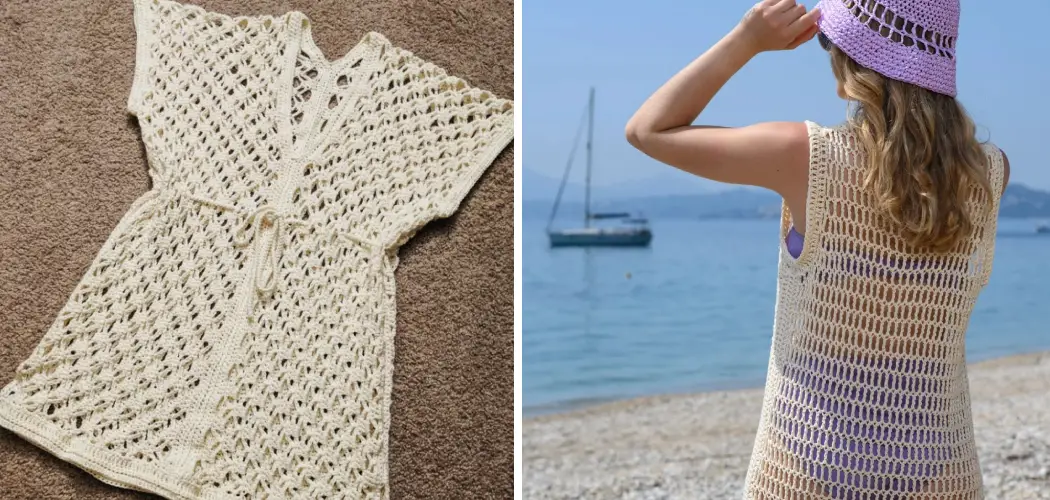
Are you looking for a fun and creative craft activity to do while spending your summer days at the beach? If so, why not try learning how to crochet a gorgeous beach cover-up? A perfect way to keep cool from the hot summer sun while adding stylish flair to any swimsuit ensemble.

Whether you have experience working with yarn or are just starting out, this tutorial will teach you everything there is to know about how to crochet a beach cover up. So grab some yarn and your crochet hook, and get ready — because it’s time to learn how!
Needed Materials
Given below is a list of all the materials you’ll need in order to successfully crochet a beach cover up:
- Yarn (Any Weight and Color)
- Crochet Hook (Matching the Size of Your Yarn)
- Large-eyed Needle for Weaving in Ends
- Scissors
Once you have gathered all the required materials, you are ready to begin!
11 Step-by-step Guidelines on How to Crochet a Beach Cover Up
Step 1: Start by Chaining 40 Stitches
This will be the length of your beach cover-up, but you can adjust this a bit at the end if you would like to make it longer or shorter. To begin, chain 40 stitches in your desired color of yarn and move on to the next step. But make sure to leave a long tail of yarn at the beginning! You’ll use this tail later on when you’re weaving in your ends.
Step 2: Single Crochet Across the Chain
Once you have finished chaining 40 stitches, single crochet across the chain until you reach the end. Make sure that each stitch is tight, as this will ensure the cover-up is of good quality. This will be the first row of your beach cover-up. This row will determine the width of the garment, so make sure to keep it consistent throughout.
Step 3: Chain 3 Stitches and Turn
After you have finished single crocheting across the chain, chain three stitches and turn the work counterclockwise so that the yarn tail is facing toward you. This will start making a V-shaped pattern, which will be continued throughout the entire cover-up. It will also help to increase the height of your cover-up.

Step 4: Skip 1 Stitch and Single Crochet Across
For this step, skip one stitch (the first single crochet from the previous row) and then single crochet across the entire length of the chain. This forms the second row of your beach cover-up, and each row should have a total of 40 stitches. But don’t forget to chain three stitches and turn the work after you finish single crocheting!
Step 5: Chain 3 Stitches and Turn
Chain three stitches again, then turn the work counterclockwise so that the yarn tail is facing toward you. This will help create the V-shaped pattern of your beach cover-up as well as give it more height. It will also make the cover-up look more interesting to look at! It will also help form an interesting pattern when it’s finished.
Step 6: Repeat Steps 4 and 5
Repeat steps four and five until you have reached the desired length of your beach cover-up. This will be determined by how long or short you want it to be, so feel free to adjust accordingly. Once the desired length is reached, move on to the next step. It’s important to keep the tension of your stitches tight, as this will ensure the cover-up is not too loose or baggy.
Step 7: Bind off Your Cover Up
When you have finished crocheting the desired length of your beach cover-up, it’s time to bind off. To do this, chain one stitch and cut the yarn. Then, pull the yarn tail through the loop and tighten it. This will secure your work and make sure it doesn’t unravel. However, you won’t be able to take off the cover-up yet as there is still more work to do.
Step 8: Weave in Your Ends
Now that you have finished crocheting your beach cover-up, it’s time to weave in all of those pesky ends! To do this, take your large-eyed needle and weave in the yarn tails at the beginning and end of your cover-up. This helps keep everything in place and gives it a professional, finished look.

Step 9: Block Your Beach Cover Up
Blocking is an important step when crocheting, as it will help stretch out any uneven or tight stitches. This will ensure your beach cover-up has a smooth and even look to it. To do this, lightly mist the cover-up with water and lay it out on a flat surface or blocking board. Use pins to hold it in place, then let it dry completely before you take it off the board.
Step 10: Adding Fringe (Optional)
To add a bit more style to your beach cover-up, you can also choose to add fringe. To do this, take a strand of yarn roughly four inches long and loop it underneath the edge of the cover-up. Pull the two ends through the loop created and pull tight to secure in place. Repeat this on each side of each row to create a fringe effect.
Step 11: Enjoy Your Beach Cover Up!
Congratulations — you’ve successfully crocheted your very own beach cover-up! Now all that’s left to do is enjoy it and show it off at the beach. Have fun and don’t forget to take pictures of your finished product so you can share it with friends and family.
We hope you enjoyed learning how to crochet a beach cover up! With some patience and practice, you’ll soon be able to create beautiful pieces of art that will last for years to come. Happy crocheting!
Tips & Tricks
- Make Sure to Work Your Stitches Tightly, as This Will Ensure Your Beach Cover-up Has a Nice, Neat Look to It.
- If You Are Having Trouble Following the Pattern or Stitches, Practice Them First on a Swatch of Yarn Before Working on the Actual Piece.
- Feel Free to Experiment With Different Colors and Weights of Yarn for Your Beach Cover-up. This Will Help You Create Unique Pieces Every Time!
- To Add Some Extra Style, Consider Adding Tassels or Fringe to the Bottom Edge of Your Beach Cover-up.
- Take Your Time and Have Fun With It! Crocheting Is an Enjoyable Creative Outlet That Can Help You Relax After a Long Day.
- If You Find Yourself Getting Stuck, Don’t Be Afraid to Ask for Assistance or Look Up Tutorials Online. There Are Lots of Great Resources Available That Will Help Make the Process Easier.

Good luck and happy crocheting! We hope you enjoy creating beautiful beach cover-ups that will make heads turn and bring a smile to your face. Don’t forget to share them with us on social media for a chance to be featured! Have fun and stay creative.
Frequently Asked Questions
Q: How Many Stitches Should I Chain for My Beach Cover-up?
A: You’ll need to chain 40 stitches in order to make your beach cover-up. However, you can adjust this a bit at the end if you would like to make it longer or shorter. It’s important to make sure that the tension of your stitches is nice and tight, as this will ensure the cover-up has a neat look.
Q: How Do I Bind Off My Beach Cover-up?
A: To bind off your beach cover-up, simply chain one stitch then cut the yarn. Then, pull the yarn tail through the loop and tighten it. This will secure your work and keep it from unraveling.
Q: How Can I Make My Beach Cover-up Stand Out?
A: To make your beach cover-up stand out, consider experimenting with different colors and weights of yarn. You can also add tassels or fringe to the bottom edge for a bit of extra style. Additionally, don’t be afraid to take your time and have fun with it! Crocheting is an enjoyable creative outlet that can help you relax after a long day.
Finally, if you find yourself getting stuck, don’t hesitate to ask for assistance or look up tutorials online. There are lots of great resources available that will make the process easier.
Q: What Is Blocking and Why Should I Do It?
A: Blocking is an important step when crocheting, as it helps stretch out any uneven or tight stitches. To do this, lightly mist the cover-up with water then lay it out on a flat surface or blocking board. Use pins to hold it in place, then let it dry completely before you take it off the board.

This will help ensure your beach cover-up has a smooth, even look to it and also gives it a professional, finished look.
Conclusion
After reading this guide on how to crochet a beach cover up, you should now have the confidence and expertise to crochet your own beach cover up. This is an easy and exciting way of expressing your creativity; if you take the time to experiment, who knows what beautiful design you will come up with for your next project?
To get started on your beach cover-up, be sure to invest in quality materials so that it can withstand the sunlight, sand and seawater – all ingredients that will make your experience that much more pleasurable.
And don’t forget to share pictures of your finished product with everyone! With a little bit of careful practice and attention to detail, we strongly believe that even the most beginner crocheters can create a stunning yet comfortable piece of clothing perfect for any trip or summer barbecue. So start planning for your beach cover up journey today – Happy Crocheting!