
Blocking your knitting projects can give them that polished and professional finish. It also helps to even out stitch tensions, making any lumps or bumps disappear and ensuring your work has an even appearance. Blocking with an iron is a straightforward process with great results.

Blocking knitting with an iron has many advantages. One of the main advantages is that it can be done quickly and easily without special equipment or techniques. Additionally, it helps to give your knitted pieces a polished appearance, as well as helping to even out uneven stitches and keep edges flat. You can find step-by-step instructions on how to block knitting with an iron in this blog article.
Step-by-Step Processes How to Block Knitting With an Iron
Step 1: Inspect Your Knitted Item
Before you begin blocking your knitting with an iron, it’s important to inspect the knitted item for any loose ends or holes. Tighten any stitches and weave in loose ends before moving on to the next step.
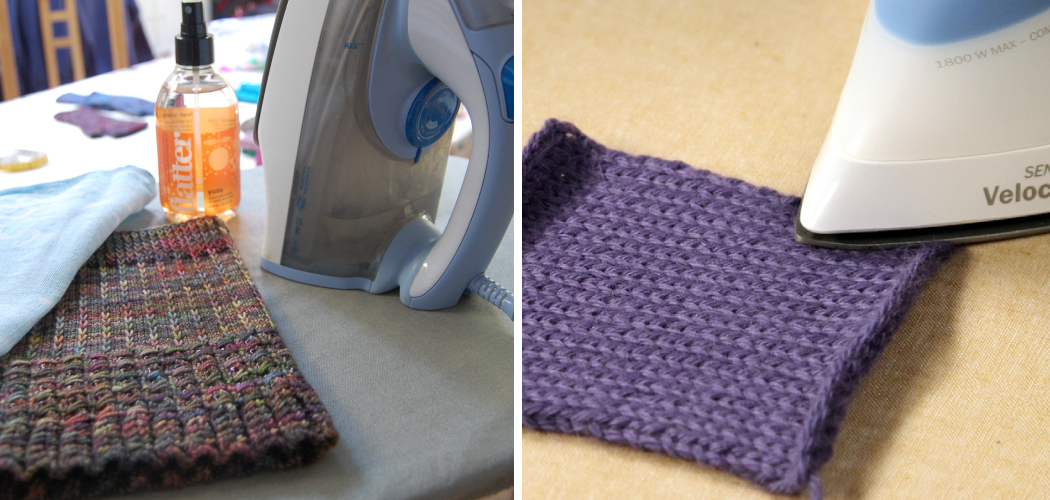
Step 2: Choose Your Blocking Method
Once your knitted item is inspected and all issues are addressed, you can begin the blocking process. Consider using either a steam-blocking or spray-blocking method for your knitting.
Gather up all of the supplies you need to complete the blocking process. You’ll need an iron, a damp cloth, pins, and blocking mats (or other items such as towels or blankets) to lay your item on.
Step 3: Preheat Your Iron
Before you begin blocking, set your iron to the appropriate temperature for the type of yarn used. Be sure that the steam setting is off if you are using a spray-blocking method. Lay out your blocking mats and wet them slightly. This will help to ensure that your ironed item maintains its shape after it has been blocked.
Step 4: Place Your Knitted Item on the Mats
Lay out your knitted item on the blocking mats, ensuring all the stitches are lying flat and in place. Use pins to secure the item in place. Begin blocking your knitted item with an iron. If you use a steam-blocking method, lightly press down on the damp cloth before applying the hot iron to the item. If using a spray-block method, use a light mist of water and press down on the item with your iron.

Step 5: Repeat Blocking
Once you have applied the iron to your knitted item, repeat the blocking process in different sections until it is completely blocked. Allow the knitted item to cool down before continuing to the next step. Once your knitted item has cooled down, remove the pins and reshape them. This will help to ensure that any yarn tension created during the blocking process is released.
Step 6: Allow the Item to Dry
Allow your blocked knitting to dry completely before wearing it or moving on to the next step in your project. Following these simple steps, you can easily block your knitting with iron and achieve professional-looking results. With some practice and patience, you’ll be able to create beautiful pieces that will last for years to come.
Precautions for How to Block Knitting With an Iron
- Be sure to use an iron designed for fabric – avoid using steam irons or other household appliances.
- Make sure the surface you are blocking is heat-resistant and fireproof, such as a pressing board or kitchen countertop covered with parchment paper.
- Test your iron’s temperature settings on a swatch of the same yarn or a scrap of fabric to ensure you use the correct temperature setting for your project.
- Place a damp cloth between the iron and the knitting, as this will prevent any heat damage to your knitting.
- Never leave an unattended iron in an area where children or pets could come in contact with it; handle it with care at all times.
- Use a pressing cloth or towel to cover your project when ironing over the knitting pieces to protect your project. This will prevent any heat damage and give you a nice finished look. It’s also important to check that all of your stitches have been correctly blocked before taking the next step in completing your project.

By following these precautions, you can be sure that your knitting projects will come out looking their best. Blocking with an iron is a great way to get professional-looking results. You’ll be amazed at the difference this finishing step can make in your completed project.
What Type of Iron is Best for Blocking Knitting?
When it comes to blocking knitting projects, you want an iron with adjustable heat settings and a steam feature. While some irons come with special features for blocking, any iron will do the job as long as it can be set to a low, medium, or high temperature and produce steam when desired.
You should never use an iron on wool fabrics at temperatures higher than what is recommended by the manufacturer, as this can produce a permanent shine or damage the fibers.
When using an iron for blocking, you should always use a pressing cloth to protect your fabric from scorching and excessive lint buildup. A tear-away stabilizer such as Vilene makes great pressing cloths and can be reused multiple times before needing to be replaced. Place the pressing cloth over your knitting and press down with the iron, then steam to set the fabric in place.
What Techniques Can You Use to Make Sure the Yarn Stays in Place When Blocking Knitting With an Iron?
When blocking knitting with an iron, it is important to ensure the yarn stays in place on the fabric as you use it. Fortunately, several techniques can help ensure this. First, use a pressing cloth between your knitted piece and the iron. A pressing cloth will remove moisture from your project and help ensure your fabric won’t melt or stick to the iron.
You can also use a steam iron if you block a lace item with many holes. The steam will fill up these areas and help them to retain their shape better than blocking them with an ordinary dry iron. Finally, having some tailor’s chalk (or a washable fabric marker) handy is also helpful.

This will allow you to mark the pattern pieces before you start blocking, which will help keep them in their intended shape and size when they are ironed.
How Often Should You Block Your Knitwear?
Blocking knitwear should be done periodically to maintain the shape and look of your knitted pieces. It’s best to block each piece after you’ve finished knitting it, but you can also do it anytime the knitwear needs some revitalizing.
Blocking is an approximate science – some people must block their pieces more frequently than others. However, it’s a good idea to block garments at least once every few months to keep them in their best shape.
You will need a few supplies to block your knitwear with an iron. These include a blocking board (or some type of padded surface), T-pins or rustproof pins, a spray bottle filled with water, and an iron. You may also use a pressing cloth designed specifically for blocking knitted fabrics.
Is It Safe to Press Seams and Buttons When Blocking Knitted Items?
It is safe to press seams and buttons when blocking knitted items. However, use a low heat setting on your iron and keep the steam off. Also, ensure the item is dehydrated before you begin pressing.
If you’re using an ironing board cover or pad while pressing your knits, ensure not to leave the iron in one place for too long, as this can potentially mark or scorch your knitting. If possible, use a pressing cloth between the item and the iron so you don’t accidentally burn any stitches.

In addition to blocking with an iron, you can use a steam wand or damp cloth to block your knitted items. When using a steam wand, be sure to hover the wand just above the item to provide enough moisture for blocking without saturating or disturbing your knitting. If you’re using a damp cloth, lightly dampen it and lay it over the item before pressing with an iron on low heat.
Conclusion
The most obvious disadvantage of using an iron to block your knitted items is that it can be quite time-consuming, as you must ensure all pieces are properly blocked and dried. Ironing also requires some skill and practice to ensure that the fabric isn’t damaged in the process.
In conclusion, block knitting with an iron is a great way to get professional-looking results in the shortest time possible. Though there are some disadvantages associated with this method, it can be a useful tool for any knitter looking to quickly and easily finish their project.
Taking extra precautions when using an iron is important to avoid damaging the fabric or burning yourself. This article has been beneficial for learning how to block knitting with an iron. Make Sure the preventive measures are followed chronologically.