
Binding a quilt is the final step that adds a polished and professional touch to your quilted creation. It involves enclosing the raw edges of the quilt with a fabric strip, providing both a decorative element and structural support. While there are various binding methods, using the backing fabric to bind the quilt is a popular and efficient technique.

Binding a quilt with the backing fabric not only creates a cohesive look but also ensures that the binding matches seamlessly with the quilt design. In this article, we will explore the step-by-step process of how to bind quilt with backing fabric, including preparing the binding strips, attaching the binding, and finishing it with a clean and secure join.
Whether you’re a novice quilter or an experienced enthusiast, this guide will help you achieve beautifully bound quilts that will be cherished for years to come.
Importance of Properly Binding a Quilt for a Finished Look and Durability
Binding a quilt correctly is essential for giving it a professional, finished look. It also helps the quilt to last longer and remain durable over time. The binding encases all of the raw edges of the quilt top, batting, and backing fabric and helps protect them from wear and tear caused by use or laundering.
When properly bound, a quilt can help keep all layers securely in place while still allowing some flexibility when stretched or moved. Binding also adds an extra layer of color or pattern that can add interest to your overall design. Finally, adding binding to a quilt projects gives it a professional finish that will be admired by those who use it for many years to come!
When creating the binding for your quilt, there are a few tips to keep in mind. First, it is important to select the right type of binding for your project; bindings come in many different weights and colors that can be used for various effects. It is also helpful to add an extra inch or two of fabric around all sides of the quilt top when cutting the binding strips to ensure a perfect fit.
Once you have cut your binding strips and pinned them onto the quilt top, it’s time to sew them into place using a straight stitch along both outer edges. Finally, once the binding has been secured on all four sides of the quilt top, fold over the edge so that it meets with the backing fabric and pin it down before stitching it into place.

Explaining the Purpose and Function of Quilt Binding
Quilt binding is a crucial step in making a quilt. It serves multiple purposes, from creating a finished edge to protecting the edges of the quilt from wear and tear. Binding also adds an extra layer of warmth to a quilt, so it’s essential for those who want extra warmth or coziness when using their quilts.
The binding also serves as an aesthetic finish, adding color or texture to your quilt – it can be matched to the fabric on the front or contrasted with it for added interest! Finally, binding helps keep your batting securely in place during use and cleaning.
There are several types of bindings that can be used depending on what look you are trying to achieve. This includes straight grain bindings, bias grain bindings, and French bindings. Each type of binding has different properties that can create a unique look for your quilt. Additionally, bindings can be cut from the same fabric used in the quilt top or a different one for a more contrasting look.
10 Steps How to Bind Quilt with Backing
Step 1: Calculate Binding Length with Precision:
Before embarking on the binding process, it is crucial to calculate the required length of your binding strips accurately. Measure the perimeter of your quilt by adding the lengths of all four sides. To account for the corners and joining, add an additional 12 inches to the total length. This extra length ensures you have enough fabric for creating elegant mitered corners and a secure finish.
Step 2: Cut Binding Strips with Care:
Using a rotary cutter and ruler, meticulously cut the binding strips from your chosen backing fabric. Consider the desired finished binding width and adjust the strip width accordingly. A commonly used width is 2.5 inches, but you can adjust it to your preference.
Cut enough strips to achieve the calculated binding length, and then stitch them together at a 45-degree angle, creating a continuous strip that is ready for application.

Step 3: Prepare the Quilt Edges to Perfection:
Before proceeding with the binding, ensure that the edges of your quilt are squared and trimmed. Carefully remove any excess batting or backing fabric that extends beyond the quilt top. Press the quilt top, batting, and backing to create crisp and precise edges, ensuring a smooth and accurate application of the binding.
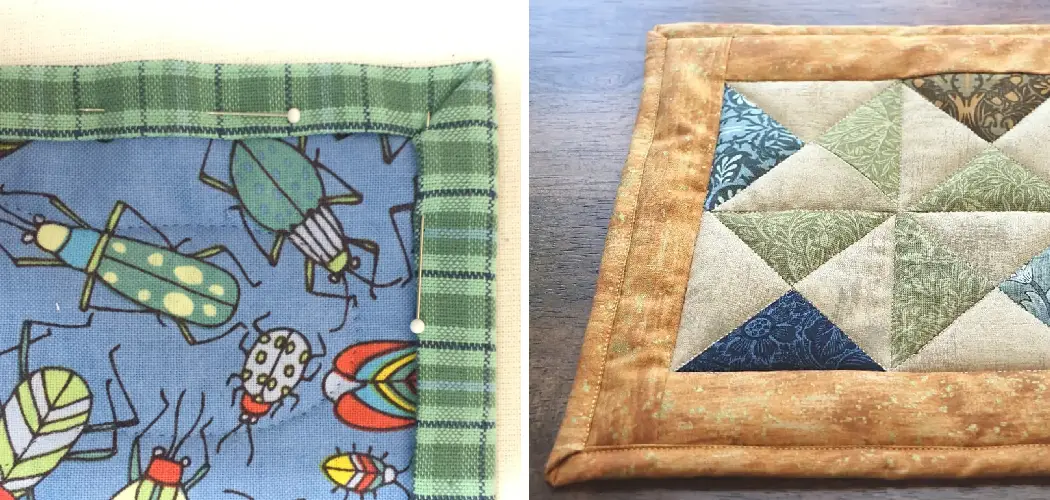
Step 4: Align and Pin the Binding with Finesse:
Take your prepared binding strip and align its raw edges with the raw edge of the quilt top, starting near the middle of one side. Leave a loose 6-inch tail and meticulously pin the binding in place. Pay close attention to ensuring that the binding lays flat and even along the quilt edge. Continue pinning the binding around the quilt perimeter, leaving the corners unpinned for now.
Step 5: Sew the Binding with Precision:
Using a ¼-inch seam allowance, begin sewing the binding to the quilt top, starting at the first pin. Sew along the entire length of the quilt, carefully removing the pins as you progress. It is essential to maintain a consistent seam allowance and keep the binding smooth and taut as you sew.
Stop stitching approximately ¼ inch before reaching each corner, ensuring you maintain a meticulous approach. If you are using a walking foot, remember to adjust the front needle position and reposition your quilt if necessary.
Step 6: Achieve Perfect Mitered Corners with Grace:
To achieve visually pleasing mitered corners, stop sewing ¼ inch before reaching each corner. Carefully fold the binding up, creating a precise 45-degree angle. Next, fold it back down, aligning the raw edge with the next side of the quilt.
This technique creates a neatly folded mitered corner that adds an elegant touch to your quilt. Pin the corner in place and continue sewing along the next side, repeating the process for each corner to ensure uniformity and precision.
Step 7: Join the Binding Ends Seamlessly:
When you reach the starting point, stop stitching a few inches before reaching the end of the binding. Cut the loose end of the binding strip, leaving a 6-inch tail. Overlap the tails, ensuring they meet precisely. Mark the overlap point, trim the excess binding, and open the binding strips.

Seam the strips together with a diagonal seam, trimming the seam allowance and pressing the joint open for a flat finish that seamlessly connects the binding ends. Finally, sew the binding ends to the quilt using a ¼-inch seam allowance. Stitch in the ditch around the entire quilt once more to complete the quilt binding. Congratulations, you have now finished your quilt!
Step 8: Finish Sewing the Binding with Attention to Detail:
Complete sewing the binding around the quilt, overlapping the starting point by a few inches. Backstitch to secure the stitches, and trim any excess binding. Take a moment to ensure that the binding lies flat and smooth along the quilt edges, making any necessary adjustments or tucks as you progress. Attention to detail at this stage ensures a flawless and refined result.
Step 9: Fold and Press the Binding with Care:
Fold the binding over to the back of the quilt, covering the raw edges. Using an iron, gently press the binding to create a crisp and clean fold. Pay special attention to folding and mitering the corners neatly to maintain the overall elegance of your quilt. Use binding clips or pins to temporarily secure the folded binding in place, allowing for an easier and meticulous finishing process.
Step 10: Hand or Machine Stitch the Binding for a Professional Touch:
The final step is to secure the folded binding to the back of the quilt. You have the option to either hand stitch the binding using a blind or ladder stitch for an invisible finish or use a sewing machine stitch for a more efficient method.
Whichever method you choose, ensure that your stitches are even, secure, and discreetly placed. Take the time to ensure the binding is neatly attached to the back of the quilt, paying attention to any overlapping corners for a professional and refined result.

Conclusion
Binding your quilt is the last step of a quilt-making process, and if done properly, it can give a simple but classy finish to your masterpiece. Not only will you be proud of yourself for aptly completing such an excellent piece, but it will also make for an eye-catchy display.
If done in the right way with good quality backing material, binding your quilt can offer that extra flaunt to your creation and help you show off other creative skills apart from stitching.
The entire process may take time, but it’s worth going the extra mile when it comes to joining quilts with their backings to make sure it looks as flawless as possible. Follow these simple instructions outlined in this blog post about how to bind quilt with backing, and you’ll be able to get the job done with ease.