
Baste stitching is often seen as a simple, preliminary step in sewing, yet it holds immense importance for anyone looking to achieve professional results. Whether you’re an experienced seamstress or a novice just starting your journey, mastering the art of baste stitching can elevate your sewing projects.

In this guide, we are going to delve deep into the what, why, and how of baste stitching, providing you with practical tips, step-by-step guidelines on how to baste stitch, and answers to common questions. By the end of this post, you’ll be equipped with all the knowledge you need to incorporate baste stitching effectively into your sewing repertoire.
What is Baste Stitching?
At its core, a baste stitch is a temporary stitch that holds fabric layers together before the final stitching. Unlike permanent stitches, baste stitches are designed to be easily removable. They help keep materials aligned and secure, ensuring precise and accurate sewing.
Baste stitches can be done by hand or machine, but they all serve the same essential purpose: to make sure everything stays in place as you work on more intricate sewing tasks. This can be especially useful when working with delicate fabrics or complex patterns.
Understanding the basics of baste stitching will provide a solid foundation for more advanced sewing techniques. Whether you’re hemming a dress, sewing a quilt, or working on a home decor project, knowing how to baste stitch correctly will make your life much easier.
Why Baste Stitching is Important
Precision and Accuracy
One of the primary reasons to use baste stitching is to enhance the precision and accuracy of your sewing projects. By temporarily holding fabric layers together, you can make adjustments and corrections before committing to permanent stitches. This is particularly useful for complex patterns and multi-layered fabrics that require exact alignment.

Versatility
Baste stitching is incredibly versatile and can be used in a variety of sewing projects. From simple hemlines to intricate garment construction, baste stitches make it easier to manage and manipulate fabric. Their temporary nature allows for easy removal, giving you the freedom to make changes without damaging the material.
Problem Prevention
Using baste stitches can help you identify and rectify potential issues before they become significant problems. Whether it’s ensuring seams match up or checking the fit of a garment, baste stitching acts as a safety net, preventing costly mistakes down the line.
Needed Materials
Before you get started with baste stitching, you’ll need to gather some essential materials. Here’s a list of what you’ll need:
Needle:
A basic sewing needle will work fine for hand basting. If using a machine, consult your machine’s manual for the appropriate needle type.
Thread:
Use a contrasting thread color to make removal easier. Cotton thread is usually a good choice.

Fabric:
The fabric you’ll be working on for your project.
Scissors:
Sharp fabric scissors are used to cut thread and fabric.
Pins:
Optional but useful for securing fabric layers before basting.
Fabric Markers:
These can be helpful for marking where you need to baste.
6 Step-by-Step Guidelines on How to Baste Stitch
Step 1: Prepare Your Fabric
Begin by preparing your fabric. Lay it out flat on a clean surface and smooth out any wrinkles. Use pins to secure the fabric layers if necessary. Mark your basting lines with a fabric marker if you need guidelines to follow. There are various techniques for marking these lines, so choose the one that suits your project best.
Step 2: Thread the Needle
Cut a length of thread that is comfortable to work with—generally, about 18 inches. Thread your needle and tie a small knot at the end. If you’re using a sewing machine, make sure the machine is threaded with a contrasting color thread. It’s also a good idea to use the longest stitch length possible. You can adjust this later if necessary.
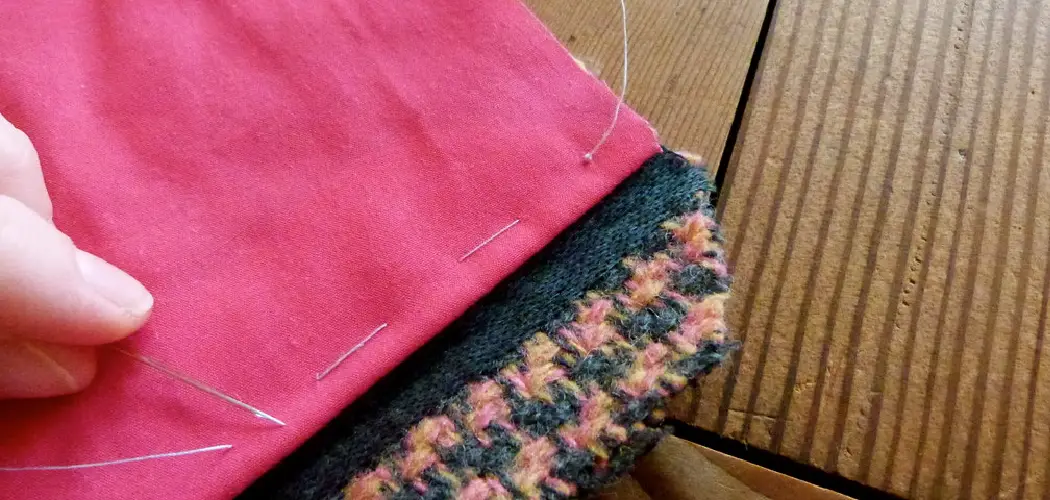
Step 3: Start Stitching
Begin your baste stitch by inserting the needle through the fabric layers from the back to the front. Pull the thread through until the knot catches on the backside. If you’re using a machine, set it to a long stitch length and start sewing along your marked line. There should be about half an inch between each stitch.
Step 4: Continue the Stitch
Continue to stitch in a running stitch pattern: in and out of the fabric in straight lines. Keep your stitches relatively long—about ¼ inch to ½ inch. This makes the stitches easier to remove later. If hand basting, make sure to keep your stitches even and consistent. It’s okay if they’re not perfect as long as they hold the fabric layers together.
Step 5: Secure the End
Once you’ve reached the end of your basting line, tie a small knot to secure the thread. If you’re using a sewing machine, simply lift the presser foot and snip the thread, leaving a small tail. IKt’s essential to secure the thread at both ends so that your basting stitches don’t come undone. BUt be sure to tie the knots lightly, so they are easy to remove.
Step 6: Inspect and Adjust
Before you proceed with your final sewing, inspect your baste stitching. Make any necessary adjustments to ensure that the fabric layers are correctly aligned and secure. Remove pins if you use them. Your fabric is now ready for the final stitching! The baste stitches can be removed by gently pulling on the thread.
Following these six steps on how to baste stitch will result in a perfectly basted fabric ready for your final stitching. Remember to remove any remaining pins before proceeding with your project.
Common Issues and Troubleshooting
Baste stitching is a relatively simple process, but like any sewing technique, it can come with its share of challenges. Here are some common issues and troubleshooting tips to keep in mind:
Uneven Stitches:

If your baste stitches are coming out uneven or crooked, try adjusting the tension on your machine or using different hand techniques for more precise stitching.
Tangled Thread:
Tangles can be frustrating and time-consuming to deal with. To prevent this issue, make sure your thread is properly threaded through the needle and use a shorter stitch length.
Fabric Slipping:
Occasionally, fabric layers may slip or shift while basting. To prevent this, use plenty of pins to secure the layers in place before stitching.
Difficulty Removing Stitches:
If you’re having trouble removing your baste stitches, try gently pulling on the thread from the opposite side of the fabric. If that doesn’t work, use a seam ripper to carefully remove each stitch individually.
Baste stitching is an essential technique for any sewing enthusiast. Whether you’re a beginner or an experienced sewist, mastering this skill will undoubtedly enhance your sewing projects’ precision and accuracy. So, next time you start working on a new project,
Additional Tips
Use Contrasting Thread
Using a contrasting thread color for your baste stitches is highly recommended. This makes it easier to see and remove the stitches once your permanent sewing is complete. It also helps you avoid accidentally sewing over your baste stitches with permanent stitches.
Keep Stitches Long
Long stitches are easier to remove and less likely to leave marks or holes in your fabric. Aim for stitches that are about ¼ inch to ½ inch long. This length provides enough hold to keep the fabric in place while still being easy to take out.

Practice Makes Perfect
Suppose you’re new to baste stitching; practice on scrap fabric first. This will help you get comfortable with the technique and improve your skills before you tackle your main project. Practicing different types of fabric can also give you a feel for how different materials behave.
Frequently Asked Questions
Q: Can I Use a Sewing Machine for Baste Stitching?
A: Yes, you can use a sewing machine for baste stitching. Simply set your machine to a longer stitch length and use a contrasting thread color to make removal easier.
Q: How Do I Remove Baste Stitches?
A: To remove baste stitches, gently pull on the thread from one end using tweezers or a seam ripper. Be careful not to pull too hard to avoid damaging the fabric. Slowly work your way along the stitch line until all the threads are removed.
Q: Is Baste Stitching Necessary for Every Sewing Project?
A: While not always necessary, baste stitching is highly recommended for projects that require precision and accuracy, such as garment construction and quilting. It helps ensure everything is correctly aligned before committing to permanent stitches.
Conclusion
Baste stitching may seem like a small detail, but it can make a world of difference in the quality and outcome of your sewing projects. By following the steps and tips outlined in this guide on how to baste stitch, you’ll be well on your way to mastering this essential skill.
Whether you’re working on a simple hem or a complex garment, baste stitching provides the precision, versatility, and problem prevention needed to achieve professional results. So gather your materials and start practicing—your future sewing projects will thank you!