
Are you looking to add a stylish touch to your curtains but want to avoid buying new ones? Adding a band of fabric is an easy and budget-friendly way to elevate the look of your curtains.

Adding a band of fabric to curtains can drastically transform the design of any living space, instantly bringing it to life with texture and color. Maybe you’ve seen this look in homes featured on blogs or shows: an eye-catching band of fabric cut into neat stripes, adding character and sophistication to otherwise plain window treatments. While the finished result looks polished and professional, it doesn’t have to be tricky or expensive – you can create your individually designed masterpiece at home.
In this tutorial, we will show you how to learn step by step how to add a band of fabric to curtains that will make your windows stand out!
What Will You Need?
To get started, you will need the following materials:
- A pair of curtains (pre-existing or newly purchased)
- Fabric for the band
- Scissors
- Sewing machine (or a needle and thread if hand sewing)
- Pins
- Measuring tape or ruler
Once you have gathered all the materials, you can start adding a band of fabric to your curtains!
10 Easy Steps on How to Add a Band of Fabric to Curtains
Step 1: Choose Your Fabric
First things first, choose your fabric. Consider your chosen fabric’s color, pattern, and texture to ensure it complements your existing curtains and room decor. You can also opt for a contrasting fabric for a bolder look.
Step 2: Measure Your Curtains
Measure the width of your curtains and add allowance of 1 inch on each side. This will be the width of your band of fabric. For example, if your curtains are 50 inches wide, you will need to cut a piece of fabric that is 52 inches wide.

Step 3: Cut Your Fabric
With your measurements at hand, proceed to cut your chosen fabric. Make sure to cut the fabric with precision, ensuring that it’s exactly the width you measured earlier, plus the 1-inch allowance on each side. Remember, if your curtains were 50 inches wide, you should now have a strip of fabric that is 52 inches wide. Keeping the lines as clean and straight as possible is essential for a seamless finish.
Step 4: Pin Your Fabric
Next, place the fabric strip on the curtain where you want the band to be. Once you’re happy with the positioning, pin the fabric in place. Ensure that the fabric is evenly placed and straight. The pins should hold the fabric firmly against the curtain, but ensure that they are not too tight as to bunch or distort the fabric.
Step 5: Sew Your Fabric
After you have securely pinned your fabric in the desired position, it’s time to sew it onto the curtain. If you’re using a sewing machine, use a straight stitch and sew along the edge of your fabric strip. Remember to start and end your sewing with a backstitch to secure your stitches.
If you’re hand-sewing, use a straight or whip stitch. Be sure to remove the pins as you go along. Once you’re done, iron the seam flat for a crisp, clean look. This process should be repeated on both sides of the fabric strip. With this, you have successfully added a fabric band to your curtain!
Step 6: Iron Your Curtains
Once you have sewn the band of fabric to your curtains and ironed the seams flat, it’s time to iron them. This will not only eliminate any wrinkles or folds from the sewing process but also help your new fabric band lay flat and blend more seamlessly with the rest of the curtain.

Use a steam setting if possible for the best results, and always iron according to the care instructions of your curtain fabric. You should now have a beautifully updated pair of curtains with a fresh, custom look!
Step 7: Hang Your Curtains
After the ironing process, your curtains are ready to be hung back up. Carefully thread them back onto the curtain rod, ensuring the rod passes through its rod pocket or rings. Take a step back and assess the appearance of the band of fabric.
If necessary, do some minor adjustments to ensure it’s hanging straight. Thanks to the added band of fabric, your curtains should now have a new touch of elegance and style. You’ve successfully updated your curtains and added a personal touch to your home decor.
Step 8: Enjoy Your Upgraded Curtains
Now that your curtains are hanging beautifully with their new addition, it’s time to sit back and enjoy your handiwork. The added band of fabric should give your curtains a unique, stylish touch that brings a new aesthetic appeal to your room.
From choosing the perfect fabric to meticulously sewing it onto your curtains, you’ve created a custom look that’s all your own. You’ve not only upgraded your curtains but also added a personal touch to your home decor. Enjoy the view, and start planning your next DIY home decor project!
Step 9: Care for Your Upgraded Curtains
Maintaining the beauty of your upgraded curtains is crucial. Ensure to clean them according to the care instructions of both your original curtains and the newly added fabric band. If both fabrics have different care instructions, opt for the most delicate option to avoid damaging either material.

Regular cleaning will keep your curtains looking their best, preserving the vibrant colors and textures of the fabrics. Remember to inspect your curtains regularly for loose threads or fraying and repair any minor damages promptly to keep your curtains looking fresh and new.
Step 10: Share and Inspire
Lastly, don’t keep your creativity to yourself! Share your newly upgraded curtains on social media platforms, DIY forums, or with friends and family. Your project could inspire others to undertake their curtain upgrades. Regardless of the platform, remember to detail your process and the techniques used, and remember to show before and after photos.
Let your DIY home decor project motivate others to inject personal style into their homes. You’ve gained a new skill and added a personal touch to your home, and you can now inspire others to do the same.
By following these ten easy steps, you can successfully add a band of fabric to your curtains, transforming them into unique and personalized pieces that enhance the look of your home.
5 Additional Tips and Tricks
- Experiment with Patterns: Feel free to mix and match patterns. A band of striped fabric on a solid curtain or a floral pattern on a polka-dotted curtain can give a vibrant and distinct look. Just make sure the colors coordinate well together.
- Use Leftover Fabric: If you have spare pieces of fabric from previous projects, consider using these for your band of fabric. This is not only a great way to utilize leftover materials, but it can also add a special touch of sentimentality to your curtains.
- Double-sided Tape for Beginners: If you’re uncomfortable with sewing, you can use double-sided fabric tape as an alternative. Simply apply the tape to the back of your fabric strip and press it onto your curtain. Make sure to smooth out any wrinkles for a neat and clean finish.
- Consider the Room’s Lighting: Adding a band of fabric can change how much light filters through your curtains. Choose a fabric that suits your lighting preferences for the room.
- Don’t Rush: Take time with each step, especially when measuring and cutting. Remember, it’s not about finishing quickly but about creating a piece you’ll love seeing in your home every day.

With these additional tips, you can customize your curtains even further and create a unique look that reflects your style.
5 Things You Should Avoid
- Choosing the Wrong Fabric: Avoid selecting a fabric that clashes with your existing curtain material. The fabrics should complement each other, both in terms of color and texture. Also, consider the weight of the fabric so it doesn’t weigh your curtains down.
- Ignoring Measurements: Pay attention to the importance of accurate measurements. A band that’s too short or too wide can ruin the aesthetics of your curtains. Always double-check your measurements before cutting the fabric.
- Skipping the Ironing Steps: It might be tempting to skip ironing, but this step ensures a clean, professional look for your curtains. Iron your fabric band before attaching it to the curtain and again after sewing to achieve a crisp, smooth finish.
- Overlooking Care Instructions: Don’t forget to check the washing and care instructions for both your curtains and the new fabric. If they have different requirements, always stick to the most delicate setting to avoid damaging the materials.
- Neglecting Regular Maintenance: Lastly, pay attention to regular maintenance. Make it a habit to check your curtains for loose stitches or fraying fabric and fix minor issues promptly to prolong the life and look of your upgraded curtains.

By avoiding these common mistakes, you can ensure a successful and visually appealing end result for your upgraded curtains.
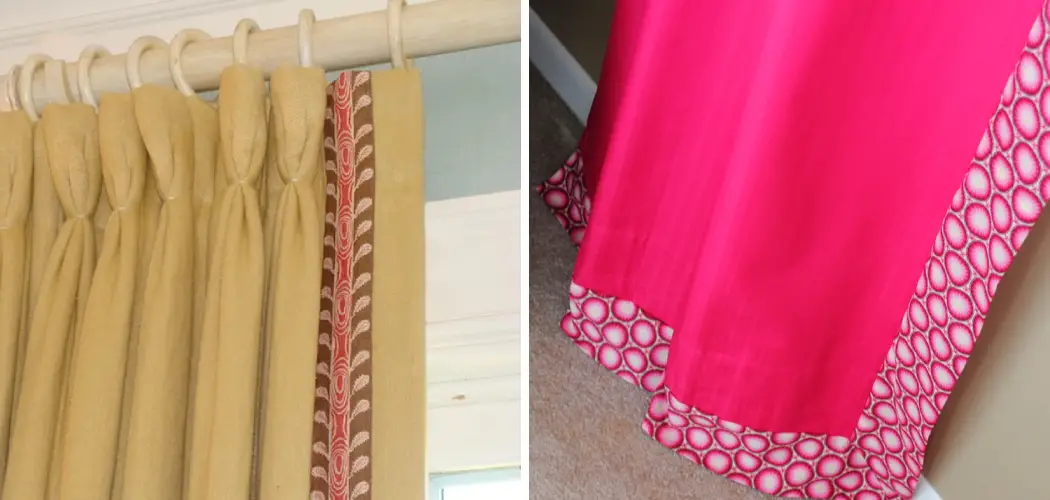
What is the Leading Edge of a Curtain?
The leading edge of a curtain refers to the side of the curtain that is closest to the center of the window or opening. It is typically the first part of the curtain that is seen when entering a room and can often be adorned with decorative elements such as tassels or trim. The leading edge may also refer to the side of the curtain where it opens and closes, with the opposite side called the trailing edge.
When adding a band of fabric to curtains, it is essential to consider which side will be the leading edge and ensure that the pattern or design of the added fabric complements this placement.
Overall, paying attention to the leading edge when upgrading your curtains can help create a visually appealing and cohesive look for your room’s decor. So, give it the proper attention and care when adding a band of fabric to your curtains.
Conclusion
After reading this step-by-step guide, you should feel confident in adding a band of fabric to curtains. All it takes is a few supplies and some patience, and you can have the custom curtains of your dreams! As always, remember to measure twice and always double-check the measurements before cutting anything. If all goes according to plan, you should be able to walk away with beautiful curtains you can proudly showcase in your home or office space.
Hopefully, the article on how to add a band of fabric to curtains has inspired you to get creative with your home decor. Remember, this is just one idea – there are endless possibilities for upgrading and customizing curtains in your unique way.
Let’s get creative: go out there and start embellishing those curtains! Best of luck!