
Headbands are great accessories that complement any outfit and add flair to your look. One of the most popular types of headbands is the knotted headband. These headbands are easy to make and can be customized to fit your style. In this blog, we will show you how to make a knot headband using simple materials. So, grab your sewing kit, and let’s get crafting!

Can You Make a Knot Headband?
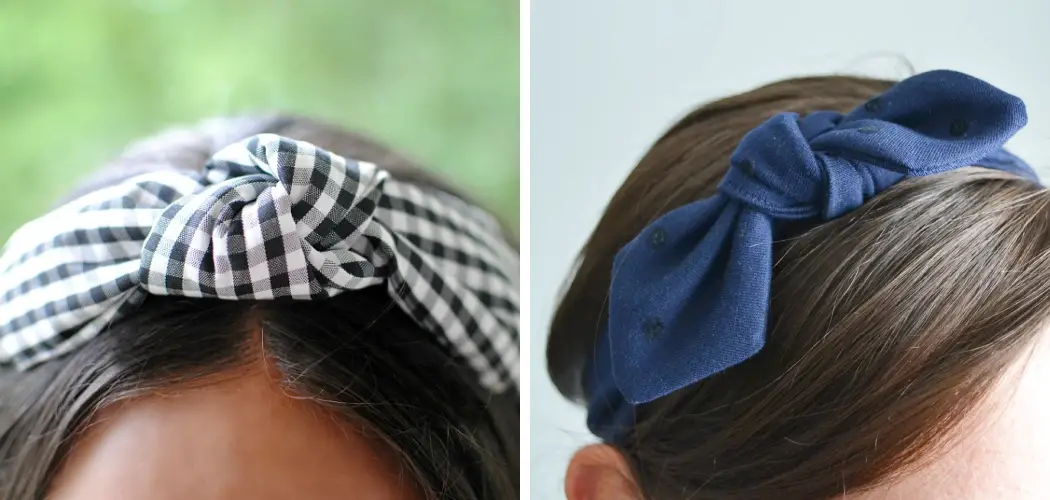
There’s something so satisfying about creating something with your own two hands, and if you’re up for a fun DIY project, making a knot headband is a great place to start. Not only is it a stylish accessory that you can wear on any occasion, but it’s also incredibly easy to make! All you need is a strip of fabric, a pair of scissors, and a little bit of patience. Whether you opt for a solid color or a funky pattern, your knot headband will turn heads and become a staple in your wardrobe. So why not give it a try? You might surprise yourself with how creative and crafty you can be!
Why Should You Make a Knot Headband?
If you’re looking for a new accessory that will add a touch of style to your look, a knot headband is just the thing. Not only are they fashionable, but they’re also incredibly easy to make. All you need is a piece of fabric, some scissors, and some creativity. Whether you prefer bold prints or muted solids, you can customize your headband to suit your style. Plus, with a knot headband, you can keep your hair out of your face without sacrificing style. So why not give it a try and make a knot headband today? We promise you won’t regret it.
Materials Needed
- The fabric of your choice (cotton or jersey fabric work best)
- Scissors
- Sewing machine or needle and thread
- Measuring tape
7 Steps to Follow on How to Make a Knot Headband
Step 1: Measure and Cut Your Fabric
Measure the circumference of your head where you want the headband to sit. Add an inch to this measurement for seam allowance. Then, measure the width of the headband you want. Cut two pieces of fabric to your measurements. The length should be the circumference measurement plus one inch, and the width should be double the width of the finished headband.

Step 2: Sew the Two Fabric Pieces Together
Place the two fabric pieces right sides together and sew along one of the long edges. Use a straight stitch and a 1/2-inch seam allowance. Turn the fabric inside out so the right side of the fabric is facing out.
Step 3: Create the Knot
Taking the two open ends of the fabric, tie a knot towards the center of the band. Ensure that the knot is tight and the fabric is gathered. Then, fold one tail of the fabric onto the other side, ensuring the seam is in the center. Pin this in place.
Step 4: Sew the Sides
Sew the open ends of the headband together along the seam line, ensuring that the seam runs down the center of the knot. Use a 1/2 inch seam allowance, and sew around the knot as well. Trim any excess fabric and turn the headband right side out.
Step 5: Create Ties for the Headband
Cut two pieces of fabric about 18 inches long and 1 inch wide. Fold them in half lengthwise, wrong sides together. Then, sew down the open side with a straight stitch and a 1/2-inch seam allowance. Trim any excess threads. Turn the fabric tubes right-side out by pushing the fabric through itself using a pencil or chopstick.
Step 6: Attach Ties to Headband
Fold the ties in half, then pin them on either side of the headband, about 1 inch from the edges. Make sure that the seams are facing down and toward the center. Sew both sides of each tie onto the headband with a straight stitch and a 1/2-inch seam allowance.
Step 7: Finish Your Knot Headband
Finally, turn the headband inside out and topstitch around the entire edge of the band. This will help to give it a more professional finish. And you’re done! Your knot headband is complete and ready to wear. Enjoy!

That’s it! You’ve learned how to make a knot headband in 7 simple steps. You can create beautiful and unique accessories for any occasion with some fabric and basic sewing supplies. Get creative with your fabric choices, and have fun!
5 Considerations Things When You Need to Make a Knot Headband
1. The Type of Fabric You Are Using
When you are choosing a headband, it is important to consider the type of fabric you are using. If you are using a delicate fabric, such as silk, you will need to be careful not to damage it when tying the knot. You may also want to consider the weight of the fabric, as a heavier fabric will require a stronger knot.
2. The Size of The Headband
The headband size will also affect the type of knot you use. A smaller headband will require a smaller knot, while a larger one will need a stronger one to hold it in place.
3. The Thickness of The Headband
The thickness of the headband can also affect the type of knot you use. A thicker headband will need a stronger knot to hold it, while a thinner headband can be tied with a weaker one.
4. The Shape of The Headband
The headband’s shape can also affect the type of knot you use. For example, if you are using a square headband, you will need to use a different type of knot than if you are using a round headband.
5. The Color of The Headband
The headband’s color can also be considered when choosing a knot. If you use a light-colored headband, you may want to use a darker-colored thread to make the knot less visible.

5 Benefits of Make a Knot Headband
1. It’s a Simple Craft
One of the benefits of making a knot headband is that it’s a simple craft. You don’t need special skills or materials to make one, and it’s a great project for kids and adults. All you need is a length of fabric and some scissors; you can make a headband in just a few minutes.
2. It’s Inexpensive
Another benefit of making a knot headband is that it’s an inexpensive project. You can use fabric scraps or old clothes to make your headband, so it won’t cost you much. It’s still a relatively inexpensive project, even if you need fabric.
3. You Can Customize It
Another advantage of making a knot headband is that you can customize it to your taste. You can choose the fabric, color, and pattern you want and add embellishments such as beads or sequins. If you’re making a headband for someone else, you can also customize it to their taste.
4. It Makes a Great Gift
If you want a unique gift idea, consider making a knot headband. It’s a thoughtful and personal gift that shows you care about the recipient. Knot headbands also make great gifts for kids, as they’ll enjoy wearing them and showing them off to their friends.
5. It’s Fun to Make
Another benefit of making a knot headband is that it’s fun! Creating something from start to finish can be very satisfying, and it’s always gratifying to see the final product when you’re done. So even if you don’t plan to give away your headband, making one for yourself can be fun and relaxing.
Making a knot headband is an easy and creative craft project that anyone can do. With the right supplies and considerations, you can quickly make a unique and stylish headband! Give it a try today and see what you can create!
Some Common Mistakes People Make When Trying to Make a Knot Headband
Making a knot headband seems like a fun and easy DIY project, but common mistakes can trip up even the most crafty individuals. One mistake is using the wrong type of fabric. If the fabric is too thin or stretchy, the knot may not hold its shape and slip out of place.

Another mistake is not measuring the fabric correctly. This can lead to a too-loose or tight headband, causing discomfort for the wearer. Finally, not tying the knot tightly enough can also be a problem. Pull the fabric taut and double-knot the ends for a secure hold. By avoiding these mistakes, you can create a stylish and comfortable knot headband that you’ll be proud to wear!
Conclusion
There you have it! Making a knot headband is easy and fun. You can create a headband that suits your style with just a few simple steps. Whether you want a bold print or something more subdued, you can customize your headband to make it uniquely yours. So next time you’re looking for a new accessory, why not try making a knot headband? Thanks for reading our post about how to make a knot headband.