
Unleashing creativity in personalized home decor has never been easier with the introduction of the Cricut Mug Press. This innovative tool has revolutionized the art of crafting by simplifying the process of creating custom-designed mugs. If you’ve recently acquired a Cricut Mug Press or are contemplating adding one to your crafting arsenal, understanding how to use it efficiently is key to unlocking its full potential.

In this article, we provide a comprehensive guide on how to use the Cricut Mug Press, from setting up the machine to selecting compatible materials and ensuring a flawless transfer of your unique designs onto mugs. Whether you’re a seasoned crafter or a newcomer to the world of DIY, this tutorial will empower you to transform ordinary mugs into personalized masterpieces with the precision and ease that Cricut enthusiasts have come to love.
Growing Popularity of Personalized Mugs
Personalized mugs are becoming increasingly popular in recent years, and for good reason. Not only do they make great gifts for loved ones, but they also serve as a fun and unique way to express one’s personality. With the rise of online marketplaces like Etsy and Redbubble, it has become easier than ever to find and purchase customized mugs.
But what if you want to take your mug designs to the next level? That’s where the Cricut Mug Press comes in. This innovative machine allows users to create professional-quality, permanent designs on mugs in just a matter of minutes. No more worrying about peeling vinyl or faded prints – with the Cricut Mug Press, your personalized mugs will last for years to come.
Importance of Proper Usage for Successful Mug Projects
Successful crafting projects are the result of a combination of skill, creativity, and proper execution. When it comes to using the Cricut Mug Press, having a good understanding of how to operate the machine is crucial for achieving quality results.
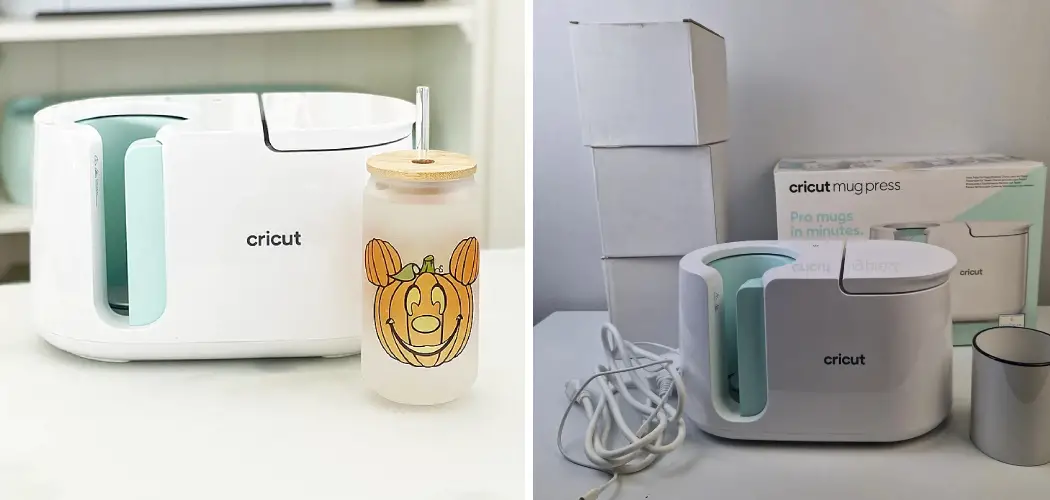
The Cricut Mug Press is designed specifically for creating customized mugs with ease and efficiency. It has a unique heating element that evenly distributes heat all around the mug, ensuring a smooth and long-lasting transfer of designs. However, without proper usage, this intricate technology may not produce the desired outcome.

One of the essential things to keep in mind when using the Cricut Mug Press is to follow the recommended temperature and time settings for different types of materials. The machine comes with a detailed guide that specifies the appropriate settings for different mug blanks and types of designs. Not following these guidelines can result in uneven heating, which can affect the quality of the transfer or even damage the mug.
Another crucial aspect of proper usage is ensuring that the design is correctly aligned and placed on the mug. The Cricut Design Space software has a feature that allows you to preview how your design will look on the mug before starting the transfer. It is essential to take advantage of this feature and make any necessary adjustments to ensure that your design fits perfectly on the mug.
In addition to these technical aspects, it is also crucial to handle both the mugs and machine with care. The Cricut Mug Press has a silicone base that can become hot during use, so it is important to avoid touching it while in operation. Also, when handling the mugs after transfer, it is best to let them cool down before removing the design backing or washing them.
10 Methods How to Use the Cricut Mug Press
1. Preheat the Mug Press
Before you begin using your Cricut Mug Press, it is important to preheat it for optimal results. To do this, plug in the machine and press the power button. The light will turn green when the machine is ready to use. It’s important to wait until the light turns green before proceeding with any other steps.
2. Prepare Your Mug

Once your mug press is preheated, you can start preparing your mug for pressing. Make sure that your mug is clean and free from dust or debris before placing it in the press. If there are any stickers or labels on your mug, make sure to remove them before pressing as well.
3. Place Your Design
The next step is to place your design onto the mug. You can either print out a design on transfer paper or use vinyl cutouts to create a decal-like effect on your mug. Once you have placed your design onto the mug, make sure that it is properly centered before continuing with the next step.
4. Place Inside Mug Press
Now that you have prepared and placed your design onto your mug, you can place it inside of the Cricut Mug Press for pressing. Gently insert the handle of the press into one side of the mug and then pull it back slightly so that it sits snugly inside of the press without being too tight or too loose.
5. Set Time and Temperature
The next step is to set both time and temperature settings on your Cricut Mug Press according to what type of material you are using for pressing (vinyl, heat transfer vinyl, etc.). Refer to the instructions provided by Cricut for the recommended time and temperature settings for different materials.
After setting these parameters, press “start” on your machine so that it begins heating up and counting down towards the completion time for the pressing cycle.
6. Check Progress
It’s important to periodically check in on how things are going while pressing with a Cricut Mug Press—especially if this is one of your first times using this particular machine! You can easily check progress by opening up the lid of machine every few minutes throughout the duration of the pressing cycle—just make sure not to open the lid too often as this could cause disruption in temperature inside the press which may affect the quality of the final product!
7. Remove From Heat When Complete
When the timer reaches zero and beeps indicating the end of the cycle, carefully remove the handle from the inside mug press, and lift the lid—being careful not to touch the hot surface! Carefully take out the finished pressed item from inside the machine—it should feel warm but not hot—and place it onto heat heat-resistant surface such as a countertop or cutting board until cooled off completely before handling it further!

8. Peel Off Transfer Paper/Vinyl
If you used either transfer paper or vinyl decals for creating designs on mugs then now would be time to peel off the backing material from top layer! Start at corner edge slowly peeling away the backing until all has been removed revealing a crisp pressed image underneath!
9. Apply Top Coat (Optional)
For extra protection against wear and tear over time, consider applying top coat sealant over the pressed image once cooled off completely! This will help preserve designs longer while also adding a glossy finish if desired! Just make sure not to apply top coat directly onto plastic mugs as this could cause damage due its chemical composition reacting negatively with the plastic surface!
10. Enjoy Your Creation
Finally, after all steps have been completed, sit back & enjoy creation made possible by Cricut Mug Press! Whether gifting item away or keeping for yourself, proudly show off unique personalized mugs created just like professional ones found in stores but without the hefty price tag attached!
Experiment with different designs, materials, and techniques to create a wide variety of custom mugs that are sure to impress! And remember, always have fun while using your Cricut Mug Press!

Things to Consider When Using the Cricut Mug Press
The Cricut Mug Press is a versatile and innovative machine that allows you to create personalized mugs for yourself or as gifts. With its easy-to-use interface, this machine has become a popular choice among crafters and DIY enthusiasts.
Type of Mug
The type of mug you use is crucial when it comes to creating beautiful and long-lasting designs with the Cricut Mug Press. The machine is designed to work with straight-walled mugs, preferably made of ceramic or coated with a polymer coating. Using mugs that are not compatible with the machine may result in subpar results or damage to your project.
Design and Size
When designing your mug, it is important to consider its size and the placement of your design. The Cricut Mug Press has specific dimensions for where your design should be placed on the mug, and exceeding these dimensions may cause issues during the transfer process. Additionally, make sure to use high-quality designs with clear and crisp lines to ensure a flawless transfer onto your mug.

Temperature and Time
The Cricut Mug Press has pre-set temperature and time settings for different types of mugs and designs. It is crucial to follow these guidelines to achieve the best results. Using the wrong temperature or time settings may result in a poorly transferred design or even damage to your mug.
Proper Preparation
Before transferring your design onto the mug, it is important to properly prepare the surface. This includes cleaning the mug with rubbing alcohol and allowing it to dry completely before starting the transfer process. Any residue or moisture on the mug can affect the transfer and result in a less-than-desirable outcome.
Common Mistakes to Avoid
The Cricut Mug Press is a popular tool for creating personalized mugs at home. It’s easy to use and produces professional-looking results. However, like any new tool, there are some common mistakes that users may make when using the Cricut Mug Press. In this section, we will discuss some of these mistakes and how to avoid them.
Not Preheating the Mug Press
One of the most common mistakes people make when using the Cricut Mug Press is not preheating it before use. This step is crucial as it ensures that the heat distributes evenly throughout the press, resulting in a better transfer onto the mug. Failure to preheat can result in uneven heating and ultimately affect the quality of your design.
Using Incorrect Pressing Time and Temperature
Another common mistake is using incorrect pressing time and temperature settings. It’s essential to follow the instructions provided with your Cricut Mug Press or consult the recommended settings for different types of mugs. Forgetting to adjust the time and temperature can lead to a poor transfer or even damage the mug.
Not Using Enough Pressure
The Cricut Mug Press works by applying heat and pressure onto the mug, transferring the design onto it. Some users may not apply enough pressure, leading to a less than ideal transfer. It’s essential to apply enough pressure for the heat to penetrate the mug and create a lasting design.

Conclusion
The cricut mug press is a versatile tool that can help you create amazing projects. From personalizing mugs for friends and family to creating custom designs for home decor, this tool is perfect for adding a personal touch to any project.
Whether you’re a beginner or an expert, the cricut mug press makes it easy to create one-of-a-kind pieces in no time. With its easy-to-use design and convenient features, this machine has revolutionized DIY craft and home decor projects.
Now that you know how to use the cricut mug press, it’s time to get started on all of your creative projects! So grab your materials and start experimenting with how this machine can transform any piece into something truly unique. Unleash your inner creativity and show off your skill with the cricut mug press today!