
Are you looking to kickstart your crafting journey with a Cricut machine? If yes, then you’ve come to the right place. Believe it or not, one of the most critical aspects of using a Cricut machine is understanding its cutting mat correctly. Misusing the mat can lead to Warping and thus ruin your project altogether!

In this blog post, we’ll cover all you need to know about how to use a cricut mat in order for it to last longer and provide more accurate results. We will talk about all of these topics related mater – from selecting the right material type for your projects to properly adhering it on an adhesive-backed craft sheet so that no warping happens while working with intricate designs – as well as some handy tricks on removing excess debris after completing your crafts!
What Will You Need?
Before we dive into the details, here’s what you’ll need to use a Cricut mat properly:
- A Cricut machine
- A cutting mat
- Adhesive-backed craft sheet
- Materials for your project (cardstock, vinyl, paper, etc.)
- Scraper tool
- Lint roller or tape
Once you have all these items, you’re ready to begin crafting!
8 Easy Steps on How to Use a Cricut Mat
Step 1: Ensure Your Mat is Clean and Sticky
Before starting any project, your Cricut mat must be clean and sticky. This ensures that your crafting materials adhere well to the mat. If your mat has lost its stickiness or has debris on it, you can clean it using a lint roller or sticky tape. Simply roll the lint roller across the mat, catching any bits of paper or other debris.
If using tape, press the sticky side onto the mat and peel it back to remove the debris. Always remember to be gentle when cleaning your mat to avoid any damage.
Step 2: Selecting and Preparing Your Materials
Once your mat is clean and sticky, the next step is to select and prepare your materials. You might work with cardstock, vinyl, paper, or other materials depending on your project. Ensure that your chosen material is free of any dust or debris. Now, place your material on the mat. Start from one end and smoothly lay it down to avoid any bubbles or wrinkles.

If your material isn’t sticking well to the mat, you can use a scraper tool to press the material onto the mat firmly. This will ensure it adheres well and remains flat during the cutting process.
Step 3: Insert the Mat into the Cricut Machine
Now that your material is prepared and firmly adhered to the mat, it’s time to put the mat into the Cricut machine. Align the top of the mat with the opening of the machine. The mat should be positioned under the metal guide bars. Once correctly set, press the ‘Load/Unload’ button. The rollers will then pull the mat into the correct starting position. Ensure the mat loads evenly to avoid any misalignments during the cutting process.
Step 4: Choose the Correct Cutting Settings
It’s essential to choose the right cutting settings based on the material you’re using for your craft project. If using a Cricut Explore machine, set your dial to the material you’re cutting. If you’re using a Cricut Maker, you’ll select your material in Design Space. Once you’ve chosen the correct setting, your machine can make precise cuts. Always perform a test cut when using a new material to prevent potential waste.
Step 5: Start the Cutting Process
You’re ready to begin the cutting process with the correct material settings in place. Press your Cricut machine’s ‘C’ button to start the cut. As the Cricut machine is doing its job, be vigilant and monitor the process to ensure everything is running smoothly. Pay particular attention to the mat and the material: they should remain flat and move evenly through the machine.
If you notice any issues, such as the material lifting or the machine making unusual noises, pause the machine, fix the issue, and then resume the cutting process.
Step 6: Unload the Mat and Remove the Material
Once your Cricut machine has completed the cutting process, it’s time to unload the mat. Press the ‘Load/Unload’ button, and the machine will release the mat. Now, it’s time to remove your material from the mat carefully. Start from one corner and peel the material back at an angle. This method reduces the risk of tearing or distorting your design. If you’re working with delicate or intricate designs, a weeding tool can help lift the material off the mat.

Step 7: Clean the Mat After Use
After completing your project, it’s time to clean the mat. This step is essential to maintain the longevity and stickiness of the mat. Start using a scraper tool to remove any leftover material from the mat gently. Be sure to scrape in one direction to prevent spreading the debris. Then, for a deeper clean, use a lint roller or sticky tape to pick up any remaining tiny bits of material.
If your mat has lost its stickiness, you can renew it using a mat adhesive spray. Always store your mat with a protective cover to keep it clean and sticky for your next project.
Step 8: Store Your Mat Correctly
After use, storing your Cricut mat correctly is essential to preserve its condition and extend its lifespan. Always replace the clear plastic cover that came with the mat. This cover protects the mat from dust and debris, keeping the adhesive surface clean. Lay the mat flat, sticky side up, in a cool, dry place.
Avoid exposing it to direct sunlight or extreme temperatures, as these can warp the mat or cause the adhesive to deteriorate. Proper storage ensures your mat is ready for your next crafting project without requiring extensive cleaning or reconditioning.
By following these steps, you can confidently use your Cricut mat and create stunning and precise craft projects. Remember to always keep your mat clean and sticky for the best results and to follow the cutting settings based on your chosen material.
5 Additional Tips and Tricks
Tip 1: Regularly Rotate Your Mat
To ensure even wear and tear, make it a habit to rotate your mat every few uses. This can help extend the mat’s lifespan and ensure the surface remains sticky.
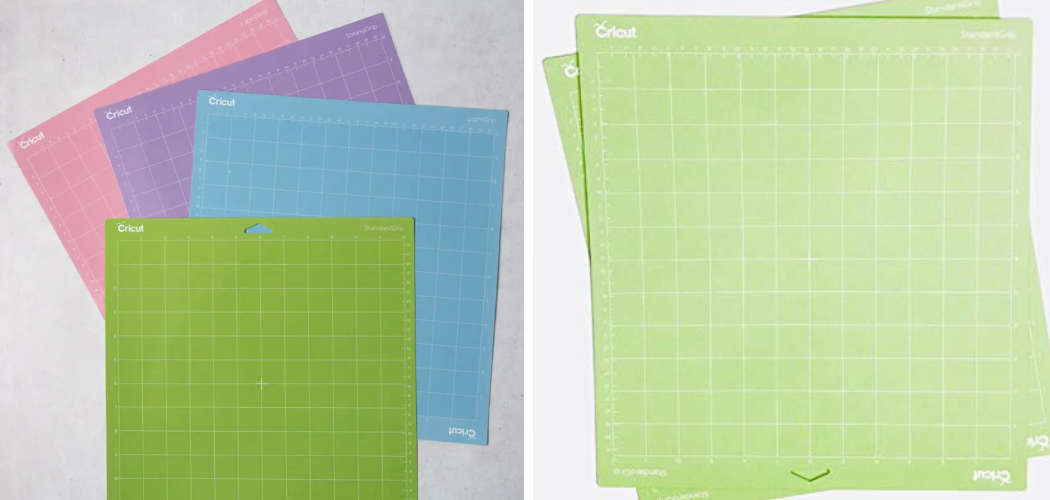
Tip 2: Use the Right Mat for the Right Material
Cricut offers mats in different stickiness levels: light grip, standard grip, firm grip, and fabric grip. Ensure you’re using the right mat for your project to prevent material slippage or difficulty removing the material after cutting.

Tip 3: Handle Mat with Clean Hands
Always handle your Cricut mat with clean hands. Oils and dirt from your hands can transfer to the mat and affect its stickiness. A simple wash of hands can make a big difference.
Tip 4: Lightly Dust the Mat
If your mat is too sticky and is damaging delicate materials, lightly dust the mat with a bit of baking powder. This can help reduce the stickiness without damaging the adhesive.
Tip 5: Don’t Use a Scraper on a Fabric Mat
If you’re using a fabric grip mat, avoid using a scraper on it, as it may damage the adhesive. Instead, use a lint roller to clean off the fabric pieces.
With these additional tips and tricks, you can become a pro at using your Cricut mat and create beautiful and intricate designs for all your crafting projects.
5 Things You Should Avoid
1. Avoid Using Sharp Objects on the Mat:
Never use sharp objects to clean or scrape your mat, as this can cause irreparable damage to the adhesive surface. Instead, gently remove leftover materials using a Cricut scraper or a similar plastic tool.
2. Don’t Roll or Fold the Mat:
Never roll or fold your Cricut mat, as this can lead to creases and warping of the mat, negatively affecting the cutting precision. Always keep your mat laid flat when in use or storage.

3. Avoid Cleaning with Harsh Chemicals:
Never clean your Cricut mat with harsh chemicals or alcohol-based cleaners. These can degrade the adhesive surface of the mat. Instead, use mild soap and water for a deeper cleaning.
4. Don’t Overload the Mat:
Avoid overloading your Cricut mat with too much material. This can cause a lack of cut precision or even jam the machine. Always ensure that the material fits within the grid lines on the mat.
5. Avoid Using a Worn-Out Mat:
If your mat is no longer sticky or has visible damage, it’s time to replace it. Using a worn-out mat can lead to inaccurate cuts and potentially damage your Cricut machine. Regular inspection and timely replacement of your mat are crucial for optimal performance.
By avoiding these common mistakes, you can keep your Cricut mat in top condition and achieve the best results for all your crafting projects.
Conclusion
In conclusion, many people must familiarize themselves with using a Cricut mat. Still, this project has provided a comprehensive overview that can help users get the most out of their creative projects. It is important to remember to use the correct size for the suitable materials and consider your project’s purpose when deciding which mat type is best suited for you.
Hopefully, the article on how to use a Cricut mat and the additional tips and precautions mentioned will help users feel more confident in their abilities to create beautiful and precise designs using their Cricut machines.
To complement these tips, please don’t forget to constantly clean and store your mats properly to extend their life spans. Above all, have as much fun as possible when engaging in Cricut projects and express yourself through the power of creativity. So go forth, share those creations with others, and keep crafting!