
Are you looking for the perfect project to liven up your home? With the right tools and supplies, transferring cricut vinyl to wood is an easy and customizable way to create unique decor pieces. Whether you want to add a personalized touch around your living room with trendy wall art or simply spruce up your bookshelf with artsy displays, this craft will not disappoint!

Cricut vinyl allows you to create intricate shapes and designs with ease, while wood adds a natural and rustic element to your projects. Additionally, combining these materials makes it perfect for adding texture and dimension to your home decor.
In this blog post, we’ll cover all you need to know on how to transfer cricut vinyl to wood, from the materials and tools required to the step-by-step process and some helpful tips. So, let’s dive in!
What Are the Uses of Transfer Cricut Vinyl to Wood?
As mentioned, transferring cricut vinyl to wood opens up endless possibilities for creating custom home decor pieces. Some popular uses include:
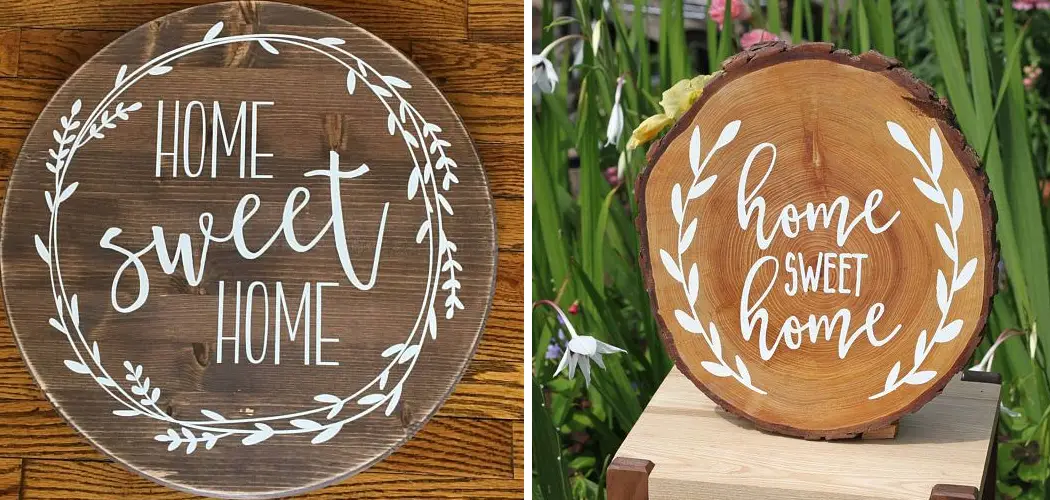
- Personalized Signs: Create custom signs with inspiring quotes, family names, or even welcome messages for guests.
- Wall Art: Add a pop of color and design to your walls by transferring vinyl onto wooden canvases or frames.
- Coasters and Trivets: Protect your furniture in style by transferring vinyl onto coasters and trivets.
- Serving Trays: Impress your guests with unique trays for special occasions, such as weddings or birthdays.
Once you get the hang of transferring cricut vinyl to wood, you’ll find yourself wanting to create more and more projects for your home. So, let’s get started on how to do it!
What Will You Need?
To successfully transfer your Cricut vinyl onto wood, here are the things you will need:
- Cricut machine (or any other cutting machine)
- Adhesive vinyl or heat transfer vinyl (depending on the type of wood and design you’re using)
- Transfer tape
- Wooden surface (such as a photo frame, sign, or plaque)
- Weeding tools (optional but recommended)
- Scissors or craft knife
Once you have all the materials ready, it’s time to start the transfer process!

10 Easy Steps on How to Transfer Cricut Vinyl to Wood
Step 1. Design Your Vinyl Decal
Start by designing your vinyl decal using the Cricut Design Space software. This program allows you to create and customize your designs. Once your design is ready, size it appropriately for your wooden surface.’
Step 2. Cut Your Vinyl Decal
Load your chosen adhesive or heat transfer vinyl into your Cricut machine. Make sure the vinyl side faces up, and then select ‘Vinyl’ on your machine’s material settings. Click the ‘Make It’s button in the Cricut Design Space software, and allow your Cricut machine to cut the design. Once the cutting process is finished, unload the vinyl from your machine.
Step 3. Weed Your Vinyl Decal
The next step involves weeding your vinyl decal. ‘Weeding’ is the process of removing the excess vinyl from your design. Using a weeding tool, carefully peel away the unwanted parts of the vinyl, leaving only your design on the backing. Take your time during this process, especially if your design includes small, intricate details. Once you’ve finished weeding, your design should be ready to transfer onto the wood.
Step 4. Apply Transfer Tape
After weeding your design, the next step is to apply the transfer tape. Cut a piece of transfer tape that’s slightly larger than your design. Peel off the backing and carefully place it over your design.

Use a scraper or an old credit card to firmly press down on the transfer tape, ensuring it sticks properly to the vinyl. This step is crucial as it helps to lift your design off the backing paper, ready for transferring onto the wood surface.
Step 5. Transfer Vinyl to Wood
Now, it’s time to transfer the vinyl to your wooden surface! Carefully peel off the backing paper from the design, ensuring that the design is still stuck to the transfer tape. Position your design onto the wooden surface, ensuring it is straight and centered. Once you’re happy with the positioning, press the transfer tape down onto the wood.
Use your scraper or old credit card to rub over the tape, ensuring the vinyl adheres securely to the wood. Peel off the transfer tape slowly, making sure all parts of the design stay on the wood. If any part of the design begins to lift, simply lay the tape back down and rub the area with the scraper again until the vinyl adheres appropriately.
Step 6. Seal the Design
After the vinyl is fully adhered to the wood, the final step is to seal the design to protect it. You can use a sealant like Mod Podge, clear acrylic spray, or polyacrylic. Apply a thin, even coat of sealant over the entire surface, covering the edges of the vinyl design to prevent them from peeling up.
Allow the sealant to dry completely before handling or displaying your new decor piece. Note that this step is optional but recommended if your wooden item is taken frequently or exposed to elements.
Step 7. Allow the Sealant to Cure
Give the sealant ample time to cure fully. This process may take a few hours to several days, depending on the type of sealant used. Patience is key here to ensure maximum durability of your design on the wood.

Step 8. Add Finishing Touches
Once the sealant is fully cured, you may add embellishments or additional finishing touches. This could include painting the edges, adding hardware for hanging or incorporating other decorative elements to enhance your design. Be careful not to damage the vinyl while adding these finishing touches.
Step 9. Display Your Artwork
Now that you have completed your project find the perfect spot in your home to display your unique decor piece. Remember, the best part of DIY projects is adding your flair to your living space. If you’re feeling extra creative, you can even use this technique to create matching sets of coasters, signs, or photo frames.
Step 10. Share and Inspire
Finally, remember to share your beautiful artwork with friends and family, or on your social media platforms. Your creativity might inspire others and kindle their interest in crafting. Always remember that the primary goal is to have fun and enjoy the process, no matter what the outcome may be. Enjoy crafting with Cricut and wood, and keep creating more unique and personalized items to brighten up your space!
By following these simple steps, you can quickly transfer your Cricut vinyl designs onto wood and create stunning decor for your home.
5 Additional Tips and Tricks
- Prep Your Wood: Before transferring your Cricut vinyl to wood, ensure the wood’s surface is smooth and clean. This provides a better adhesive surface for the vinyl.
- Use a Transfer Tape: Transfer tape is not just for moving the vinyl onto the wood, but it also helps in positioning the design perfectly and smoothing out bubbles.
- Pressure Matters: When applying the vinyl to the wood, use adequate pressure. This will help the vinyl stick better to the wood.
- Peel Slowly: When peeling the transfer tape off, go slow. This will prevent the vinyl from lifting off the wood.
- Keep the Heat Away: If you’re using a heat transfer vinyl, avoid placing it in direct sunlight or near any heat source. This can cause the vinyl to melt and ruin your design.

By following these additional tips, you can ensure a successful transfer of Cricut vinyl to wood.
5 Things You Should Avoid
- Avoid Uneven Surfaces: Make sure the wood is not only clean but also even. An uneven surface could lead to bubbles or creases in the vinyl.
- Avoid Low-Quality Transfer Tape: It may be tempting to save money by purchasing cheaper transfer tape, but it could lead to poor results. Invest in high-quality tape to ensure a smooth transfer.
- Avoid Rushing: Patience is key! Take your time with the process, as it can lead to mistakes and poorly placed designs.
- Avoid Non-adhesive Vinyl: While non-adhesive vinyl can be used on some materials, it’s not the best choice for wood. Opt for adhesive vinyl to ensure a stronger bond.
- Avoid Ignoring the Manufacturer’s Instructions: The instructions provided by the manufacturer are essential for successful application. Ignoring these guidelines can fail to adhere correctly or damage the design.
By following these tips and avoiding common mistakes, you can quickly transfer Cricut vinyl to wood like a pro. Be patient, take your time, and enjoy the process of creating beautiful and unique personalized wooden pieces for your home or as gifts for loved ones.
How Do You Keep Vinyl From Peeling Off Wood?
Peeling of vinyl from wood can be a common problem, but there are a few ways to prevent it from happening.
- Firstly, use high-quality adhesive vinyl specifically designed for wood surfaces. This will provide a stronger bond and reduce the chances of peeling.
- Properly prepping the wood surface before applying the vinyl also plays a significant role in preventing peeling. Ensure the surface is clean, smooth, and free of any dust or debris.
- Applying adequate pressure while transferring the vinyl to wood can also help prevent peeling. Use a scraper tool or credit card to firmly press down on the design.
- Finally, avoid placing your wooden piece in direct sunlight or near heat sources, as this can cause the vinyl to melt and peel off.

Follow these tips, and you can enjoy beautifully transferred Cricut vinyl designs on your wooden creations for a long time to come.
How Do You Get Cricut Vinyl to Stick to Rough Wood?
If you’re working with a rough or textured wood surface, getting the vinyl to stick can be a bit challenging. However, there are a few things you can do to ensure better adherence.
- Firstly, use a high-quality adhesive vinyl specifically designed for uneven surfaces. This will provide a stronger bond and reduce the chances of the vinyl lifting off.
- Next, properly clean and prepare the wood surface before applying the vinyl. This includes sanding down any rough areas and removing any dust or debris.
- You can also use a primer or sealant on the wood before applying the vinyl. This will create a smoother surface for the vinyl to adhere to.
- When applying the vinyl, use extra pressure and go over it multiple times with a scraper tool or credit card. This will help the vinyl adhere better to the rough surface.
By following these tips, you can achieve a successful transfer of Cricut vinyl onto even the roughest wood surfaces. Overall, with the suitable materials and techniques, transferring Cricut vinyl to wood is a simple and fun DIY project that allows for endless design possibilities on wooden pieces.

What Wood is Best for Cricut?
While wood can be used with Cricut vinyl, some types may work better than others. Here are a few suggestions for the best types of wood to use for Cricut projects:
- Basswood: This is a popular choice among Cricut users due to its smooth surface and ability to hold intricate designs well.
- Pine: Pine is another common choice as it’s readily available and relatively easy to work with. It also provides a smooth surface for vinyl application.
- Birch Plywood: This type of wood is known for its durability and ability to withstand pressure, making it great for Cricut projects.
- MDF Board: Medium-density fiberboard (MDF) is a budget-friendly option that offers a smooth and consistent surface for vinyl application.
Ultimately, the best wood for your Cricut projects will depend on your personal preference and the type of design you’re looking to create. Experiment with different types of wood to find what works best for you and your designs.
Conclusion
In conclusion, there are a few different methods for transferring cricut vinyl to wood, but the most effective way is by using a broom with the correct pressure. This method ensures that your design will move and adhere to the wood surface perfectly without damaging it.
Additionally, if you follow the steps provided above correctly, you should have no problems in getting your vinyl design onto a piece of wood perfectly.
So, now that you know how to transfer cricut vinyl to wood, why not give it a try and see what creative designs you can come up with? Let us know in the comments section what kind of projects you create!