
Tie-dying is a fun and creative way to add a splash of color to your wardrobe. A popular technique is the swirl tie-dye, which creates a beautiful spiral pattern.

If you’re new to tie-dyeing, don’t worry! It’s simple and easy to do. In this beginner’s guide, we’ll take a look at the step-by-step process of how to tie dye a swirl.
Can You Tie Dye a Swirl?
Tie-dye has always been a fascinating form of art that mesmerizes and intrigues people of all ages. The technique involves dying fabric using multiple colors and tying them in various patterns to create mesmerizing swirls. However, the question that many people ask is, can you tie-dye a swirl? The answer is yes!
A swirl pattern is one of the most popular and iconic tie dye patterns, and it involves twisting and folding the fabric into a spiral and dyeing it in bright, bold colors. This technique results in a beautiful and unique pattern that will catch the eye of anyone who sees it. So, if you’re looking to create something that is both stylish and unique, give tie-dyeing a swirl pattern a try!
Why Should You Tie Dye a Swirl?
Tie-dye has become a popular fashion statement that has been around for a while. The process of creating unique designs using fabric dye and a lot of creativity has captivated the hearts of craft enthusiasts worldwide. One of the most popular designs is the tie-dye swirl. It is a timeless pattern that never goes out of style, and there are a plethora of reasons why you should try it.
Firstly, it is incredibly easy to make, and you don’t need years of experience to create it. Secondly, since it’s a pattern made using different colors, it can brighten up any piece of clothing. Thirdly, it’s perfect for those who like to stand out from the crowd and show their unique personality through their clothing.
Finally, it’s a fun and relaxing activity that can be done with friends and family. So, go ahead, grab some dye, and start creating a swirl on your t-shirt or dress today!
A Beginner’s Guide to How to Tie Dye a Swirl
Step 1: Choose the Material
To start with, you need to select the article of clothing that you want to tie dye. Cotton is the best material for tie-dyeing as it absorbs the dye well. You can wear a T-shirt, hoodie, or any other cotton fabric.

Step 2: Layout Your Clothing
Once you have your fabric ready, lay it out on a flat surface. Pick the center of the fabric, hold it with your fingertip, and twist it in a clockwise or counterclockwise direction. Keep twisting the fabric till it forms a spiral shape.
Step 3: Secure the Fabric
Once you have the spiral shape, you must secure it. Use rubber bands to keep the fabric in place. Place the first rubber band at the spiral’s center, then continue placing the rubber bands at equal distances along the spiral till the end of the fabric. Ensure the rubber bands are tightly secured to prevent dye from seeping through.
Step 4: Get Ready to Dye
Now that the fabric is ready, it’s time to apply the dye. Prepare the dye as per the instructions on the package. Place the fabric in a plastic bag and pour the dye over it. Make sure to cover the fabric entirely. Seal the bag and let it sit for the recommended time mentioned on the dye package.
Step 5: Rinse and Dry
After the recommended time is up, remove the fabric from the plastic bag and rinse it in cold water until it is clear. Cut off the rubber bands, and rinse again in cold water until the water runs clear. Wash the fabric in a washing machine on a cold cycle, and then dry it.
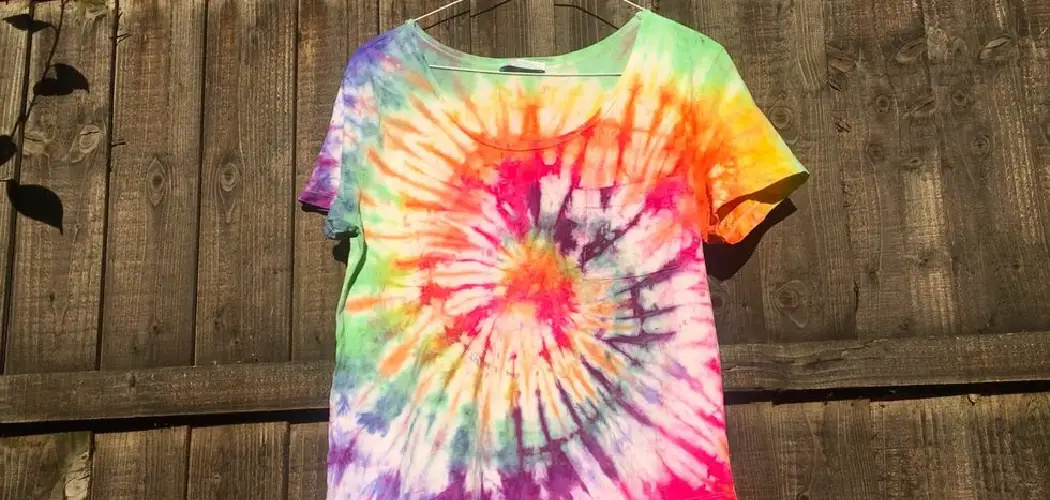
Step 6: Reveal Your Swirl Tie-Dye
Once the fabric is dry, remove it from the washing machine and unfold it. You should see a beautiful swirl pattern on your fabric. The colors will be vibrant and unique, as each tie-dye creation is one-of-a-kind.

Step 7: Wear and Enjoy
Congratulations, you have successfully tie-dyed a swirl pattern on your fabric! Wear your new garment with pride and enjoy the vibrant colors. You can also experiment with different color combinations and techniques to create various swirl designs. Have fun tie-dyeing! So, these were the simple steps on how to tie dye a swirl pattern on any cotton fabric. Try it out and let your creativity flow!
5 Considerations Things When You Need to Tie Dye a Swirl
1. Choose the Right Dye
When you are looking to tie dye a swirl, you first need to consider the type of dye you will be using. Many different types of dyes are available, so it is important to choose one that will give you the desired results. If you are looking for vibrant colors, then a fiber-reactive dye is recommended. This dye has a strong bond with the fabric and will ensure that your colors last for a long time.
2. Prepare Your Fabric
Once you have chosen your dye, it is important to prepare your fabric before beginning the tie-dye process. You should start by washing and drying your fabric thoroughly before tying it up and applying the dye. This will help ensure that all areas of the fabric have been properly prepped and that the colors stay true when applied.
3. Select Your Tie-Dye Pattern
The next step in creating a beautiful tie-dye swirl is selecting your pattern. The most popular way to create a spiral design is by folding your fabric into an accordion shape and then tying it off regularly with rubber bands or string. This will create sections where each color can be applied separately, allowing for more intricate designs.

4. Apply Your Dye
Now that your fabric has been prepared and your pattern has been selected, it’s time to apply your dye! When applying the dye, use even pressure when squeezing out each color so that they blend together nicely and create an even spiral effect on your fabric. It’s also important not to leave any gaps between each color, as this could lead to uneven results when finished.
5. Rinse and Dry
After all of your colors have been applied, it’s time to rinse out any excess dye from your fabric and let it dry completely before wearing or displaying it! To do this, fill up a sink or bucket with cold water and submerge your fabric until the excess dye has been removed from its surface. Once this has been done, lay out your piece on an old towel or cloth and let it air dry overnight before showing off your beautiful tie-dye swirl!
5 Benefits of Tie Dye a Swirl
1. Unique Patterns
Tie dyeing a swirl is an easy way to create unique patterns with the fabric you are dyeing. With this technique, you can create interesting swirls and circles in the fabric that will make each item one-of-a-kind. This method of tie dyeing is also great for creating intricate designs that would be difficult to achieve with other methods.
2. Color Combinations
Tie dyeing a swirl also allows you to experiment with different color combinations. You can mix and match colors to create various looks, from subtle gradients to bold, bright patterns. This technique also makes it easy to combine several colors into one pattern, allowing you to get creative and explore different color combinations.

3. More Control
When tie dyeing a swirl, you have more control over the final product than when using traditional tie dye techniques. With this method, you can control how much fabric is dyed in each area, how intense the colors are, and how much they blend. This allows you to customize your project to look exactly how you want it to look.
4. Quicker Process
Tie dyeing a swirl is also quicker than traditional tie dye techniques because there is less need for pre-dye preparation or post-dye finishing work. With this method, all you need to do is apply the dye directly onto the fabric and let it sit until it reaches your desired saturation level before washing out any excess dye. This makes it easier for beginners who may not have experience with more complex tie dying methods.
5. Cost Effective
Finally, tie dyeing a swirl is an economical option since all you need are dyes and fabric in order to complete the project successfully. The cost of materials needed for this project is usually lower than those needed for other types of tie dying projects, such as shibori or batik, due to its simplicity and lack of additional tools or supplies required.
6 Common Mistakes People Make When Trying to Tie Dye a Swirl
1. Not Pre-soaking the Fabric
One of the most common mistakes people make when trying to tie dye a swirl is not pre-soaking the fabric before it starts. Pre-soaking helps to ensure that the fabric will absorb the dye evenly, which is essential for creating a beautiful swirl pattern. To pre-soak, simply submerge your fabric in warm water and let it sit for at least 30 minutes before you begin tying and dyeing.

2. Not Using Enough Dye
Another mistake people often make when tying dye is not using enough dye. If you don’t use enough dye, your colors won’t be as vibrant, and your design won’t look as good. To avoid this, make sure you have plenty of dye on hand so that you can apply multiple coats if needed.
3. Not Tying Tightly Enough
When tying your fabric for tie-dyeing, it’s important to ensure that you’re tying tightly enough so that the dye doesn’t leak out or bleed into other areas of your design. If you don’t tie tightly enough, your design won’t turn out as well as it could have with tighter ties.
4. Overworking the Fabric
When working with tie-dye fabric, it’s important to be gentle with it and not overwork it too much while tying or applying the dye. Overworking can cause the fabric to stretch or tear and ruin your design in the process. Take your time when working with tie-dye fabrics and try to be gentle with them in order to get better results.
5. Not Letting It Dry Completely
Another mistake people often make when trying to tie-dye a swirl is not letting their fabric dry completely before washing it out or rinsing it off in cold water. This can cause some of the colors from one area of your design to bleed into another area, resulting in an uneven pattern or coloration on your finished product. Make sure you give your fabric plenty of time to dry completely before washing or rinsing it off in cold water!
6. Not Following Instructions Carefully
Finally, many people make mistakes when trying to tie-dye a swirl because they don’t follow instructions carefully or accurately enough when mixing their dyes or applying them to their fabrics. Make sure you read all instructions carefully and follow them exactly as written in order to get optimal results from your project!
Can I Use Any Type of Fabric for Tie Dyeing a Swirl?
Tie-dyeing a swirl is a fun and creative way to add a splash of color to just about any old piece of clothing. But when it comes to selecting the right fabric for your swirl, it’s important to tread carefully. Believe it or not, not all fabrics are created equal when it comes to tie-dyeing.

Some fabrics such as cotton, rayon, silk, and linen work particularly well with tie-dye because they are able to absorb and retain dye better. On the other hand, fabrics such as polyester and nylon can make it difficult for the dye to penetrate, resulting in a less vibrant pattern. By choosing the right fabric, you can be sure your tie-dye swirl will be bright, bold, and beautiful.
Conclusion
Tying a swirl for tie-dyeing is an exciting and easy technique that anyone can do. With just a few basic items and a little creativity, you can create a unique and colorful wardrobe. Remember, the key to tie-dyeing is to have fun and be creative. So, go ahead and experiment with different colors and patterns to create your personalized tie-dye designs! Thanks for reading our post about how to tie dye a swirl.