
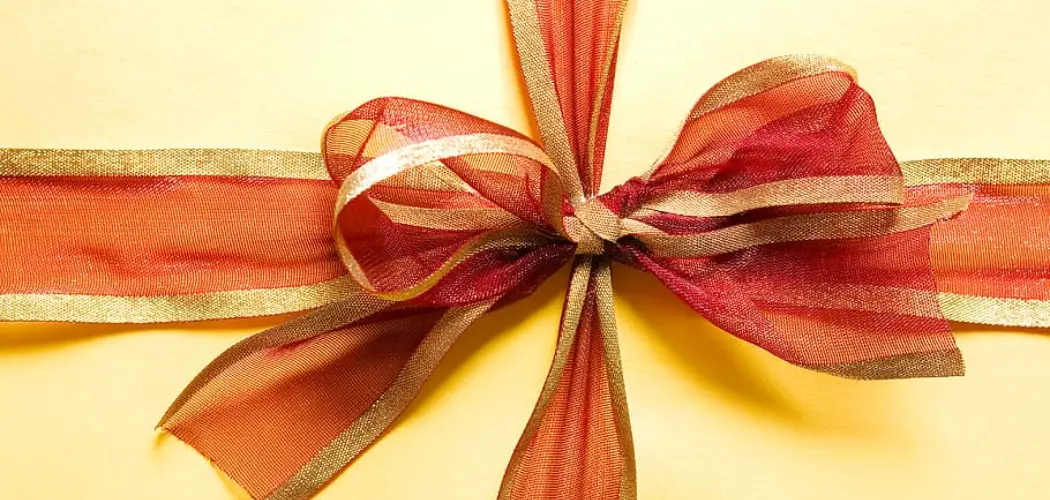
Burlap ribbon offers a beautifully rustic touch to flowers, gifts and home decor. However, with its coarse texture and tendency to fray, burlap can be challenging to work with compared to smoother fabrics. Over the years I’ve tried numerous techniques for neatly tying burlap ribbons into bows, and have gained an appreciation for why these handmade accents often look so effortlessly charming yet imperfect.

In this tutorial on how to tie a bow with burlap ribbon, I’ll share the step-by-step method I’ve developed for creating gorgeous burlap bows that hold their shape without frustration – so grab your spool of burlap ribbon and let’s get started! Using just a few simple tools and techniques, you’ll be an expert ribbon tier in no time.
Materials Needed
To tie a bow with burlap ribbon, you will need the following materials:
Burlap Ribbon:
You can find this in various widths and colors at craft stores or online.
Scissors:
A pair of sharp scissors will make it easier to cut the burlap ribbon.
Wire or String:
This will be used to secure the bow in place.
Ruler:
This will help you measure and cut the ribbon to your desired length.
11 Step-by-step Guidelines on How to Tie a Bow With Burlap Ribbon
Step 1: Cut a Length of Burlap Ribbon
Measure and cut the burlap ribbon to your desired length, leaving extra inches for making the bow. It’s better to have more ribbon than you think you’ll need, as it can always be trimmed down later. But be careful not to cut too little, as you’ll need enough length to work with. How much ribbon you need will depend on the size of the bow you want to create. You can use the ruler to make sure your cuts are even.

Step 2: Create a Loop with the Ribbon
Take one end of the ribbon and create a loop by folding it over, leaving enough length for the tail. This will be one side of your bow. It doesn’t have to be a tight loop, as the burlap ribbon is naturally stiff and will hold its shape. But you can always adjust it later if needed. This will be the base of your bow. It doesn’t have to be a tight loop, as the burlap ribbon is naturally stiff and will hold its shape.
Step 3: Create Another Loop
Create a second loop by folding the other end of the ribbon over in the opposite direction and crossing it over the first loop. This will be the other side of your bow, so make sure both loops are even in size. But don’t worry if they’re not perfect – that’s part of the charm of burlap bows. It may take some practice to get the loops just right, but it will be worth it in the end.
Step 4: Secure the Bow in the Center
Take a piece of wire or string and wrap it around the center of your bow, securing both loops in place. Make sure to leave enough length on the ends of the wire or string so you can use it to tie your bow wherever you plan to attach it. Otherwise, you can always trim it down later if needed. But having enough length will make it easier to work with. You can also use this wire or string to secure the bow onto your desired item.
Step 5: Adjust the Loop Sizes
At this point, you can adjust the sizes of your loops by pulling and shaping them. You can manipulate the wire or string to hold the shape of your bow while you make adjustments. Don’t worry if it’s not perfect – a little bit of imperfection adds character to burlap bows. It may take some practice to get the hang of shaping the loops, but don’t be afraid to experiment.
Step 6: Create More Loops
If desired, you can create more loops by repeating the previous steps. You can also use multiple strands of burlap ribbon to add volume and texture to your bow. Just make sure to secure each set of loops with wire or string before moving on to the next step. But be careful not to make your bow too bulky, as it can become difficult to handle and shape.

Step 7: Trim the Tails
Once you have created all of your desired loops, trim the tails to your desired length. You can leave them longer for a more dramatic look or opt for shorter tails for a more subtle bow. Just make sure they’re even in length and don’t forget to trim the wire or string as well. it will make your bow look cleaner and more professional.
Step 8: Fluff and Shape the Bow
Take some time to fluff and shape your burlap bow, adjusting the loops as needed. You can separate individual strands of burlap to add texture or twist them for a more polished look. Don’t be afraid to get creative and play around with different shapes and sizes until you’re happy with the result. It will take some practice, but you’ll eventually find your own unique style.
Step 9: Secure the Bow in Place
Once you’re satisfied with your bow, use the wire or string to secure it in place on your desired item. You can also use hot glue if needed, but be careful not to burn yourself as burlap can be a bit stiff to work with. You can also use the wire or string to create a loop for hanging your bow if desired. Just make sure it’s secure and won’t come undone. It’s always better to be safe than sorry.
Step 10: Add Finishing Touches

You can add additional embellishments to your burlap bow, such as a small flower or a sprig of greenery. This will add more dimension and interest to the bow. You can also use different colors or patterns of burlap ribbon for a more personalized look. The possibilities are endless, so don’t be afraid to get creative and make it your own.
Step 11: Admire Your Beautiful Burlap Bow
Congratulations! You have successfully tied a bow with a burlap ribbon. Now step back and admire your beautiful creation. With some practice, you’ll become an expert at making burlap bows in no time. Now that you know the basic techniques, you can experiment with different variations and styles to create unique and stunning bows for any occasion.
Following these step-by-step guidelines on how to tie a bow with burlap ribbon, you can easily tie a beautiful bow with a burlap ribbon. But don’t be afraid to add your own personal touch and make it your own. Whether you’re using burlap bows for gift wrapping, home decor, or any other creative project, they are sure to add a rustic and charming touch. Happy crafting!
Frequently Asked Questions
Q: Can I Use Hot Glue to Secure My Burlap Bow Instead of Wire or String?
A: Yes, you can use hot glue if needed. Just be careful not to burn yourself as burlap can be a bit stiff to work with. It’s always best to use caution when working with hot glue.
Q: How Do I Make a Larger Burlap Bow?
A: To make a larger burlap bow, simply use longer strands of ribbon and add more loops. Just be mindful not to make it too bulky as it can become difficult to handle and shape. Practice makes perfect, so don’t be afraid to experiment and find the size that works best for you.
Q: Can I Use Different Types of Ribbon to Make a Burlap Bow?
A: Yes, you can use different types of ribbons for a more unique and personalized look. Satin, lace, and sheer ribbons are great options to add texture and dimension to your burlap bow. You can also mix and match different fabrics for a more eclectic look. Just have fun and let your creativity flow!
Q: How Do I Store My Burlap Bows?

A: To store your burlap bows, you can gently fold them and place them in a box or container to keep their shape. You can also wrap them in tissue paper or bubble wrap to prevent any damage. Always make sure to store them in a cool, dry place to avoid any potential damage from moisture or heat.
Conclusion
To wrap it up on how to tie a bow with burlap ribbon, you should now have a good understanding of how to tie and style your burlap ribbon in the form of a bow. While it may seem complicated at first, with practice you’ll be an expert in no time. Try out different sizes for the loops or vary the size of the knot – these small changes can make a big difference in the overall look.
Take your time and experiment with colors and designs too – your creativity is sure to bring out some unique combinations. Embrace burlap ribbon bows as they provide an elegant way to spruce up any gift, wreath or centerpiece. We hope this article has given you plenty of ideas on how to create stunning and captivating bows with burlap ribbons – it’s time for you to put them into practice!
Expertise:
Crafting expert with a focus on innovative techniques and diverse materials.
Specialization:
- Textile arts (weaving, embroidery, and fabric dyeing)
- Woodworking and furniture design
- Mixed media and upcycling projects
Recognition:
- Featured in local art exhibits showcasing innovative craft projects
- Collaborated with community organizations to promote crafting workshops
- Received accolades for contributions to sustainable crafting initiatives
Mission:
- To inspire and empower crafters of all levels to discover their creative potential
- Encourages experimentation and self-expression through hands-on projects