
Making cloth napkins at home is a fulfilling and inexpensive way to add unique details to your dinner table decorations. Not only will you impress your guests with homemade items, but you’ll also save money on paper products while reducing waste.
This guide on how to sew cloth napkins walks you through every step of the process, from materials and design ideas all the way to binding and edging techniques for that perfect professional-looking finish.

All it takes is some fabric scraps, thread, scissors – and most importantly – patience! So get ready as we take this journey through creating beautiful and stylish cloth napkins for your next gathering!
Needed Materials
Given below is a list of materials you will need to sew your cloth napkins:
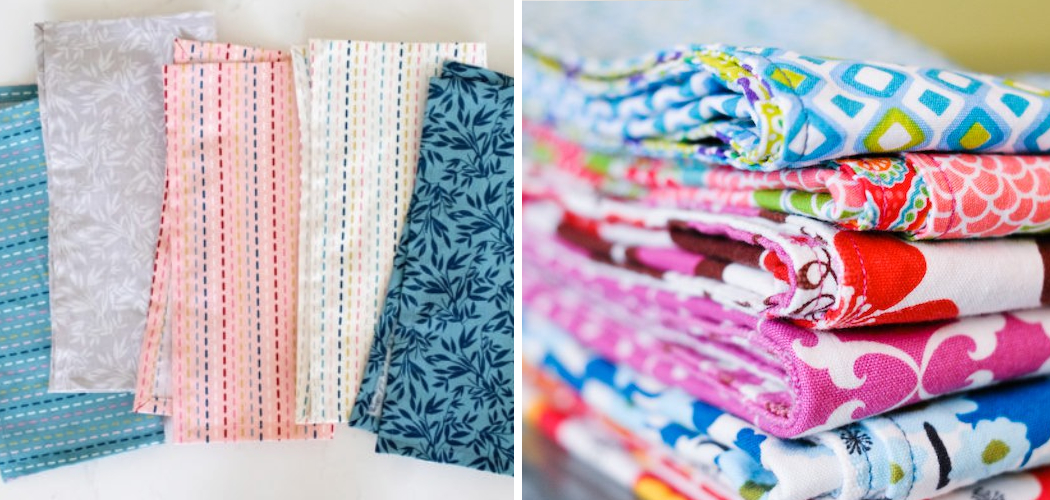
- Fabric Scraps in the Desired Pattern/colors
- Thread for Sewing Machine and Hand Stitching
- Scissors
- Iron
- Ruler or Measuring Tape
- Pins or Clips (Optional)
- Pattern Paper (Optional)
11 Step-by-step Guidelines on How to Sew Cloth Napkins
Step 1: Decide on a Pattern for the Napkins
You may choose to mix and match fabric scraps or use a single fabric color. Consider patterns such as striped, polka-dotted, floral, gingham, checkered, etc. It is essential to select and cut out the fabric pieces for your cloth napkins in advance. This will help you avoid any confusion or mistakes while sewing. But if you want to experiment, try placing the fabric pieces randomly on top of one another.
Step 2: Cut Out Fabric Pieces as Per Measurements
Use a ruler or measuring tape and scissors for accurate cutting. Generally, cloth napkins measure 20″x20″. You can adjust the measurements according to your needs. For example, you may decide to make the napkins slightly bigger or smaller.

It is recommended to add a half-inch or one-inch seam allowance to the measurements for a neat finish. But this step is optional if you are confident of your measurements. This step is also the time to make any changes you wish to before sewing.
Step 3: Place Fabric Pieces Right-side Together and Pin Together
The right sides of the fabric should be placed together for accurate sewing. You can use pins or clips to hold them in place while you sew. If you want a more professional finish, press the edges with an iron prior to sewing.
It would be best to refer to the pattern you have chosen, especially for more complex patterns. This step will help you get a better understanding of the pattern and guide your sewing process. It can also save time as you proceed with the project.
Step 4: Sew the Edges of the Fabric Pieces Together
Using a sewing machine, sew all four sides of the fabric pieces together. Make sure to leave an opening at one side so that you can turn the cloth napkin inside out later. But do not forget to add a few backstitches at the beginning and end of the seam.
It is also important to make sure that all four sides are sewn evenly, with no mistakes or skips in between. You may refer to the pattern for guidance. It is best to use a straight stitch for sewing cloth napkins.
Step 5: Trim Excess Fabric and Clip Corners
Now that the edges are sewn together, you can cut off the excess fabric along the seam allowance. This will help get rid of any bumps or irregularities while also making it easier to turn your cloth napkin inside out.

Additionally, clip the corners of the napkin to achieve a more professional-looking finish. Make sure all clipped edges are even so that they look neat when turned inside out. It is best to use sharp scissors for better accuracy. This will give you a better looking cloth napkin.
Step 6: Turn the Napkin Inside Out
Through the opening that was left while sewing, turn the napkin inside out to make sure the seam is tucked in properly. You can use a safety pin or something similar to help with this process. But do not forget to remove the pins or clips used earlier for holding the fabric pieces together.
Once turned inside out, press it with an iron for a neater finish. This will also help to press the seam in place. You can also use a chopstick or knitting needle to help press the fabric into corners and other tight spots.
Step 7: Press the Edges
Press the edges of your cloth napkins for a professional-looking finish. You can use an iron or simply press them down with your hands. It would be best to use pins or clips to hold the edges in place while pressing. This will help to maintain an even look for all your cloth napkins. But make sure to use the right temperature for the fabric you are working with. This will help to avoid any damage or discoloration.
Step 8: Topstitch the Edges
Using a sewing machine, topstitch the edges of your cloth napkins to give them a more finished look. This will also make sure that the seam does not come undone later. You can use a straight stitch or a zigzag stitch for this purpose.
But make sure that the topstitching is even on all sides of the cloth napkins. You may also opt to hand-sew the edges with an invisible stitch if you prefer. It is important to use the right thread for topstitching so that it does not stand out after sewing.
Step 9: Hand-stitch an Edge
To ensure extra strength, you can hand-stitch one edge of your cloth napkin with invisible stitches. Make sure there are no loose threads or knots when you are done. It is important to use the right thread for hand-stitching so that it does not stand out after sewing. You can even match the thread color with your fabric pattern or color. This will help to create a professional and attractive look for your cloth napkins.

Step 10: Create a Hem
You can create a hem or folded edge on the top of your cloth napkins to give them a stylish touch. You may use either hand-stitching or machine-stitching for this step. You can also opt to use a decorative thread for stitching the hem. This will add an attractive detail to your cloth napkins. Make sure the hemline is even on all sides of the cloth napkin for a better-looking finish.
Step 11: Place and Iron Interfacing (Optional)
Interfacing is a lightweight material that you can place between two fabric layers to give them an extra layer of strength. This step is optional but recommended for longer-lasting durability. Once the interfacing has been placed, press it down with an iron for a neat finish. Always refer to the instructions given on the interfacing packet for guidance.
Following these eleven steps on how to sew cloth napkins will give you beautiful cloth napkins whose style and beauty can match that of the most expensive stores. You’ll be able to save money while making something truly unique for your own home. So why not give it a try today? Who knows, you may just discover a new passion for sewing!
Do You Need to Use Professionals?
If you are not confident in your sewing skills or don’t have the time to make the cloth napkins yourself, there are professional companies and artisans who will be more than happy to help. Do a bit of research online and you’ll find plenty of reputable services with good reviews. You may also check out local craft fairs for independent artisans who specialize in handmade cloth napkins.
Making your own cloth napkins is an enjoyable and inexpensive way to add a touch of unique charm to any gathering or party. With the help of this guide, you now have all the necessary information for creating beautiful and stylish cloth napkins with ease!
So go ahead and get started today! Your guests will be impressed by your handiwork – and you can take pride in knowing that your napkins were made with your own two hands.

Frequently Asked Questions
Q: How Long Does It Take to Sew a Cloth Napkin?
A: This depends on your level of skill and the complexity of the design. Generally, it should take no more than an hour or two to complete a cloth napkin.
Q: What Types of Fabrics Can Be Used for Sewing Cloth Napkins?
A: You can use almost any type of fabric to make cloth napkins. Popular options include cotton, linen, silk, and even wool blends. However, be sure to use medium-weight fabrics as they are more durable for daily use.
Q: What Kinds of Edging Techniques Can I Use?
A: You can get creative with the edging techniques for your cloth napkins. Popular options include French seams, bias tape binding, zigzag finishes, and even decorative pom-poms or tassels!
Q: What Are the Best Types of Threads to Use for Making Cloth Napkins?
A: For most cloth napkin projects, you should use polyester threads as they are strong and durable. However, if your fabric is delicate or lightweight, then you should opt for a softer thread such as cotton or silk. Make sure to choose the appropriate weight according to the type of fabric you are using.
By following this guide, you can create beautiful and stylish cloth napkins for your next gathering or special occasion. So get creative and make something unique with just a few materials! Who knows, it may become one of your new favorite hobbies. Have fun and happy crafting!

Conclusion
Sewing cloth napkins can be an easy and rewarding project, one that’s satisfying and enjoyable. This tutorial has taken you through the basics of how to sew cloth napkins, from selecting your fabrics to folding, cutting, and finally stitching the finished pieces. Now you have the skills to make beautiful and functional cloth napkins of every size and color for any occasion.
Keep practicing these techniques you’ve learned today; whether you are an experienced seamstress or just starting out, it’s never too late to expand your sewing abilities. Not only will you develop your creative talents but you’ll be learning a useful practical skill as well. So keep going and see where it takes!