
Are you looking to add a touch of personality and style to your home? Want to give your house a quick makeover and an on-trend look? Adding wallpaper to walls in any room can bring new life and energy into the space. Wallpaper can be the perfect solution, allowing for bold patterns or subtle accents that make a room feel unique. However, before you get started on this DIY project, there are several steps you’ll need to take to prep the walls for your wallpaper application.

In this blog post, we will discuss how to prep walls for wallpaper to achieve quality results. We’ll cover everything from cleaning and priming the surface areas in question to selecting the correct adhesive and tools needed for wallpapering success – all so that you can ensure your space looks like something out of a magazine!
Necessary Items
Before you begin, gather the necessary items for adequately prepping your walls. You will need:
- A bucket of warm water and a sponge
- Gentle detergent or soap
- A scraper and caulk (for filling any holes or cracks)
- Sandpaper or sanding block
- Wallpaper adhesive recommended by the manufacturer
- Appropriate tools such as a wallpaper smoother or roller, scissors, and a razor knife
- A level and measuring tape
- Drop cloths to protect flooring
- A ladder (if necessary)
10 Steps on How to Prep Walls for Wallpaper
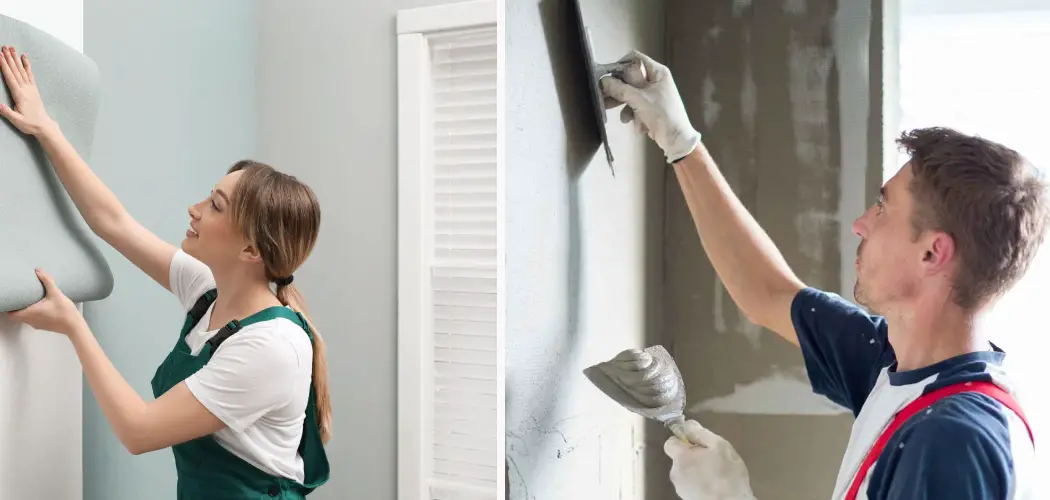
Step 1: Clean the Walls
First, use warm water and gentle detergent or soap to wash down the walls where you’ll apply wallpaper. This is important as it removes any dust, dirt, or grease that may affect the adhesive’s ability to stick. Use a sponge and gentle pressure, and rinse away any soap residue.

Step 2: Scrape and Caulk
Next, check for any holes or cracks in your walls. If you find any, use a scraper to remove loose debris and fill them with caulk. Once filled, smooth the caulk with a putty knife and let it dry completely before moving on to the next step.
Step 3: Sandpaper
Once the walls are clean and any holes or cracks have been sealed, it’s time to sand down any rough or uneven areas. This will help ensure a smooth surface for your wallpaper application. Use sandpaper or a sanding block and lightly sand in a circular motion. Be sure to wipe away any dust with a damp cloth.
Step 4: Prime
If you’re covering walls with wallpaper for the first time, it’s highly recommended that you prime them beforehand. Priming helps the adhesive bond better and results in a smoother finish overall. Follow the manufacturer’s instructions on how long to let the primer dry before proceeding.
Step 5: Measure and Cut
Before you start applying wallpaper, be sure to measure your walls accurately. This will help you determine the number of rolls needed and how much to cut each section. It’s essential to leave at least a few extra inches on all sides for trimming later.
Step 6: Mix Adhesive
Prepare the adhesive according to the manufacturer’s instructions. Most adhesives require mixing with water and a specific consistency. Mix the adhesive well and let it sit for a few minutes before use.

Step 7: Start Wallpapering
Starting at one corner of the wall, apply the wallpaper with a smoother or roller. Be sure to follow any specific pattern directions, if applicable. Smooth out any air bubbles as you go and continue until you reach the end of the wall.
Step 8: Trim Excess Wallpaper
Once the wallpaper is applied, use a razor, knife, or scissors to trim any excess paper along the edges and corners. Take your time and be careful not to cut into the wall itself.
Step 9: Repeat for Remaining Walls
Continue these steps for each wall you plan on covering with wallpaper, making sure to measure and cut the appropriate amount for each section.
Step 10: Let Dry
After covering all walls, let the wallpaper dry entirely according to the manufacturer’s instructions. Once dry, you can move furniture back in place and enjoy your newly wallpapered space!
Properly prepping your walls before applying wallpaper is essential for achieving quality results. By following these ten steps, you can ensure that your wallpaper will adhere properly and look flawless. Remember to take your time and follow the manufacturer’s instructions for best results.

8 Things to Avoid When Prepping Walls for Wallpaper
1. Skipping the Cleaning Step
Skipping cleaning your walls may result in poor adhesive performance and cause your wallpaper to peel or bubble over time.
2. Not Filling Holes and Cracks
Neglecting to fill any holes or cracks in your walls can create an uneven surface, leading to visible bumps and imperfections under your wallpaper.
3. Using the Wrong Adhesive
Using a low-quality or incorrect adhesive can prevent your wallpaper from sticking correctly, leaving you with a messy and unsatisfactory result. Always follow the manufacturer’s recommendations for best results.
4. Not Measuring Accurately
Failing to measure accurately may result in insufficient wallpaper to cover all the necessary areas, leading to an incomplete and unprofessional-looking job.
5. Not Letting Primer Dry Completely
Allowing primer to dry completely is crucial for proper adhesive bonding. Rushing this step can lead to a messy and challenging wallpaper application process.
6. Overlapping Wallpaper Seams
While it may initially seem like a good idea, overlapping wallpaper seams can lead to visible lines and uneven patterns. Always try to match the pattern up as closely as possible.
7. Not Using a Wallpaper Smoother or Roller
Using your hands to apply wallpaper may result in air bubbles and creases, making it difficult to achieve a smooth and seamless finish. Be sure to use a wallpaper smoother or roller for best results.

8. Not Letting the Wallpaper Dry
Rushing the drying process can lead to your wallpaper peeling or not adhering properly, resulting in a poor and unfinished look. Be patient and follow the manufacturer’s instructions for drying time.
Properly prepping your walls for wallpaper is essential for achieving a beautiful and long-lasting result. By following these steps and avoiding common mistakes, you can ensure that your wallpaper application process goes smoothly and leaves you with a stunning finished product.
Frequently Asked Questions
Can I Apply Wallpaper Over Old Wallpaper?
Applying wallpaper over old wallpaper is not recommended, as this can lead to an uneven surface and potential peeling or bubbling. It’s best to remove the old wallpaper before applying the new wallpaper.
How Long Does Wallpaper Take to Dry?
Drying time for wallpaper can vary depending on the type of adhesive used and the specific manufacturer’s instructions. It is essential to follow these instructions carefully to ensure that your wallpaper dries appropriately.
Can I Apply Wallpaper Over Textured Walls?
Applying wallpaper over heavily textured walls is not recommended, as this can create an uneven surface and make wallpaper application difficult. It’s best to smooth out any rough areas before applying wallpaper.
What Do I Do If My Wallpaper Starts to Peel?
If your wallpaper starts peeling, you can use a damp cloth to gently re-adhere it. However, if the peeling persists, it may be necessary to remove the wallpaper and start the application process again. Overall, proper preparation and application techniques can help prevent wallpaper from peeling in the first place. So be sure to follow these steps carefully for the best results.
Can I Use Regular Glue Instead of Wallpaper Adhesive?
No, it is not recommended to use regular glue as a substitute for wallpaper adhesive. Wallpaper adhesive is specifically designed for this purpose and will provide better results for your wallpaper application. It is worth investing in the proper adhesive for a successful project. In addition, using regular glue may damage the wallpaper or wall surface over time.
What Do I Do If My Wallpaper Starts to Bubble?
If you notice air bubbles under your wallpaper, try smoothing them with a smoother roller. If the bubbles persist, it may be necessary to remove and reapply that section of wallpaper. It’s essential to work carefully and avoid creating air bubbles during the application process.
Conclusion
In conclusion, prepping your walls for wallpaper requires time, patience, and a few materials that can be found at any home improvement store- but it’s worth it in the end to get beautiful results. With these critical steps, you can ensure your wall is adequately prepared and ready to take on your wallpaper. Properly prepping your walls before applying wallpaper is essential for achieving a beautiful and long-lasting result.
By following the steps on how to prep walls for wallpaper outlined in this guide, you can ensure that your wallpaper adheres properly and looks flawless. Remember to take your time, measure accurately, and choose the suitable adhesive for best results.
So now you are ready to tackle that wallpaper project and transform your space! Take a deep breath, trust the process, and dare to be bold – before you know it, you’ll have beautiful walls with unique wallpaper that adds personality and charm to any space. Don’t hesitate or doubt yourself – go forth and get creative!