Do you ever feel like your home décor is in need of a bit of sprucing up? Whether you’re looking to give your interior design a modern twist or add some rustic charm to your living space, one affordable and creative option for adding warmth and style is DIY paper cone trees.

Not only can these unique decorations be customized to fit any color scheme, but they are also relatively easy and cost-effective to make with supplies from local craft stores.
In this blog post, we’ll walk you through the steps of how to make paper cone trees that will instantly transform any room in your house!
Supplies You Will Need to Make Paper Cone Trees
- Cardstock paper or scrapbook paper in various colors and patterns
- Scissors
- Glue or tape
- Wooden dowels or sticks
- Decorative accessories (optional)
Step-by-step Guidelines on How to Make Paper Cone Trees
Step 1: Choose Your Paper
The first step to making paper cone trees is selecting the perfect paper. You can choose from a wide range of colors and patterns, including solid colors, metallics, and even glitter paper! For a more rustic look, you can also use recycled book pages or newspapers. Choosing different sizes of paper will also give your trees a unique look.
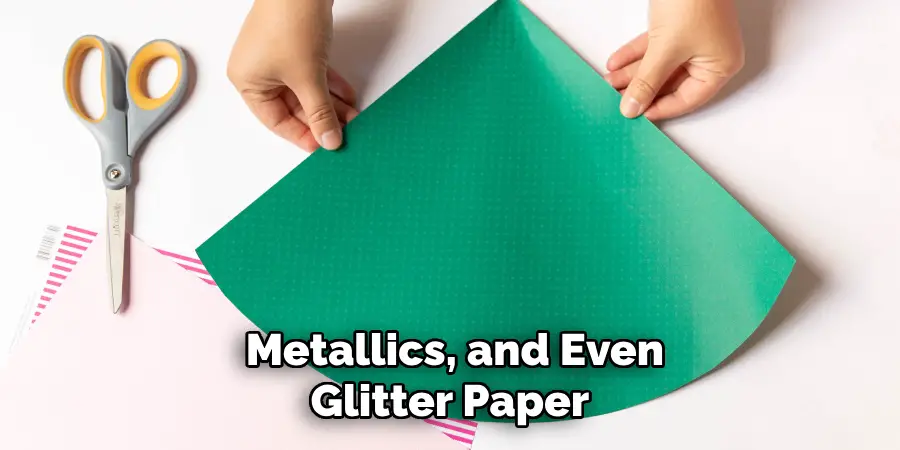
Step 2: Cut Out Paper Cones
Take a sheet of paper and cut it into a square. The size of the square will determine the final size of your cone tree, so feel free to experiment with different sizes. Then, fold the square in half diagonally to create a triangle shape. Next, fold one corner down to meet the opposite corner and crease.
This will create a smaller triangle. Cut off the excess paper at the bottom of the triangle, leaving a small straight edge for the base of your cone tree. Lastly, roll the triangle into a cone shape and secure it with glue or tape.
Step 3: Assemble Your Trees
Take your wooden dowels or sticks and wrap them in green tissue paper or paint them green to mimic tree trunks. Then, take your paper cones and attach them to the sticks using glue or tape. You can make multiple cone trees and arrange them in a vase for a cute centerpiece, or place them around your house for added festive charm.
Step 4: Add Decorative Accessories (Optional)
To add some extra flair to your paper cone trees, you can use decorative accessories like mini ornaments, ribbons or bows, and even string lights. Adding these small touches will make your trees look more festive and complete. Lastly, make sure to adjust the height and placement of your trees to create a visually appealing display.

Following these simple steps, you can easily make paper cone trees to add a touch of whimsy and creativity to your home décor. These DIY decorations are perfect for any occasion and can be made in different colors and sizes to fit your personal style.
So why not give it a try and see how these easy-to-make paper cone trees will make a big impact on your living space? So, start gathering your supplies and let your imagination run wild! Happy crafting!
Additional Tips and Tricks to Make Paper Cone Trees
1. Instead of using just one color or type of paper, experiment with different combinations to add more visual interest to your cone trees. You can mix and match solid colors, prints, metallic papers, and even recycled wrapping paper.
2. To give your cone trees a more festive look, consider adding glitter or sequins to the edges of your cones. You can also use paint or markers to create fun designs and patterns on the paper before rolling it into a cone shape.
3. If you want to add some height and dimension to your cone trees, try using different sizes of paper for each layer. This will create a tiered effect and make your trees stand out even more.
4. Don’t limit yourself to just paper when making cone trees. You can also use other materials such as fabric, felt, or even ribbons to create unique and textured cones.
5. To make your cone trees sturdier, you can glue them onto a cardboard base before decorating them. This will also make them easier to display on a flat surface.
6. Consider using different cone tree templates for more variety in your creations. You can find free templates online or create your own by drawing and cutting out various sizes and shapes of cones.

7. If you want to add some extra sparkle to your paper cone trees, try adding string lights or small battery-operated LED lights inside the cones. This will make them look extra magical, especially during the holiday season.
8. Don’t be afraid to add other embellishments to your cone trees such as ribbon bows, paper flowers, or mini ornaments. These small touches can really elevate the overall look of your paper cone trees.
9. You can also use paper cone trees as party decorations by adding them to a table centerpiece or hanging them from the ceiling with string or fishing lines. They can also make great party favors by filling them with small treats or trinkets.
Following these tips and tricks will help you create beautiful and unique paper cone trees that can be used as decorations for any occasion. Get creative, have fun, and see what other fun ways you can incorporate paper cone trees into your home decor or party planning. The possibilities are endless! So go ahead, grab some paper, and start making your own paper cone trees today. Happy crafting!
Precautions Need to Be Followed for Making Paper Cone Trees
1. First of all, it is important to ensure that the paper used for making paper cone trees is sturdy and thick enough. Thin paper will not hold its shape and the tree might collapse.
2. Secondly, it is important to use a good quality glue or adhesive to stick the edges of the paper together. Low-quality glue may not hold the cone in place and can cause frustration when making the trees.
3. It is also recommended to use scissors with sharp blades for cutting the paper into cones. Dull scissors can result in uneven and messy edges, making it difficult to create a neat-looking tree.

4. When folding the paper into a cone shape, make sure to press firmly along the edges to ensure a tight hold. Loose or poorly folded cones can cause the tree to lean or fall apart.
5. It is important to allow ample time for the glue to dry before proceeding to the next step. Rushing through this process can result in a weak hold and the tree might not stand upright.
6. Lastly, make sure to handle the trees with care once they are complete. These paper cone trees are delicate and can easily bend or tear if handled roughly.
Following these precautions will ensure a successful and sturdy paper cone tree that can be used for various decorations and crafts. Now, let’s take a look at some creative ways to use these trees!
Frequently Asked Questions
How Do I Decorate Paper Cone Trees?
Decorating paper cone trees is where you can get creative and add your personal touch. You can use items like glitter, sequins, pom poms, ribbons, or even paint to decorate the cones before stacking them. Some ideas include using different colors or patterns of paper, adding glitter to the edges, or creating designs with paint. You can also add a star on top or glue small ornaments onto the tree for a festive look.
Can I Use Other Materials Instead of Paper?
Absolutely! While paper is the most commonly used material for making cone trees, you can get creative and use other materials as well. Some ideas include using fabric, felt, or even foam sheets to make the cones. You can also use natural materials like leaves or twigs to create a unique and eco-friendly tree.
Can I Make Different Sizes of Paper Cone Trees?
Yes! The great thing about making paper cone trees is that you have complete control over the size and shape. To make smaller cones, simply use thinner and shorter strips of paper. For larger cones, use wider and longer strips of paper. You can also vary the size of each cone to create a more whimsical and unique tree.
How Can I Display Paper Cone Trees?
There are multiple ways to display paper cone trees, depending on your preference and the space available. You can stack them in a pyramid shape, hang them on a wall or door using string or adhesive hooks, or even place them individually around your home as table decorations. Get creative and find the perfect spot to showcase your handmade paper cone trees!
Conclusion
Now that you have all the necessary background and skills to make your own paper cone tree, why not start crafting one and see what beautiful decorations you can come up with? You can even fill it with colorful ribbons or snow-like glitter if you’d like. With a little time and dedication, you could easily have a handmade paper cone tree to look at each year as a reminder of the beauty of the Christmas season.
No matter what decorations you choose for your tree, it is sure to bring joy to everyone who sees it. So don’t wait, get creating! And show us how you’ve used How to make paper cone trees to create something unique and special this holiday season.

