
Are you looking for a fun and creative way to give your home a festive holiday makeover? Ornament clusters are an easy-to-make decorative masterpiece that is sure to add both sparkle and cheer to any room. Rich with color, texture, and dimension, these stunning artworks can be crafted with just a few simple materials from around the house.
Whether you’re designing one elaborate cluster or several smaller ones throughout your space, This guide will provide helpful steps and tips on how to make ornament clusters for making ornament clusters that will truly have visitors admiring your work of art.
Needed Tools and Materials
Below is a list of all the materials you will need to make your own ornament clusters:
- A Variety of Ornaments in Different Sizes, Shapes and Colors
- Ribbon or String for Hanging
- Glue Gun
- Floral Wire
- Scissors
- Wire Cutters
10 Simple Step-by-step Guidelines on How to Make Ornament Clusters
Step 1: Gather Your Ornaments
The first step in making your ornament clusters is to gather all of your materials. Be creative and choose ornaments in a variety of shapes, sizes, and colors that complement each other. You can use old or new ornaments as long as they are sturdy enough to hold together. It’s also a good idea to have some backup ornaments in case you need to fill any gaps.
Step 2: Organize Your Ornaments
Once you have all of your ornaments, it’s time to organize them. Place them in groups by color or size and think about how you want to arrange them in your cluster. This will help ensure that you have a good balance of colors and sizes throughout your design. You can also mix and match different styles of ornaments to add variety.
Step 3: Cut Your Floral Wire
Next, cut a length of floral wire long enough to create a loop at the top of your cluster and secure it to your hanging location. This will serve as the base for your ornament cluster. It’s better to cut a longer wire and trim it later if needed, rather than starting with a short piece. But don’t cut too long either, as it may become difficult to handle.
Step 4: Begin Hanging Ornaments
Start by tying a knot at the end of your wire and thread it through the loop at the top of one of your ornaments. Then, add another ornament and continue this process until you have about three or four ornaments on your wire. It’s essential to vary the lengths of your wire so that your ornaments are not all at the same level. But don’t make the top ornament too long, as it will be difficult to secure in later steps.
Step 5: Tie a Knot
Once you have a few ornaments on your wire, tie another knot. This will help secure the ornaments in place and prevent them from sliding down the wire. You can also add a small dot of hot glue to the knot for extra security.
If you have trouble tying knots, you can also use small pieces of tape to hold the ornaments in place. It won’t be visible once the cluster is complete. If you are using tape, make sure to wrap the wire tightly to avoid any slipping.

Step 6: Add More Ornaments
Continue adding ornaments and securing them with knots and glue until you have filled your wire. Remember to vary the sizes and colors of your ornaments for a more dynamic look.
You can also add smaller ornament clusters onto your main cluster to create even more dimension. Although, make sure to balance out the weight so that your cluster doesn’t become too heavy on one side.
Step 7: Trim Excess Wire
Once you have completed your cluster, take your wire cutters and trim off any excess wire. You can also use scissors to trim any unsightly ends sticking out from the ornaments. It’s crucial to be careful during this step, as the wire may be sharp.
You can also wear gloves for extra protection. But be sure to trim the wire close enough so that it’s not visible when hanging. It’s also a good idea to double-check that your ornaments are securely attached.
Step 8: Add Ribbon or String
To hang your cluster, take a piece of ribbon or string and tie it around the top loop. You can also use different colors to match your ornaments or a clear fishing line for a more subtle look. Make sure to tie the ribbon or string securely, and you can also add a dot of hot glue for extra reinforcement.
If you want to hang your cluster from the ceiling, tie another loop at the top of your main loop. It’s essential to make sure your cluster is balanced and not too heavy on one side.

Step 9: Hang Your Cluster
Once you have tied on your ribbon or string, it’s time to hang your ornament cluster. You can hang it directly on a wall, use a hook or nail, or suspend it from the ceiling with another piece of ribbon or string. Depending on where you plan to hang your cluster, make sure you have the right amount of support and that it’s secure.
You can also use extra pieces of ribbon or string to attach your cluster to other objects, such as a lamppost or banister. However, be careful not to overload your cluster with too much weight.
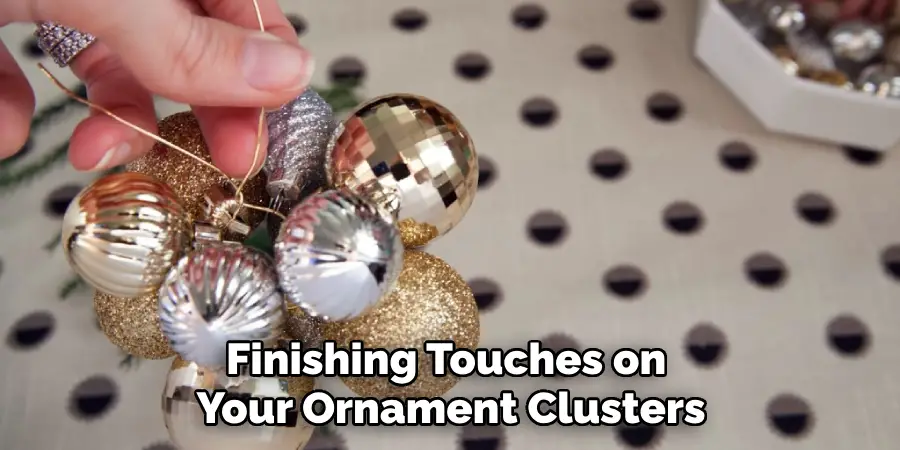
Step 10: Add Finishing Touches
Now that your ornament cluster is hung, you can add any finishing touches to make it stand out even more. You can attach small bows or ribbons around the cluster for a festive touch, or even insert some battery-powered lights inside for an illuminated effect.
The possibilities are endless, so let your creative juices flow and have fun with it! You can also make several smaller clusters and hang them throughout your space for a cohesive and eye-catching display.
Following these simple steps on how to make ornament clusters will have you creating beautiful and unique ornament clusters in no time. So gather your materials and start designing! Who knows, this may become a new holiday tradition for you and your loved ones to enjoy year after year.
Do You Need to Hire Professionals?
No, making ornament clusters is a fun and easy DIY project that anyone can do. You don’t need to hire professionals or have any special skills to create a stunning ornament cluster for your home.
Plus, it’s a great way to get into the holiday spirit and add a personal touch to your decorations. So why not give it a try? It’s simple, budget-friendly, and adds a beautiful touch to any space. So go ahead and try making your own ornament clusters this holiday season!
Frequently Asked Questions:
Q: Can I Use Any Type of Ornament for My Cluster?
A: Yes, you can use any ornaments as long as they are sturdy enough to hold together. However, it’s best to choose a variety of shapes, sizes, and colors for a more visually appealing design. It’s also a good idea to have some backup ornaments in case you need to fill any gaps.
Q: How Do I Keep My Cluster Balanced?
A: Varying the lengths of your wire and distributing the weight evenly will help keep your cluster balanced. You can also add smaller clusters to your main cluster to create more dimension and balance. But be careful not to make it too heavy on one side.
Q: Can I Hang My Cluster Outside?
A: Yes, you can hang your ornament cluster outside as long as it’s protected from harsh weather conditions. It’s best to use waterproof ornaments and secure them tightly to prevent them from falling.
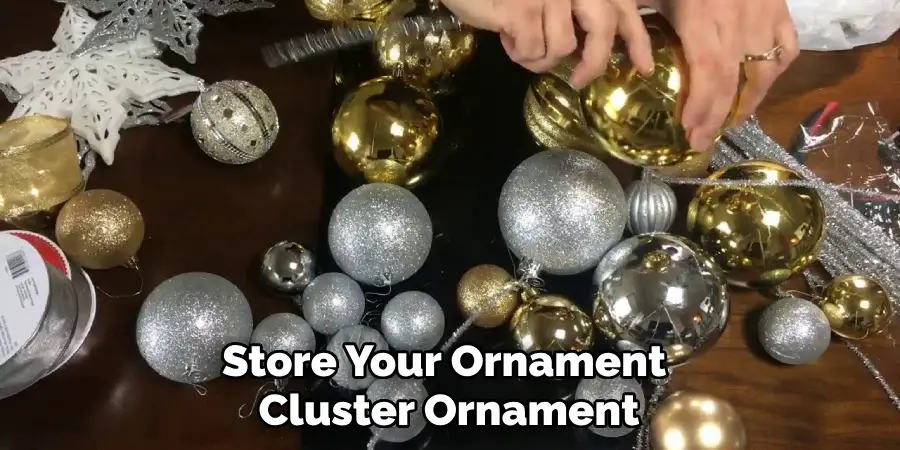
Q: How Do I Store My Ornament Cluster after the Holidays?
A: You can carefully dismantle your cluster and store it in a container with tissue paper or bubble wrap for protection. Make sure to label the container so that you can easily find it next year. Also, avoid storing your cluster in a humid or damp environment to prevent any damage to the ornaments.
Conclusion
Now that you know how to make your own ornament clusters, why not give it a try this holiday season? There’s nothing like creating a festive and unique look for your home that will enchant friends and family and bring joy to your space.
With just a little bit of effort, you can make something beautiful for the special holidays. So get creative, make some ornament clusters of your own, and spread the holiday cheer! And if you’d like more information, there are plenty of tutorials and videos that can help guide you through the process. Thanks for reading this article on how to make ornament clusters.