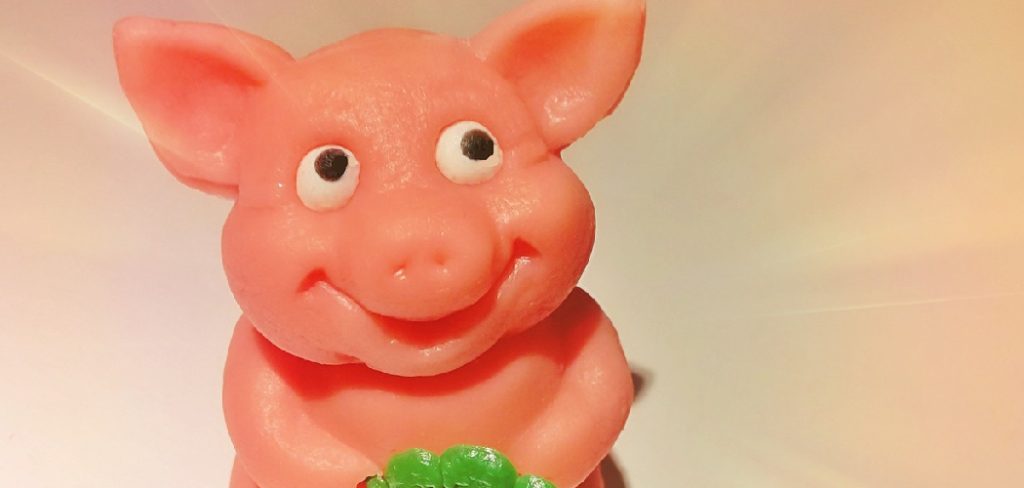
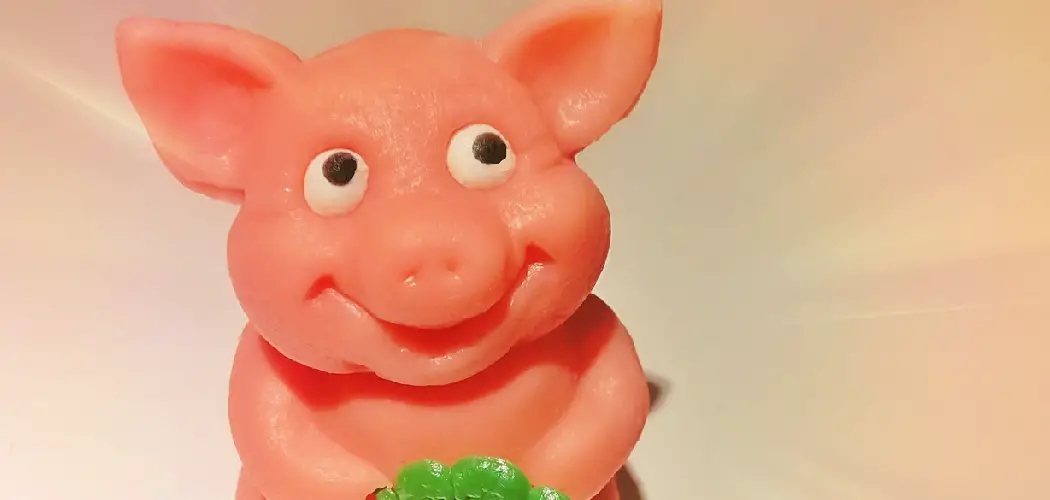
Ahh, marzipan – the sweet and chewy delight that adds a whimsical touch to any cake or festive gathering. Did you know it’s also surprisingly easy to make into fun shapes? This blog post will show you how to make marzipan pigs for the perfect edible centerpiece at your next party!
Marzipan pigs are a classic addition to Christmas celebrations in many European countries. These cute little figures represent good luck and prosperity, making them the perfect symbol for the holiday season.

Here, we’ll provide tips on where to buy quality ingredients, plus step-by-step instructions for creating these cute treats that will be a hit for kids and adults alike. So grab some almond paste and food coloring; let’s start with our homemade marzipan pig making adventure!
What Will You Need?
To make marzipan pigs, you’ll need the following ingredients and utensils:
- 1 cup of finely ground almonds
- 1/2 cup of powdered sugar
- One egg white
- A few drops of almond extract (optional)
- Pink and black food coloring gel or powder
- A mixing bowl and a spatula or wooden spoon for mixing
- Parchment paper or a non-stick surface for rolling out the marzipan
- A small round cookie cutter or a shot glass to cut out the pig’s body shape
- A knife for shaping and cutting details on the face and legs
Once you have these items, you’re ready to start creating your marzipan pigs!
8 Easy Steps on How to Make Marzipan Pigs
Step 1: Make the Marzipan Dough
In a mixing bowl, combine the finely ground almonds and powdered sugar. Stir them together until they’re well mixed. Then, add the egg white and a few drops of almond extract (if using) to your mixture. Stir all the ingredients together until you form a sticky dough. This will be the base for your marzipan pigs.

Step 2: Color the Dough
Split your marzipan dough into two portions, leaving one larger for the pig’s body and one smaller for the details like the nose and tail. Add a few drops of pink food coloring gel to the larger portion.
For the smaller portion, add a tiny amount of black food coloring gel. Mix each portion until the color is uniform. Remember, adding more coloring than removing it is easier, so start with a small amount and add more if necessary.
Step 3: Shape the Pig’s Body
Take the pink marzipan dough and divide it into small pieces; each piece will eventually become a pig. Roll each piece into a round ball for the pig’s body. Next, gently pinch one end of the ball to form the snout, then flatten the opposite end for the bottom.
Take a knife for the pigs’ legs and make four small indents around the bottom of the body. Remember, marzipan is very forgiving, so don’t worry if it’s imperfect; it will still look like a cute pig!
Step 4: Create the Pig’s Features
Now, let’s move on to the pig’s face. Take a small piece of pink marzipan dough for the nose and shape it into a tiny oval. Attach it to the snout and use your knife to make two small holes for the nostrils.
For the eyes, take two little pieces of black marzipan dough and roll them into small balls, then press them onto the face above the snout. Take two additional small pieces of pink marzipan for the ears, shape them into small ovals, and attach them above the eyes. Finally, for the tail, roll a tiny piece of pink marzipan into a thin coil and attach it to the back of the pig’s body.
Step 5: Let the Marzipan Pigs Dry
After you have completed shaping your marzipan pigs, it’s time to let them dry. Place your pigs on a non-stick surface or parchment paper and leave them in a cool, dry place for about 24 hours. This will help the marzipan hold its shape and the colors to set. Be sure not to cover them, as this could cause them to become sticky. Once the pigs are dry, they will be ready to be used as a delightful addition to your holiday table or packaged as a charming homemade gift. Enjoy your handmade marzipan pigs!

Step 6: Storing Your Marzipan Pigs
Proper storage of your marzipan pigs can extend their freshness and taste. Place the dehydrated marzipan pigs in an airtight container, separating layers with parchment paper to prevent them from sticking together.
Store the container in a cool, dry place away from direct sunlight. When properly stored, your handmade marzipan pigs can stay fresh for up to two weeks. Remember, these marzipan pigs make delightful treats and beautiful gifts for friends and family during the holiday season.
Step 7: Presenting Your Marzipan Pigs
Presentation is vital when it comes to your marzipan pigs. You can display them atop a cake, add them to your sweets platter, or even package them into small gift boxes to surprise your loved ones. If you place them on a cake, ensure it has cooled completely to prevent the pigs from melting.
For a sweets platter, you can arrange them with other treats like cookies, candies, and chocolates. If you’re packaging them as gifts, consider using a clear box or cellophane bags tied with a festive ribbon. This will showcase your delightful, handmade marzipan pigs and make your gift unique.
Step 8: Enjoying Your Marzipan Pigs
Now comes the best part – savoring your homemade marzipan pigs! These charming edible creations serve as fantastic decor and delicious sweet treats. Their soft, chewy texture combined with almonds’ rich, nutty flavor makes them an enjoyable delicacy. Remember, they symbolize good luck and prosperity, so make a wish before biting. Enjoy these marzipan pigs as part of your festive celebrations or as a delightful snack anytime you desire a sweet treat.

Following these ten easy steps, you can create your own marzipan pigs at home! With a few simple ingredients and some creativity, you can make these charming and delicious treats to impress your friends and family.
5 Additional Tips and Tricks
- Using Food Coloring: Consider using red and yellow food coloring to give your marzipan pigs a more realistic hue. Mix these until you achieve a perfect pink tone.
- Add Texture with Tools: Using a toothpick or a small knife can help add texture and details to your marzipan pigs. This can make them look more lifelike.
- Store Properly: If not served immediately, marzipan pigs should be stored in a cool, dry place, wrapped in plastic wrap to prevent them from drying out.
- Use Quality Almond Paste: The quality of your marzipan pigs dramatically depends on the almond paste you use. Investing in a good brand can make a noticeable difference in the final product.
- Practice Makes Perfect: Like any craft, the more you practice, the better your marzipan pigs will look. Don’t be discouraged if your first few attempts don’t appear as expected. Keep trying!
With these additional tips and tricks, you can take your marzipan pig making skills to the next level.
5 Things You Should Avoid
- Overuse of Food Coloring: While a bit of food coloring can give your marzipan pigs a realistic hue, too much can alter the flavor and texture of the marzipan. Use sparingly.
- Complicating the Design: While intricate designs may look impressive, they can be simple for beginners. Start with simple designs and gradually add more detail as you gain confidence.
- Poor Storage Conditions: Marzipan pigs can become complex and stale if stored improperly. Avoid humid or overly warm storage environments.
- Using Expired Almond Paste: Almond paste has a shelf life, and using expired paste can affect both the taste and texture of your marzipan pigs. Always check the expiry date before use.
- Impatience: Patience is vital when making marzipan pigs. Take your time with the process, which can lead to mistakes and an inferior end product.
By avoiding these common mistakes, you can ensure that your marzipan pigs turn out perfectly every time.
5 Different Flavor Ideas to Try
- Chocolate Marzipan Pigs: Add cocoa powder to your marzipan mixture for a rich, decadent chocolate twist.
- Citrus Marzipan Pigs: Mix in lemon or orange zest for a refreshing citrus flavor.
- Spiced Marzipan Pigs: Add some ground cinnamon, nutmeg, or ginger for a warm and aromatic flavor.
- Coconut Marzipan Pigs: Swap out some of the almond meal with desiccated coconut for a tropical twist.
- Matcha Marzipan Pigs: Mix in some matcha powder for a unique and vibrant green color and a subtle earthy taste.
These are just a few flavor ideas to experiment with, but feel free to get creative and come up with your unique combinations.

Conclusion
To conclude, making marzipan pigs is a great way to add a bit of festive cheer to any celebration! Not only are they easy to make and fun to decorate, but they’re also delicious. Armed with these tips, you can customize marzipan pigs in any way.
Hopefully, this guide on how to make marzipan pigs has helped you understand the process of making marzipan pigs and given you some ideas for your next batch. Remember to have fun and get creative, as the possibilities are endless when it comes to these adorable little treats.
So don’t be afraid to get creative with your unique marzipan pig – the possibilities are endless! Why not give your loved ones the sweetest gift this season – homemade marzipan pigs? You won’t regret it. Happy baking!

