
Unlock your inner creativity and add a touch of elegance to your hair accessories collection by learning how to make barrettes with ribbon. Barrettes are not only functional but also offer an opportunity to showcase your unique style.
Crafting your own barrettes allows you to tailor them to suit various occasions, from everyday chic to special events. Using ribbons as the main material opens up a world of possibilities for textures, colors, and patterns. In this guide, we’ll delve into the art of crafting beautiful and versatile barrettes with ribbon.

From classic designs to intricate embellishments, you’ll discover step-by-step methods that enable you to design eye-catching barrettes that perfectly complement your personal style and elevate your hair accessory game. Whether you’re a crafting enthusiast or a beginner looking for a stylish DIY project, these techniques will help you create stunning barrettes that add flair to your hairstyles.
The Concept of Crafting Stylish and Personalized Barrettes Using Ribbon
Creating barrettes with ribbon is a great way to bring your own unique style and personality to your look. With just a few simple supplies, you can craft stylish barrettes that are perfect for any occasion. Whether it’s an accessory for everyday use or a special form of hair decoration for special occasions, these ribbon-made barrettes will make sure you stand out from the crowd.
First, you’ll need to collect some supplies: ribbon in any desired color or pattern, scissors, and barrette clips. Once you have your supplies, it’s time to get creative. Cut the ribbon into strips that are 2-3 inches long and about 1/2 inch wide. If you want to create a different look, you can cut the ribbon into strips of varying widths.
Once you have your desired lengths and widths, it’s time to attach the barrette clips to the ribbon. You’ll want to clip one end of each strip securely onto the barrette clip.
Next, take your scissors and trim any excess ribbon from around the clip. This will help give your barrette a neat and finished look. Now, you can get creative with how to tie the ribbon strips together. You can make different knots or bows if desired. Once you have your ribbon ties secured in place, your barrettes are ready to wear!

The Versatility of Ribbon Barrettes as Fashionable Accessories
Ribbon barrettes are a fun, affordable way to add a colorful touch of style to any outfit. Not only are they versatile in terms of the different colors and patterns you can use, but they can also be easily customized to fit your own unique style. Whether you’re looking for something classic or eye-catching, ribbon barrettes offer a great way to accessories your look.
To make sure you get the most out of your ribbon barrette, here are a few tips on how to choose the right one for you:
- Choose colors that match or complement the other accessories and clothing items in your outfit. If you want something more bold and daring, opt for bright colors such as neon yellows and pinks.
- Consider the length of your hair when selecting a ribbon barrette. If you have shorter hair, opt for a larger one that can adequately hold all of your hair in place. If you have longer hair, go with a narrower barrette so it won’t look bulky or too big for your hairstyle.
- Look for ribbons that are made of quality materials, such as polyester or satin. These types of fabric will be more durable and won’t fray easily.
- For a more refined look, choose ribbon barrettes with subtle details like bows or embroidery. This can add a touch of sophistication to your overall style.
So go ahead and experiment with ribbon barrettes to create unique, fashionable looks that are sure to turn heads. With a little bit of creativity, you can find the perfect ribbon barrette for any season or occasion. Enjoy accessorizing!
10 Methods How to Make Barrettes with Ribbon
Method 1: Regal Ribbon-Wrapped Barrette
Embark on your journey by mastering the classic ribbon-wrapped barrette. Begin with a sleek metal barrette base and a ribbon that resonates with your style. Cut the ribbon slightly longer than the barrette, then fix one end with a dab of glue.

Begin winding the ribbon tightly around the barrette, ensuring each layer aligns impeccably. Secure the other end with glue and let it dry. The result is a chic and polished barrette that allows the ribbon’s color and texture to shine.
Method 2: Bow-Tie Elegance
Elevate your look with a sophisticated bow-tie ribbon barrette. Fashion this timeless accessory by cutting two equal lengths of ribbon for the tails and a shorter piece for the bow’s center. Cross the tails over the center and knot them, allowing for graceful loops.
Adjust the loops and tails until achieving the desired bow shape and proportion. Affix the completed bow to a barrette base using glue, resulting in a refined accessory that exudes understated elegance.
Method 3: Blossoming Ribbon Flower Barrette
Channel your inner artist by crafting a ribbon flower barrette adorned with delicate petals. Cut the ribbon into individual petal shapes and layer them, using glue to secure each layer.
Create depth and dimension by alternating colors and sizes. Center the flower with a decorative button or bead, then attach it to the barrette base. This method yields a barrette that is both charming and intricate.
Method 4: The Twisted Ribbon Delight
Inject a twist of creativity into your barrette designs by crafting a twisted ribbon masterpiece. Begin by cutting a length of ribbon and folding it in half. Twist the folded ribbon to create a spiral effect, then secure it to the barrette base. The twisted ribbon adds a touch of dynamism and playfulness to your hair accessory, making it a conversation starter.
Method 5: Layered Ribbon Mosaic
Harness the art of layering to create a captivating mosaic of ribbons on your barrette. Cut ribbon pieces of varying lengths and widths, then assemble them in an artistic arrangement. Glue the ribbons onto the barrette base, letting them overlap and interact visually. The resulting creation boasts depth and texture, making it a true work of art for your hair.
Method 6: The Ruffle Reimagined
Craft an ultra-feminine and whimsical look with the ruffled ribbon barrette. Cut a piece of ribbon and create ruffles by sewing a gathering stitch along one edge. Gather the ribbon to create the ruffles, then sew it onto the barrette base. The ruffles lend a romantic and soft texture, adding a dash of charm to your hairstyle.

Method 7: The Ribbon-Wrapped Snap Clip Transformation
Elevate ordinary snap clips into exceptional barrettes by enveloping them with ribbon. Commence by adhering one end of the ribbon to the clip and winding it around tightly. Secure the ribbon’s end with glue, resulting in a revamped snap clip that is both functional and stylish. This technique allows for a quick and customizable transformation of everyday accessories.
Method 8: The Geometric Fusion
Infuse a modern twist into your barrettes by embracing geometric designs. Cut ribbon into triangles, squares, or other geometric shapes, then arrange and glue them onto the barrette base to form captivating patterns. This method combines contemporary aesthetics with the traditional elegance of ribbon, resulting in a unique and eye-catching accessory.
Method 9: The Ribbon Weave Artistry
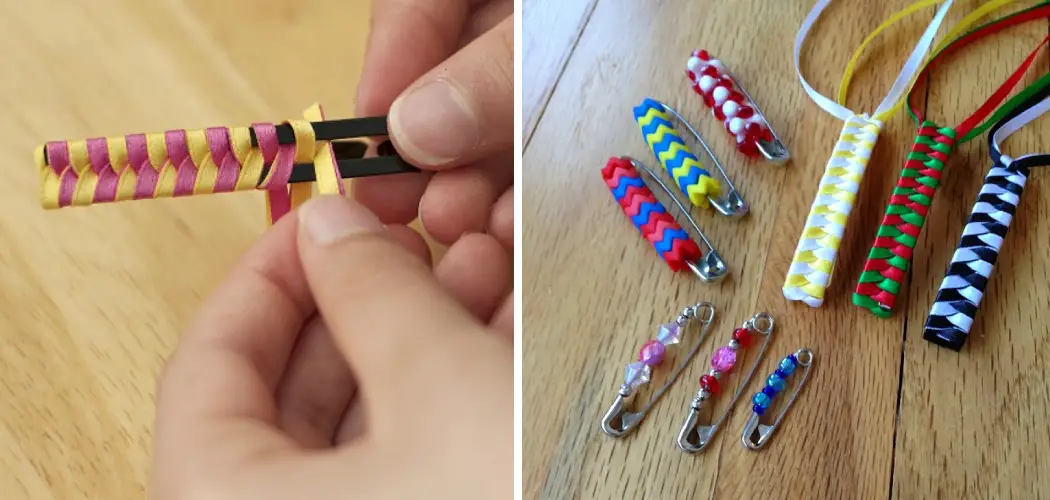
Immerse yourself in the intricate art of ribbon weaving to create a truly exceptional barrette. Cut ribbon into strips and weave them through the prongs or openings of the barrette base. This technique marries precision and creativity, resulting in a textured masterpiece that is a true testament to your craftsmanship.
Method 10: The Ombre Symphony
Embrace the enchantment of color gradients by designing an ombre ribbon barrette. Select ribbons in complementary shades that transition from light to dark. Arrange and glue them in a gradient pattern on the barrette base. This technique creates a mesmerizing play of colors that adds depth and visual intrigue to your hair accessory.
Things to Avoid When Making Barrettes with Ribbon
When making barrettes with ribbon, you should avoid a few key things to ensure your project goes smoothly. Ribbon can be tricky to work with and it’s important to make sure that you use the right materials and techniques so that your finished product is something you can be proud of. Here are some tips for avoiding common mistakes when making barrettes with ribbon.
- Avoid using plain ribbon for making barrettes, as it is too thin and will not hold the shape of the barrette well. Look for thicker ribbons or a stiffer fabric like grosgrain to make sure that your barrette holds its form.
- Be careful when cutting your ribbon so that you get a nice, even cut. If the edges are uneven or frayed, it will be difficult to attach the ribbon to the barrette clip in a neat and tidy way.
- Be sure to use strong glue for attaching the ribbon to the clip. Glue that is too thin can cause the ribbon to come off of the barrette after only a few uses.
- When adding embellishments to your barrette, use a strong adhesive to make sure it is secured firmly. Glitter glue or hot glue works well for this purpose.
- Make sure that you store the barrettes in a safe place when not in use, as they can easily be bent out of shape if not cared for properly. Wrapping them in tissue paper and keeping them in an upright position is the best way to keep your barrettes looking great.

Follow these tips and you’ll be sure to have beautiful barrettes that will last for years!
Conclusion
There you have it. Everything you need to make your own beautiful and unique barrettes with ribbon! With this guide, you will be able to customizations for every occasion or mood. Assembling different colors and patterns of ribbon creates a look that is truly unique and can’t help but catch the eye!
So whether you are looking for something to make for yourself or are making these barrettes as a gift for someone special, by following these steps, you’ll be sure to make a barrette that will turn heads. Follow these simple instructions outlined in this blog post about how to make barrettes with ribbon, and you’ll be able to get the job done with ease.