
Are you ready to add a touch of Polynesian beauty to your home or wardrobe? Making an orchid lei is a great way to bring the vibrant colors and simple elegance of Hawaii into your décor. Not only is it beautiful, but making an orchid lei can also be incredibly easy and fun – once you know how!

In this post, we’ll take a look at everything you need to know about how to make an orchid lei. From selecting the right type of flower, understanding where and how to string them together, and even discovering how long they last – by the end of this blog post, you’ll have all the necessary tips for crafting one yourself!
Step-by-step Guidelines on How to Make an Orchid Lei
Step 1: Choosing the Right Orchids
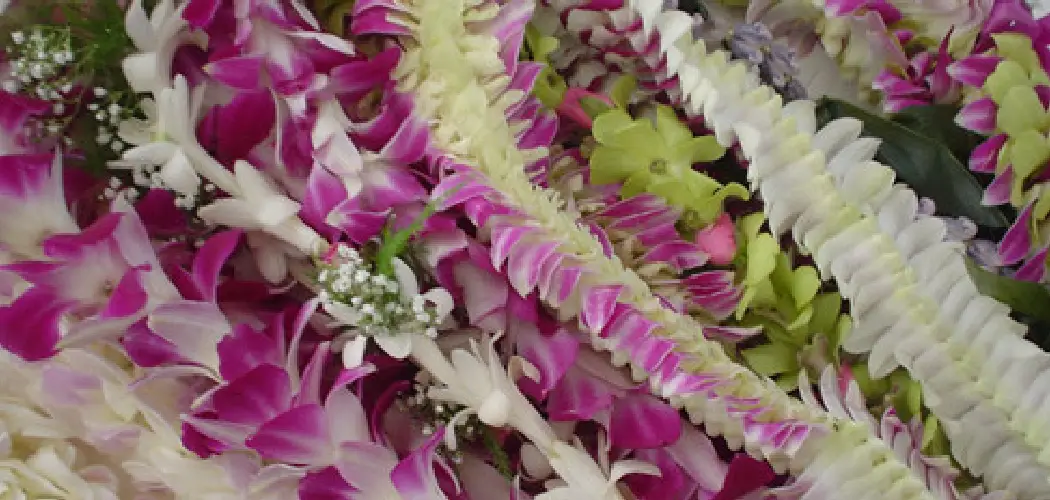
The first step in creating an orchid lei is choosing the right flowers. The most common types of orchids used for leis are Dendrobium and Phalaenopsis, as they come in a variety of colors and have sturdy stems that make them ideal for stringing together. You can find these flowers at your local florist or even online.
Step 2: Preparing the Flowers
Before you start stringing the flowers, it’s essential to prepare them properly. Gently remove any excess leaves from each stem and cut off any damaged or discolored petals. This will ensure that your lei looks fresh and beautiful. Preparing the flowers also prolongs their lifespan. This step is particularly crucial if you are using fresh orchids.
Step 3: Stringing the Lei

Once you have prepared your flowers, it’s time to start stringing them together. Take a long length of strong thread or fishing line and thread on one flower at a time, starting from the base of the stem. You can alternate between different colors or types of orchids to create a more unique and colorful lei. Stringing the lei can be done in a few different ways, depending on your preference. One method is to use a needle to thread the flowers onto the line, while another option is to tie each flower individually.
Step 4: Adding Accents
If you want to add some extra flair to your orchid lei, consider incorporating other elements, such as small beads or ribbons. This will add a personal touch to your lei and make it even more eye-catching. Adding accents is also an excellent way to use up any leftover flowers or materials. You can experiment with different combinations to find the perfect look for your lei.
Step 5: Finishing Touches
Once you have strung enough flowers to create a full, flowing lei, tie the ends of the thread or fishing line together securely. You can also trim any excess string or flower stems if needed. Your orchid lei is now complete. Make sure to store it in a cool, dry place until you are ready to wear or display it.
Following these simple steps, you can create your very own orchid lei that will last for days or even weeks. With the right choice of flowers, proper preparation, and creativity in stringing and adding accents, you can make a stunning lei to wear yourself or give as a gift.
Additional Tips and Tricks to Make an Orchid Lei

1. When choosing orchid flowers for your lei, make sure to pick ones that are in full bloom and have a strong fragrance. This will give your lei the best visual and aromatic impact.
2. Before stringing the flowers onto the lei, cut off the bottom of each stem at a diagonal angle. This will help the flowers absorb more water and stay fresh longer.
3. To keep your lei looking fresh and vibrant, mist it with water every few hours or place it in a plastic bag with a damp paper towel until you are ready to wear it.
4. If you want to add some extra color to your lei, you can incorporate other types of flowers or greenery into the design. Just make sure they are compatible with orchids and won’t wilt too quickly.
5. If you are making a long lei, consider using a combination of short and tall flowers to add dimension and texture to the design.
6. Don’t be afraid to experiment with different types of knots or techniques for stringing the flowers onto the lei. You can create unique patterns or designs by varying the spacing between each flower.
7. To add a personal touch to your lei, consider adding small charms or beads throughout the design. This can also help add weight and balance to the lei.
8. If you are giving the lei as a gift, consider wrapping it in tissue paper or placing it in a decorative box before presenting it to the recipient. This will make it feel like an even more special and thoughtful gift.
9. Don’t limit yourself to just using orchids for your lei-making. You can also incorporate other types of flowers, such as plumeria or carnations, for a unique and colorful look.

Following these tips and tricks can help you create a beautiful and long-lasting orchid lei that is sure to impress. Have fun with the process and let your creativity shine through! So, go ahead and gather some fresh orchids, grab some string or ribbon, and start creating your own unique orchid lei today.
Precautions Need to Be Followed for Making an Orchid Lei
1. First and foremost, it is important to source fresh orchid flowers for making a lei. Using wilted or old flowers will result in a less attractive and long-lasting lei.
2. It is recommended to pick a variety of colors in the orchid flowers to create an eye-catching and vibrant lei. However, make sure that the colors complement each other well.
3. Before starting the process of lei-making, it is important to have all the necessary tools and materials ready. This includes scissors, needle and thread, tape, and ribbon or string.
4. It is important to handle the orchid flowers with care as they are delicate and can easily bruise or wilt. Avoid crushing or pulling on the petals while handling them.
5. When selecting the flowers, make sure they are not too small or too large. Smaller flowers may result in a flimsy lei, while larger ones can be difficult to work with and may not hold their shape well.
6. Ensure that the stem of each flower is clean and free from any dirt or debris. This will prevent the lei from getting dirty or damaged.
7. As you begin stringing the flowers, make sure to keep them facing the same direction. This will give a uniform and neat appearance to the lei.
8. When tying knots between each flower, make sure they are not too tight or too loose. A moderate tension is necessary to hold the flowers in place without damaging them.
With the right precautions and attention to detail, anyone can create a beautiful and long-lasting orchid lei. These delicate flowers deserve to be handled with care and will reward you with a stunning lei that will be cherished for its beauty. Happy lei-making!
Frequently Asked Questions
How Do I Select the Right Type of Orchids for My Lei?
When choosing orchids for your lei, it is important to consider the color and size of the blooms. You want to select orchids that are vibrant in color and have a good size to them. Avoid selecting orchids that are too small or wilted, as they will not hold up well in the lei-making process.
Can I Use Any Type of String for My Lei?
While you can technically use any type of string for your lei, it is best to choose a strong and durable type of thread or string. This will ensure that your lei will hold up well over time and not break easily.
How Do I Prepare the Orchids for Making the Lei?
Before beginning the lei-making process, make sure to prepare your orchids by removing any excess leaves or stems. You can also trim the ends of the orchids and place them in a container with water to keep them fresh.
What Is the Best Way to String the Orchids?
To string the orchids, take your strong thread or string and make a knot at one end. Then, using either a thin needle or a sharp pin, carefully poke through the center of each orchid bloom. String the blooms onto the thread, spacing them out evenly. Once all the orchids are strung, tie a knot at the other end to secure them in place.
How Do I Create a Traditional Braided Orchid Lei?

To create a traditional braided orchid lei, you will first need to make three separate leis using the above instructions. Once the leis are made, braid them together to create a thicker and more intricate lei. You can then tie the ends together to complete the braided orchid lei.
Conclusion
Knowing how to make an orchid lei is a beautiful and meaningful skill to have. It allows you to create a personalized and unique gift for your loved ones, or even for yourself. With the proper selection of orchids and string, as well as careful preparation and stringing techniques, you can make a stunning lei that will last for days. So gather your supplies and give it a try – you may just discover a new hobby in the process! Happy lei-making!