
Making a personalized welcome mat for your entryway has never been easier – and it can save you time, money, and energy! With just a few simple steps on how to make a doormat with cricut using the Cricut cutting machine, you’ll have an attractive and sturdy doormat to greet your visitors with.
Not only will it give your space a personalized touch of style, but it also makes a great gift for friends or family. So forget about spending hours in the craft store searching for that perfect door mat; now you can make one yourself with all the benefits of customization – plus none of the hassle. Read on to learn how easy creating custom mats with Cricut really is!
What is Cricut?
Cricut is a cutting machine that can be used to create custom designs on a wide variety of materials. It’s incredibly versatile and easy to use, making it a great choice for projects like doormats.
The basic set-up includes the Cricut machine itself as well as an iPad app or laptop software where you can design your own projects. Depending on the version you purchase, there are also accessories like special mats and tools that make working with Cricut even easier.
What Do You Need to Make a Doormat?
To make a doormat with Cricut, you’ll need the following:
- Cricut machine
- Design software (i.e., Cricut Design Space)
- Cutting mat
- Vinyl/Stencil material
- Doormat or outdoor rug
- Transfer tape
- Scrap paper
- Ruler and Pencil
The Advantages of Making a Doormat With Cricut
The beauty of creating a doormat with Cricut is that it allows you to customize your own design. Whether you want to add a funny phrase, an inspirational quote, or just some artful designs – anything is possible! Plus, since the process requires minimal tools and materials, it’s also much more cost-effective than buying a pre-made doormat. It can also be a fun way to pass the time and get creative.
10 Tips on How to Make a Doormat With Cricut
Step 1: Design Your Doormat
The first step is to decide what kind of design you want for your mat. This can be done by using the Cricut Design Space on your laptop or iPad app. You can either create your own design from scratch or choose one of the pre-made templates.
Step 2: Prepare Your Materials
Once you have a design in mind, it’s time to gather all the materials needed for the project. This includes gathering vinyl material, transfer tape, and other tools you may need, such as scissors and a ruler. Be sure to measure the size of your doormat beforehand so you know what size vinyl sheet to buy.
Step 3: Cut Your Design
Using the Cricut cutting machine, place your design on the mat and cut out the shape you want. Depending on the complexity of your design, this step can take a few minutes or up to an hour.
Step 4: Apply the Transfer Tape
Once the design is cut out, it’s time to apply the transfer tape. This tape allows you to transfer your design onto your doormat more easily. Place a strip of transfer tape onto the back of your vinyl and then slowly peel away from the mat until all of your design is on the tape.
Step 5: Place Your Design Onto the Doormat
Now is the time to place your design onto your doormat! Start in one corner and slowly peel away the transfer tape while pressing down with a ruler or other flat object. To ensure you get an even application, take your time and press firmly.
Step 6: Remove the Transfer Tape
Once the design is on your doormat, it’s time to remove the transfer tape. Gently peel away the tape at a 45-degree angle and discard. If there are any stubborn pieces of transfer tape left behind, use a pair of tweezers or your fingers to carefully remove them.
Step 7: Smooth Out Your Design
To ensure that your design is properly applied to the doormat, take a scrap piece of paper and rub it over the design. This will help smooth out any bubbles or wrinkles in the vinyl.
Step 8: Heat Set Your Design
Once you’re happy with how your design looks, it’s time to heat-set it. You can do this by using a hair dryer or setting your iron on low and gently pressing down on the design for about 5-10 seconds. Be sure to always use a pressing cloth!
Step 9: Let It Cool
Now that your design is heat-set allow it to cool for at least 10 minutes before touching it. Otherwise, you could accidentally smudge or damage the design.
Step 10: Enjoy Your Custom Doormat
Congratulations! You have now created your very own custom doormat with Cricut. Place it proudly by your door and enjoy your masterpiece!
Making a doormat with Cricut is an easy way to add a personalized touch to your home. With a few simple steps and materials, you can create a beautiful and unique doormat that will last for years to come! Plus, it’s an enjoyable craft project that anyone can do in their spare time.
5 Tips for Decorating Your Doormat With Cricut
1. Add Beads and Buttons
Adding accents such as beads and buttons to your doormat can add a unique touch. You can glue these directly onto the mat or use a heat press to attach them.
2. Embroidery
If you want something more detailed, try embroidering with Cricut’s fabric stabilizers. This will give your doormat a more polished look. It is a good choice to make the mat look different.
3. Make Cutouts
Cricut has a wide variety of materials to choose from. Use vinyl, paper, or fabric to make cutouts and apply them directly onto your doormat. These materials will make the mat special.
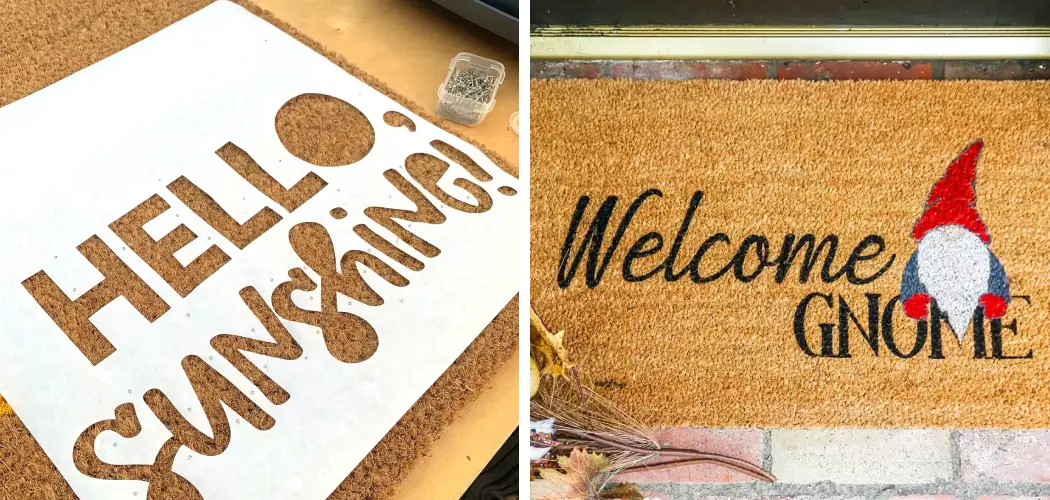
4. Stencils
You can use paint or spray paint to create stencils and apply them directly onto the mat. This is a great way to add intricate designs and patterns. Stencils are a unique way to brighten up your mat.
5. Add Appliques
You can use Cricut’s Heat Transfer Vinyl (HTV) to add appliques such as paw prints, hearts, or stars to your doormat. This will help make your doormat unique and stylish.
By following these tips, you will be able to easily create a beautiful and custom doormat with Cricut that fits your personal style. Have fun creating your own one-of-a-kind creation!
5 Maintenance Tips
1. Use a Vacuum
Routinely vacuuming your doormat will help keep it looking like new. This will remove any dirt and debris that has been tracked in, so your mat stays clean and fresh.
2. Regular Cleaning
Make sure to regularly clean your doormat with mild detergent and warm water. This will help keep the fabric looking and feeling new. In contrast, removing any built-up dirt or grime.
3. Protect From the Sun
The sun can fade and damage the fabric of your doormat over time, so make sure to place it in a spot where it won’t be exposed to direct sunlight for long periods of time.
4. Spot Clean
If there are any spots or stains, you can use a damp cloth to spot-clean the area. Make sure not to scrub too hard, as this could damage the material. otherwise
5. Protect From Moisture
Make sure to keep your doormat in a dry area, as moisture can damage the fabric and lead to mold growth. If you must place it outside, try to find a spot that is well-protected from rain or snow.
By following these simple maintenance tips, you can make sure your doormat stays looking like new for years to come. Have fun crafting and enjoy the unique look of your custom creation!
How Long Will It Take to Finish the Project?
The amount of time it takes to make a doormat with Cricut will depend on the size and complexity of the design. On average, it should take about 2-3 hours from start to finish. Once you have gathered all your materials and outlined your design, you can begin cutting out the pieces and assembling them together.
This process can be made faster by using the Cricut machine’s auto-cut feature, which will speed up the process significantly. After you have assembled your mat and added any accents, such as beads or buttons, it’s time to seal it with a protective finish. This is an important step that will ensure that your doormat looks its best for years to come.
Conclusion
Having a personalized doormat can add a unique and welcoming touch to your home’s entrance. Not only does it make a great gift for housewarming parties, but it can also be an everyday reminder of your affection and care for those who enter through the doorway of your home.
With these tips on how to make a doormat with cricut , you now have the knowledge to create wonderfully customized mats that express your character in your own creative way.
So why not get out there, find some fun material, gather some supplies, and make yourself that one-of-a-kind personal statement when friends come over to visit? It will be sure to bring charmed smiles all around!
Furthermore, engaging in this kind of project is fun and rewarding: working with Cricut is easy and enjoyable, and the outcome can be happily displayed with pride every time someone passes through their threshold. So go grab that crafty spirit of yours, try out this exciting venture from home, and create something new – have a wonderful time!