
Welcome to all the crafters and crocheters, whether you are a seasoned pro or just starting out on your crafting journey. Today’s blog post is for everyone who loves both crochet and tracking daily temperatures – we’re going to combine these two interests and create something truly unique: a crochet temperature blanket!

This project has gained popularity over the past few years as people embrace the art of yarn-crafting while keeping track of what Mother Nature has in store each day. With winter fast approaching, now is the perfect time to pick up your hooks, gather some materials, and get started on this fun and practical project that will keep you cozy all season long.
Get ready to dive into how to make a crochet temperature blanket. So grab your favorite cup of tea, settle in, and let’s get creative together!
What Will You Need?
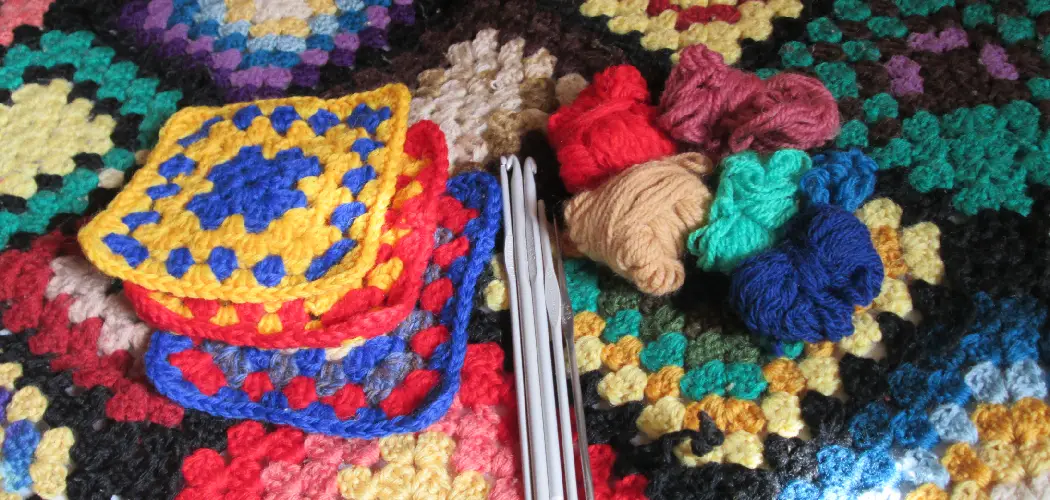
Before we dive into the step-by-step process of making a crochet temperature blanket, let’s ensure you have all the necessary materials. Here is a list of what you will need:
- Yarn in various colors – choose at least seven different shades for a full year’s worth of temperatures
- Crochet hook – size will depend on your yarn choice, but generally, a size H or I hook works well
- Scissors
- Tapestry needle
- Ruler or measuring tape
- Paper and pen for keeping track of temperatures (optional)
Once you have all your materials gathered, it’s time to get started on the fun part – crocheting!
9 Easy Steps on How to Make a Crochet Temperature Blanket
Step 1. Choose Your Temperature Range

The first step in making a crochet temperature blanket is deciding on the range of temperatures you want to track. Some people choose to track highs and lows, while others prefer tracking average daily temperatures. The choice is yours – just make sure you keep track of the temperatures consistently throughout the year.
Step 2. Assign Colors to Temperatures
Next, assign a color to each temperature in your chosen range. For example, you could use blues for cold temperatures, greens for mild temperatures, and yellows or oranges for warmer temperatures. Get creative with your color choices!
Step 3. Start Crocheting
Each day, take note of the temperature and pick the corresponding color of yarn. You will crochet one row per day using the color matching your chart’s temperature. This is where you can choose the crochet stitch you prefer. Many people use the primary single, half-double, or double crochet stitches for their temperature blankets.
Remember, consistency is key here. Stick to the same stitch and number of stitches in each row for the entire blanket. This way, your rows will all be the same width, and your blanket will have a neat, cohesive look.
Step 4. Maintain Consistency
As you crochet each row, it is important to maintain the same stitch tension to ensure a uniform look to your blanket. This means applying the same amount of pressure as you make each stitch. If your tension is too tight, your blanket may curl up at the edges. If it’s too loose, the blanket might look uneven.
Regular practice will help you find a balance and achieve consistent tension. Keep going day by day, and before you know it, your temperature blanket will start to take shape.

Step 5. Putting It All Together
As days turn into weeks and weeks into months, your crochet temperature blanket will gradually grow, reflecting the changing seasons beautifully and tangibly. Keep on crocheting one row per day, faithfully recording daily temperatures with your chosen colors. Remember to finish each day’s row completely before starting the next one to preserve the pattern of daily temperatures.
If you’re going away or can’t crochet one day, write down the temperature and catch up when you have time. It might seem like a slow process, but patience and persistence are part of the joy of this project. By the end of the year, you will have a blanket that not only keeps you warm but also tells a story of the year’s weather in a unique and colorful way.
Step 6. Finishing Your Blanket
Once you’ve crocheted a row for each day at the end of the year, it’s time to finish your blanket. You should add a border to give your blanket a neat, finished look. The border can be as straightforward or as elaborate as you like. You could use one of the colors from your temperature range or choose a new color to frame your work.
Using your crochet hook, you can create a simple single crochet border around the entire blanket or get creative with more intricate stitch patterns. Once you’re satisfied with your order, cut your yarn, leaving a tail of about 6 inches. Use your tapestry needle to weave this tail back into your work, securing it so it won’t unravel.
Step 7. Caring for Your Blanket
Now that you have your completed crochet temperature blanket, it’s essential to take proper care of it to ensure its longevity. Hand washing is usually the safest method for cleaning crochet items. Fill a sink or basin with cold water and add a mild detergent. Place your blanket in the water and gently agitate it with your hands.

Rinse thoroughly, being careful not to wring or twist the blanket as this can distort the stitches. Instead, press out the excess water and lay the blanket flat on a clean towel. Roll up the towel with the blanket inside to soak up additional water, and then unroll and leave your blanket to dry flat. Remember to store your blanket in a cool, dry place away from direct sunlight to avoid color fading.
Step 8. Celebrate Your Achievement
Finally, take a moment to admire your work and celebrate your achievement. Creating a crochet temperature blanket is a long-term project that requires commitment and patience. Each stitch represents a day in your life, and each color change reflects the shifting seasons.
In the end, you have not only created a beautiful and functional blanket but also a unique record of the year’s weather. Consider taking photos of your finished blanket to share with friends or online crafting communities. You can also start planning your next crochet temperature blanket, perhaps choosing different colors or a new stitch pattern.
Step 9. Share Your Work
Now that you’ve completed your temperature blanket consider sharing your work with others. Whether it’s showing off the finished piece to family and friends or posting it on social media, sharing your creation can be a rewarding experience. It’s a great way to inspire others to take up the hobby and start their temperature blanket projects.
Plus, it’s always interesting to compare the weather patterns of different locations. Use hashtags if you share it on social platforms like Instagram or Facebook; you might use #CrochetTemperatureBlanket, which could help your post reach more people interested in crochet projects.

By following these steps, you can create your crochet temperature blanket and enjoy making something practical and beautiful. Whether it’s a gift for yourself or for someone else, a temperature blanket is a unique and meaningful project that will be cherished for years to come.
5 Additional Tips and Tricks
- Use a Color Key: When making your crochet temperature blanket, creating a color key that associates different colors with specific temperature ranges is beneficial. This will simplify the process as you continue to crochet day after day.
- Stay Consistent: It’s essential to maintain consistency in your stitch type and size throughout the entire blanket. This ensures uniformity and enhances the visual impact of your temperature variations.
- Keep a Daily Record: To accurately represent the temperatures for each day of the year, log the high and low temperatures daily. These records will guide your color choices as you progress.
- Plan Your Blanket Size: Consider the size of your blanket at the outset. The size will depend on the stitch you choose and the number of rows you plan for each day.
- Enjoy the Process: Remember, the process of creating a crochet temperature blanket is a year-long journey. Enjoy each day’s progress, and don’t rush. The beauty of a temperature blanket is its slow transformation, mirroring the shift of seasons.
With these additional tips and tricks, you’re well on your way to creating a stunning and meaningful crochet temperature blanket.
5 Things You Should Avoid

- Avoid Using Too Many Colors: While it’s tempting to incorporate a rainbow of colors, having too many can make your blanket look chaotic. Stick to a manageable palette to maintain a coherent and visually pleasing result.
- Remember Your Gauge: Skipping the gauge check can result in a blanket that’s too small or too large. Always crochet a swatch to check your gauge before starting.
- Avoid Skipping Days: It may seem trivial to miss one or two days, but it can disrupt the chronological accuracy of your blanket. Consistency is key in a temperature blanket.
- Don’t Rush the Process: Making a crochet temperature blanket is a year-long journey. Take your time with it. Take time to enjoy each step.
- Avoid Not Double Checking Your Temperature Data: Ensure the reliability of your temperature data. A mistaken entry can throw off your whole color scheme. Double-check your records to maintain accuracy.
By avoiding these common mistakes, you can create a beautiful and accurate crochet temperature blanket that will be cherished for years.
What Crochet Stitch is Best for a Temperature Blanket?
Many different crochet stitches can be used for a temperature blanket, but the single crochet is the most popular and recommended stitch. This simple stitch creates a tight and sturdy fabric, perfect for showcasing color changes and maintaining consistency in size and shape.
Other options include the double crochet or even the granny square stitch, depending on your personal preference and desired aesthetic. Regardless of the stitch chosen, it’s essential to maintain consistency throughout the entire blanket.
Overall, making a crochet temperature blanket is a fun and creative way to track the changing temperatures throughout the year. With these tips, you can create a beautiful and meaningful blanket that will keep you warm and remind you of each day’s weather as time passes.
Is Crochet Good for Hot Weather?
While crochet is often associated with cozy blankets and warm accessories, it can also be suitable for hot weather. With the right yarn and stitch choice, you can create lightweight and breathable garments perfect for summer days. Some recommended stitches for hot weather include the lacy shell stitch or the openwork stitch.

Additionally, using a thin and smooth yarn such as cotton or bamboo can make the finished product more suitable for warm weather. So don’t let the thought of crochet being too heavy or warm deter you from working on your temperature blanket during those hot summer months. With a little creativity and planning, you can enjoy crocheting no matter the season.
Overall, crochet is a versatile craft that can be enjoyed year-round, whether you’re making a temperature blanket or a summer top. So grab your hook and yarn and start creating!
Conclusion
As we come to the end of this blog post on how to make a crochet temperature blanket, I hope you have gained valuable insight into the wonderful and unique world of crochet temperature blankets. From selecting your yarn colors to tracking daily temperatures and creating beautiful patterns, this project truly has something for everyone.
Whether you are a seasoned crocheter or just starting out, the beauty of this blanket lies not only in its appearance but also in the journey of creating it. As the days and seasons go by, your blanket will continue to grow and serve as a reminder of all the memories attached to each stitch.
So don’t hesitate any longer. Grab your hooks and yarn and start on this delightful adventure! And don’t forget to share your progress with us using the hashtag #crochettempblanket – we can’t wait to see all your colorful creations. Happy crocheting!
Expertise:
Crafting expert with a focus on innovative techniques and diverse materials.
Specialization:
- Textile arts (weaving, embroidery, and fabric dyeing)
- Woodworking and furniture design
- Mixed media and upcycling projects
Recognition:
- Featured in local art exhibits showcasing innovative craft projects
- Collaborated with community organizations to promote crafting workshops
- Received accolades for contributions to sustainable crafting initiatives
Mission:
- To inspire and empower crafters of all levels to discover their creative potential
- Encourages experimentation and self-expression through hands-on projects