
Are you looking for an easy-to-create craft that’s perfect for kids to help with? Do you want something cute, colorful and fun that can turn a boring day into one filled with enjoyment? Then look no further than making a bunny tail out of yarn!
Using just a few simple materials and some creativity, anyone can make their own adorable bunny tails – and it doesn’t even require any special sewing or knitting skills. Whether you’re an experienced crafter or just beginning to learn how to make a bunny tail out of yarn, this tutorial will provide all the instructions needed to make your very own custom bunny tails. Ready to get started? Read on!
What Shape Is a Bunny Tail?
A bunny tail is a small tuft of fur that sticks out from the back end of a rabbit. This tuft is usually short and fluffy and can be white, gray, black, or brown, depending on the type of rabbit it belongs to. It is a defining characteristic that helps to distinguish rabbits from other animals.
Making your own bunny tail out of yarn is a great way to bring an extra touch of whimsy and fun to any craft project. You can use it to decorate dolls, teddy bears, or other stuffed animals. It can also be used for decoration in the home or to create a unique costume accessory. No matter how you choose to use it, making your own bunny tail out of yarn is easy and fun.
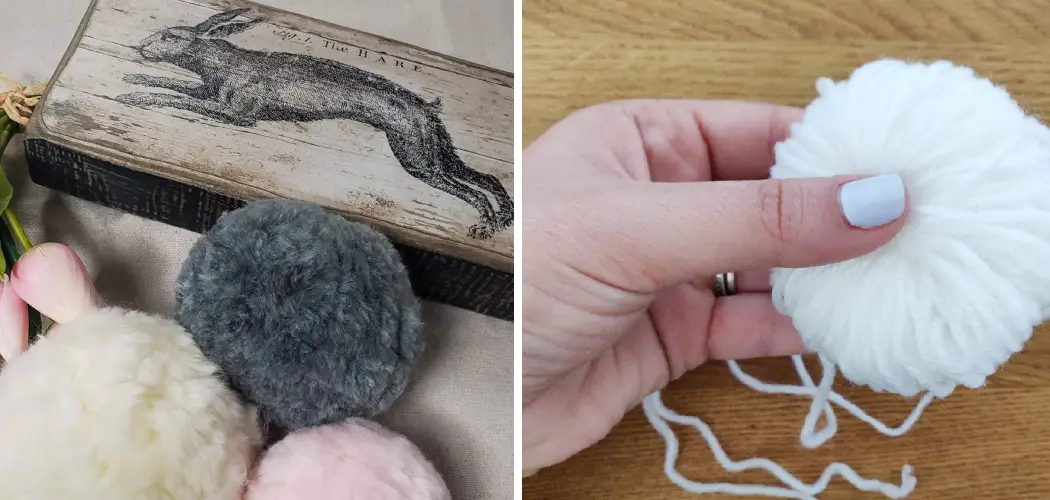
When creating a bunny tail out of yarn, it is important to consider the desired shape. A typical rabbit tail has a curved bottom that points downward slightly at the end. The long portion should have an even width throughout its length before tapering off at the tip.
When complete, you should have a rounded teardrop-shaped tuft of fur that resembles a real rabbit’s tail. With this shape in mind, you are ready to begin crafting your own fluffy bunny tail out of yarn.
10 Methods on How to Make a Bunny Tail Out of Yarn
1. Gather Your Materials:
The first step is to gather the necessary materials. You will need scissors, yarn in the desired color of your bunny tail, an appropriate needle for weaving (such as a tapestry needle or a knitting needle), and stuffing of some kind (such as polyester fiberfill or cotton batting). If you do not have a needle, you can use an empty thread spool instead. Make sure all of the materials you use are clean and free of debris.
2. Cut Your Yarn:
Now it’s time to cut your yarn. Depending on how long you want your bunny tail to be, you can either cut one piece of yarn that is twice as long as the desired length of your finished bunny tail or two pieces that are each equal to the desired length plus two inches for stitching allowance. If you are using two pieces, make sure to attach them together at one end so they don’t get tangled. Try to make sure they are both the same length.
3. Weave Your Yarn Together:
Next, thread your needle with one end of the yarn. Starting at one end of the length, weave your needle in and out through the yarn until you reach the other end. Make sure to keep an even tension as you go to ensure that your bunny tail has a nice, even texture when complete.
If you want your tail to be thicker, use a second piece of yarn and weave it alongside the first. Make sure to tie off any loose ends when you are done. Although it may take some time and effort, you will be rewarded with a beautiful bunny tail in the end.
4. Pull Tight:
Once you have reached the other end, pull both ends of your yarn tight so that it is secured together in a neat bundle. Secure the yarn with a basic knot to make sure it doesn’t become loose. If you need to, you can add a tiny bit of glue (such as craft glue) to the knot so that it holds in place. While this is not a necessary step, it can help secure the knot if you are going to be using your bunny tail on an item that will be washed or handled often.
5. Tie Knots:
Now, you can tie a few knots at each end of your bundle for extra security and to prevent unraveling later on. Make sure to tie the knots tightly in order for your bunny tail to stay together. Although this step is not necessary, it’s always a good idea to secure your bundle. If you prefer, you can also add extra yarn pieces through the knots to make your bunny tail look more interesting. Try to use different colors of yarn for this purpose.
6. Trim Ends:
After knotting, trim off any excess yarn from the ends of your bundle so that it looks neat and tidy. If you’re making more than one bunny tail, you can use the same yarn for all of them to create a uniform look. While still holding the yarn bundle together, use scissors to trim off any excess length. Although you may want to keep a little extra yarn length, avoid making the tails too long.
7. Fill With Stuffing:
Now it’s time to fill the center of your bundle with stuffing material. You can take a handful at a time and stuff it into the center until your bunny tail has reached the desired level of fullness. While doing this, make sure to keep a good grip on the bundle so that the stuffing doesn’t come out of the edges. If you want your bunny tail to look really fluffy, you can use a lot of stuffing. Make sure to use enough so that the stuffing is firmly packed in.
8. Secure Center:
When you have finished stuffing, secure the middle by tying another knot or two around the center of your bundle to keep all of the stuffing in place. If you want to add extra stability, you can tie a few extra knots around the center and then cut off any excess yarn. While this isn’t absolutely necessary, it will help ensure that your bunny tail doesn’t come undone. When you’re done, you should have a roughly cylindrical shape with fluffy stuffing in the center.
9. Create Shape:
Now you’re ready to create the shape of your bunny tail! Gently tug on both ends so that they curve down slightly towards each other and create an even teardrop shape. Make sure not to pull too tight, as this could cause unwanted stretching or distortion. When you’re happy with the shape, tie a double knot at the top of your bunny tail. Make sure you leave enough room to fluff the yarn afterward.
10. Finishing Touches:
Finally, you can use your needle to stitch any loose ends together or trim off any excess yarn as desired. And voila! You now have a completed bunny tail made out of yarn that’s ready to be used however you’d like!
Congratulations on making your own bunny tail out of yarn! Whether it’s going to adorn a stuffed animal, complete a costume, or just add some extra cuteness to your home decor, we’re sure it will be the perfect addition to any craft project. Have fun with it, and enjoy the beautiful creation you’ve made!
Things to Consider When Making a Bunny Tail Out Of Yarn
1. Choose the right yarn:
Consider using a fluffy yarn, such as angora or alpaca wool, to create your bunny tail. These types of fibers are soft and light enough to give you the desired look for your project.
2. Prepare for Extra Bulk:
Keep in mind that when you work with fluffy yarns like angora or alpaca, it will add bulkiness to your project. This can be beneficial if you need some extra body for your rabbit’s tail but should be taken into account when measuring out the yardage needed for the project.
3. Measure Wisely:
As with any project, before beginning make sure you have an accurate measurement of where the bunny tail will go. This will help you determine how much yarn you need for the project and also how long to make it.
4. Choose Color:
If you’re making a traditional white bunny tail, consider using white or cream-colored yarns. However, if you’d like to add a pop of color to your tail, try using a different colored yarn. This can add an interesting splash of color to your project and make it truly unique.
5. Add Details:
If you’d like to further decorate your bunny tail, consider using other materials, such as fabric scraps, buttons, or beads. These small details can be incorporated into the design of the tail and give it an even more special look.
6. Stay Organized:
When making a bunny tail out of yarn, it’s important to stay organized. This means keeping track of the order in which you’re working and making sure that all pieces are going in the right direction. This will help make the process smoother and easier for you and save time in the long run.
Conclusion
Now that you know how to make a bunny tail out of yarn, you can add this cute finishing touch to any stuffed animal, whether you’re making a bunny for Easter or just because your child will love snuggling up with a soft and fluffy friend.
With just a few supplies and some simple instructions, you can easily make a unique stuffed animal that will be cherished for years to come.