Creating a bandana wreath is a delightful and crafty way to infuse your space with a touch of rustic charm and vibrant colors. Whether you’re looking to spruce up your front door, add a pop of personality to a plain wall, or craft a unique gift, making a bandana wreath offers a creative and budget-friendly solution.

This do-it-yourself project combines simplicity with versatility, allowing you to choose colors that complement your decor or evoke a specific theme.
With just a few materials and a bit of time, you can transform ordinary bandanas into a stunning wreath that reflects your style. In this guide, we’ll take you through the step-by-step process of how to make a bandana wreath, offering tips and tricks to ensure your bandana wreath turns out beautifully.
Get ready to unleash your artistic side and craft a wreath that not only enhances your living space but also serves as a testament to your crafting prowess.
Why Bandana Wreaths Are Popular for Decoration
Bandana wreaths have soared in popularity as a decoration for their unparalleled ability to blend nostalgic flair with modern whimsy. These wreaths are often admired for their customizability; the wide array of bandana colors and patterns available means they can be tailored to any season, occasion, or personal taste.

Not only are they highly adaptable in design, but bandana wreaths also carry the appeal of handmade charm that elevates the warmth and welcoming atmosphere of any space.
Their lightweight design makes them easy to hang and switch out as desired, and their fabric-based construction adds a cozy, textile feel that’s less common with traditional foliage wreaths. Whether hanging on a front door or as an interior accent, bandana wreaths are a chic, cost-effective way to celebrate individual style and craftiness.
Materials Needed
To embark on the journey of creating your own bandana wreath, you’ll need the following materials:
- Bandanas: Choose at least 5-10 bandanas in various colors or patterns that complement your intended aesthetic.
- Wire Wreath Frame: A simple metal frame will serve as the foundation for your wreath.
- Scissors: For trimming the bandanas to the desired length and cutting any additional embellishments.
- Ruler or Measuring Tape: To ensure uniform size of your bandana pieces.
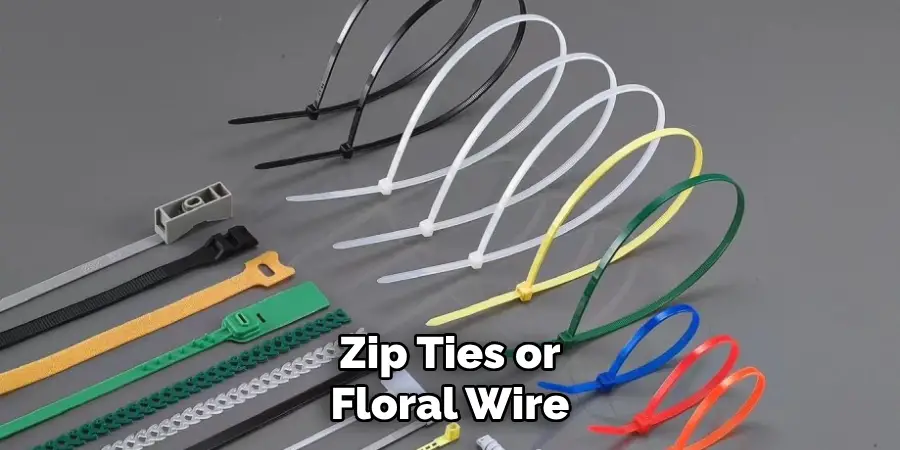
- Zip Ties or Floral Wire: These will be used to secure your bandanas to the wreath frame.
- Optional Decorations: Depending on the season or theme, consider adding embellishments like faux flowers, ribbons, or rustic signs to personalize your wreath.
Gathering all your materials before starting ensures a smooth and enjoyable crafting experience. Once you have your materials ready, you’re all set to begin crafting your bandana wreath, a colorful and versatile decoration that is sure to catch the eye.

10 Steps How to Make a Bandana Wreath
1. Gather Materials
The first step in making a bandana wreath is to gather all the necessary materials. This includes bandanas (around 12-15 depending on the size of your wreath), a wire wreath frame, scissors, and any additional decorations you may want to add.
2. Cut Bandanas Into Strips
Next, cut the bandanas into strips that are about 6 inches long and 1 inch wide. You can use multiple colors or patterns for a more colorful wreath.
3. Tie Bandana Strips onto The Wire Frame
Take one of the bandana strips and tie it onto the wire frame, making sure to secure it tightly. Continue tying on more strips until the entire frame is covered.
4. Fluff up The Bandanas
Once all the strips are tied on, fluff them up to create a full and fluffy wreath. You can also trim any excess length if needed.
5. Add Additional Decorations
If desired, you can add additional decorations such as faux flowers, ribbons, or small ornaments to your wreath for extra flair.
6. Secure Decorations with Hot Glue
Use hot glue to secure any additional decorations onto your wreath. Be careful not to burn yourself while handling hot glue.
7. Let Dry
Allow the hot glue to dry completely before hanging or moving your wreath. This typically takes about 20-30 minutes. However, if using a hot glue gun, it may take less time.
8. Attach a Ribbon for Hanging
To hang your wreath, attach a ribbon or string onto the back of the wire frame using hot glue. If using a thicker ribbon, you may need to tie it onto the frame instead.
9. Hang and Enjoy!
Find a spot to hang your finished bandana wreath and enjoy its festive charm! Additionally, you can make multiple wreaths to rotate and switch out throughout the year.

10. Customize for Different Occasions
You can easily customize this DIY project for different occasions by using themed bandanas and adding appropriate decorations. For example, red and green bandanas with holiday-themed decorations would make a great Christmas wreath! Get creative and have fun with it!
Hanging and Displaying Your Bandana Wreath
After creating your bandana wreath, finding the perfect spot to showcase your work is key to enhancing its decorative appeal. A front door is a classic choice for display, inviting guests with a warm and personalized touch. Alternatively, consider hanging your wreath above a mantel, on a gallery wall among other cherished items, or even resting on a bookshelf for a more unconventional approach.
For outdoor display, ensure the area is sheltered from extreme weather conditions to preserve the vibrant colors and fabric integrity. Indoors, avoid placing the wreath in direct sunlight to prevent fading.
When hanging, use an adjustable wreath hanger or a command hook for a damage-free option, particularly on doors or walls where nail holes are undesirable. If you’re hanging your wreath on a wall, use a picture hook for a secure hold, especially if your wreath includes heavier embellishments.

Rotate your bandana wreath seasonally or for special occasions to keep your decor fresh and exciting. When not in use, store your wreath in a cool, dry place, ideally laid flat or hanging to maintain its shape.
An appropriately sized storage box or even a wreath bag can provide protection from dust and damage, ensuring that your handcrafted creation remains a delightful addition to your decor for many occasions to come.
Tips and Tricks for Bandana Wreath Making
Making a bandana wreath is a delightful and creative process, but like any craft, it comes with its own set of challenges. Here are some useful tips and tricks to help you make the most out of your wreath-making experience:
- Pre-Wash Bandanas: Before you begin cutting, give your bandanas a wash. This will prevent any color bleeding after the wreath is made and ensure the fabric is soft and flexible for tying.
- Color Coordination: Lay out your bandanas and plan your color scheme beforehand. Consider how different patterns and colors will blend together to create a harmonious look.
- Tightly Secured Knots: When tying your bandana strips to the frame, be sure to double knot each piece to secure it in place. This will prevent the fabric from slipping and keep your wreath looking full and lush.
- Symmetrical Strips: Use a ruler or cutting mat to measure and cut your bandana strips. Consistent sizing helps in achieving a symmetrical and professional appearance.
- Layering Technique: To add depth to your wreath, layer the bandana strips, placing some slightly above others as you tie them on to create a multidimensional effect.
Common Mistakes to Avoid When Making a Bandana Wreath
In the craft of bandana wreath making, there are pitfalls that can detract from the final product’s beauty and durability. To help ensure your wreath making is a success, here are some common mistakes to avoid:
- Overcrowding the Frame: While a full wreath is desirable, overcrowding the frame with too many strips can make it look bulky and unrefined. Strike a balance for an even and appealing look.
- Mismatched Patterns: Without a clear color scheme, randomly mixing patterns can create a chaotic result. Choose bandanas that complement each other for visual harmony.
- Inconsistent Knots: Tying knots of differing tightness can result in an uneven appearance and loose strips that may fall out over time. Aim for uniformity in each knot.
- Skimping on Quality: Using poor quality bandanas or wire frames can lead to a wreath that looks lackluster and falls apart quickly. Select quality materials for a longer-lasting creation.
- Forgetting the Weather: If hanging outside, neglecting to consider the elements can cause your wreath to fade or deteriorate. Opt for weather-resistant materials if exposed to the outdoors.
- Improper Glue Usage: Using too little glue may not secure your embellishments, while too much can look messy. Apply an appropriate amount and let it dry fully for a clean finish.
Conclusion
In conclusion, learning how to make a bandana wreath is a fun and creative way to add a personal touch to your home decor. Not only is it an inexpensive project, but it also allows for endless customization possibilities. With just a few simple materials and some creativity, you can create a beautiful wreath that will brighten up any room or door.
From holiday-themed wreaths to everyday ones, the options are truly endless. Plus, making a bandana wreath is a great activity for family and friends to do together. So why not gather your loved ones and have a wreath-making party? You’ll be amazed at what you can create when you work together.
And don’t forget, if you want to take your bandana wreath to the next level, you can experiment with different textures and materials like burlap or twine. The possibilities are truly limitless!
So go ahead and try out this DIY project today and share your creations with us using #bandanawreath on social media. We can’t wait to see what you come up with! Now it’s time to get those creative juices flowing and make a statement piece for your home with a beautiful bandana wreath. Happy crafting!

