
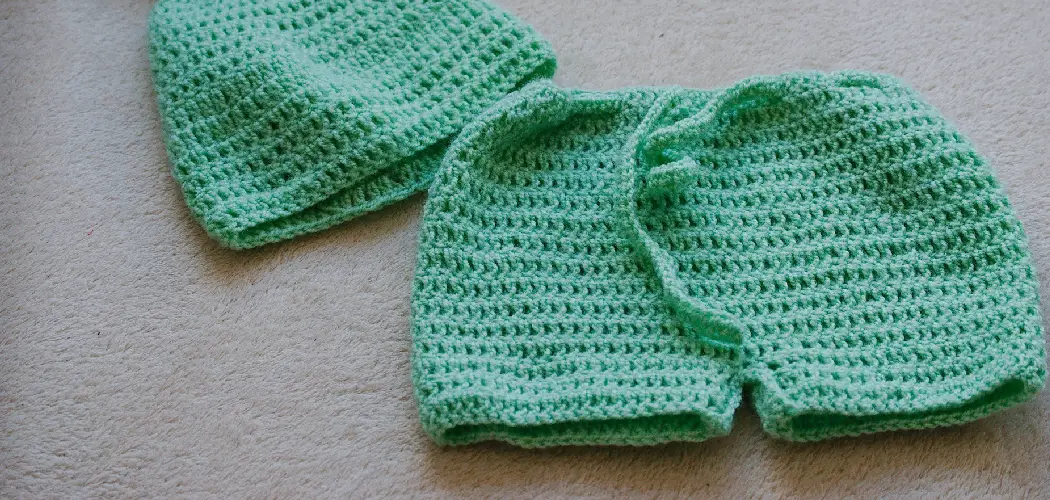
Are you ready to tackle a new crafting challenge? Knitting shorts is not only an exciting project but can also be rewarding. From beautiful and contemporary designs to comfortable and practical pieces, there’s something for everyone – no matter your knitting skill level!
Whether you’re just starting or have been knitting for years, our step-by-step guide will help you create your unique shorts. Always take your time and enjoy the process – it’s just as much about having fun as creating something special.

In this guide, we’ll be covering the basics of how to knit shorts. We’ll discuss all the materials and tools you’ll need, as well as some tips and tricks to help you create your own fabulous shorts. So, let’s get started!
What Will You Need?
Before you can begin knitting shorts, you’ll need to have the right materials on hand. Here’s a list of everything that you’ll need:
- Yarn (at least two colors)
- Knitting needles
- Tapestry needle
- Scissors
- Measuring tape or ruler
- Sewing pins
- Sewing machine (optional)
Once you have all the materials, it’s time to get ready for knitting!
10 Easy Steps on How to Knit Shorts
Step 1: Choose Your Yarn and Needles
Choosing the correct yarn and needles is essential for your project. For shorts, it’s best to choose a comfortable and breathable material – a cotton or cotton blend yarn is often a good choice. The weight of the yarn will determine the size of the knitting needles you will need.
Typically, a medium-weight yarn pairs well with US size 7 or 8 knitting needles. Remember that the label on your yarn will recommend a needle size, which is a good starting point. Remember to ensure that your choice of yarn and needles will give you the correct gauge for your pattern.

Step 2: Measure for Size
Measure the shorts’ waist, hip, and desired length to determine the size. It’s important to take accurate measurements because they will guide the number of stitches you need to cast on and the rows you need to knit. For the waist, measure the circumference where you want the shorts to rest.
For the hip, measure the widest part. Measure the length from the waist to where you want the shorts to end. Jot down these measurements, as they will be critical in the knitting process.
Step 3: Cast On Stitches
Casting on is adding new stitches on your needle to start your work. For shorts, you will need to cast on enough stitches to fit around the hip measurement. It’s recommended to use a long-tail cast on for its elasticity which is suitable for waistbands.
To calculate the number of stitches you must cast on, you will multiply your hip measurement by your gauge (the number of stitches per inch). Always remember that knitting is not an exact science, and you might need to adjust the number of stitches after a few rows if you find the fit needs to be corrected.
After casting on the stitches, join in the round, being careful not to twist the stitches; place a marker for the beginning of the round, and you’re ready to start knitting your shorts.
Step 4: Begin Knitting
After casting on, it’s time to start knitting the waistband. Using a rib stitch (alternate between knit and purl stitches) is recommended for the waistband because it has elasticity and can maintain its shape over time. Depending on the thickness of the waistband you want, you can knit in rib stitch for about 1-2 inches.

Make sure to maintain a consistent knitting tension throughout this process to ensure that your stitches are even and your finished product will be of a consistent shape and size. Once you’ve completed the waistband, you can transition to your chosen pattern stitch for the main body of the shorts.
Step 5: Continue Knitting the Shorts Body
Once you’ve completed the waistband, it’s time to continue knitting the main part of the shorts. This is where you can express your creativity – you can choose a simple stockinette stitch or a more complex pattern based on your skill level and preference.
When knitting, remember to keep checking the fit of the shorts and adjust your stitches accordingly. If you’re adding stripes or patterns, plan them out before you start. Continue knitting until your shorts have reached the desired length from the waistband.
Step 6: Start Knitting the Legs
Once the main body of your shorts has reached your desired length, it’s time to start knitting the legs. You will divide your stitches equally between the two legs to do this. Using a stitch marker, mark the middle of your row. This will be where you separate the legs.
Continue knitting in your chosen pattern until you reach the marker. When you get to the marker, you can cast off a few stitches (usually about 1-3 stitches) to create the leg hole and then continue knitting the first leg.
Step 7: Complete the First Leg and Start the Second
Once you’ve reached your desired length for the first leg, you can finish it off by knitting a few more rows in rib stitch. This will create a neat and comfortable edge at the bottom of the leg. After finishing the first leg, cut the yarn leaving a long tail for weaving in later, and secure the last stitch.

Now, you’re ready to start the second leg. Repeat the same process as you did for the first leg: reattach the yarn at the leg hole and start knitting.
Step 8: Completing the Second Leg
Upon reaching the desired length for the second leg, finish it similarly to the first leg with a few rows in a rib stitch for a clean and comfy edge. Once completed, cut the yarn leaving a long tail for weaving in later, and secure the last stitch. At this point, you should have two legs of your shorts knitted, and the major part of your project is done.
Step 9: Weaving in the Ends and Finishing Touches
Now it’s time to weave in all the loose ends using your tapestry needle. This process helps to secure the yarn and prevent it from unraveling. Simply thread the tapestry needle with the tail of the yarn and weave it back and forth through the inside of the shorts a few times. After you have finished with all the ends, cut any excess yarn.
Next, you could choose to add a drawstring or elastic to the waistband. For a drawstring, you can knit a separate cord and thread it through the stitches of the waistband. If you prefer to use elastic, cut a comfortable length around your waist, thread it through the waistband, and sew the ends together using a sewing machine or hand-stitching.
Step 10: Final Inspection and Care Instructions
Congratulations, you’ve knitted a pair of shorts! Before wearing them, check your project for any loose stitches or ends needing securing. Finally, remember that knitted items often require special care when washing.
Always check the washing instructions for your specific yarn, but generally, it’s best to hand wash knitted items in cool water with a gentle detergent. Lay your shorts flat to dry to help maintain their shape.

By following these simple steps, you’ll have your own knitted shorts quickly. Unleash your creativity and see how far you can go with this fun knitting project!
5 Additional Tips and Tricks
- Make sure to leave enough room between your stitches for easy finishing.
- Always use the correct size needles for the yarn you’re using.
- Use stitch markers or safety pins to keep track of rows and stitches in complex patterns.
- To ensure your shorts fit properly, measure your waist before beginning, and check your progress periodically.
- If you’re new to knitting shorts, start with a basic pattern before attempting more complicated designs. This will help you understand the stitch patterns and processes involved in making shorts.
When knitting shorts, it’s important to be mindful of the tension of your stitches to ensure that they are even and consistent throughout the project.
5 Things You Should Avoid
- Avoid using multiple yarn strands in the same pattern, as this can create a bulky fabric that won’t fit properly.
- Don’t use too much tension when knitting your stitches – this can distort the shape of your fabric and affect the overall fit of your shorts.
- Don’t be tempted to rush through complex patterns without taking breaks – this can lead to errors and mistakes in the pattern.
- Avoid using too thick or thin yarn for your pattern, as it won’t provide the shape and structure you need for your shorts.
- Don’t use straight needles – double pointed needles are much easier to work with when knitting shorts.
By following these tips, you can make sure that your shorts are knitted properly and fit perfectly.

5 Different Style Options
- High-Waisted Shorts: These provide a stylish, retro look and can be complemented with a crop top or tucked-in shirt. Consider using a ribbed stitch for the high waistband for added elasticity.
- Bermuda Shorts: Longer and typically end above the knee. These offer a modest, comfortable style, and a seed stitch pattern can add a nice texture.
- Running Shorts: Usually lightweight and loose fitting, these are ideal for athletic activities. Add a drawstring waist for adjustability.
- Lace Shorts: Consider knitting lace shorts for a feminine, chic style. Use delicate lace patterns for a sophisticated look.
- Boxer Style Shorts: Inspired by men’s boxer shorts, these offer a relaxed, casual style. Use a simple stockinette stitch for a smooth, even texture.
These are just some of the many styles you can knit with shorts. With a bit of creativity and by following these tips, you can create a unique look that’s perfect for any occasion. Happy knitting!
How to Do Japanese Short Rows?
Japanese short rows are a great technique for knitting shorts that provide a tailored and comfortable fit. With this technique, the fabric is folded inward to create an extra layer of fabric, giving the shorts more structure and helping them fit better. To do Japanese short rows:
- Begin by knitting across your row normally until you reach your desired length.
- Then, slip the next stitch as if to purl.
- Bring your yarn to the front of the work and turn your work so that you are knitting in the opposite direction.
- Knit across until you reach the original turning point, then continue with your pattern as usual.
- On each following row, repeat the process, slipping the next stitch as if to purl and turning your work before knitting back across.
- When you finish the short rows, close any gaps in your stitches by picking up a loop from underneath and inserting it into the last stitch on your needle.
By mastering this technique, you can give your shorts a professional and custom fit. Enjoy!
How Do You Knit a Rib Row?
Rib rows create an elastic texture to your shorts which helps them fit snugly around the waist and hips. To knit a ribbing row:
- Begin by knitting two stitches in the same stitch.
- Then, slip the next stitch as if to purl, leaving it on your needle.
- Knit one stitch, then pass the slipped stitch over this new stitch.
- Repeat steps two and three until you reach the end of your row.
- On each following row, knit the knits and purl the purls to create a ribbed pattern.

By mastering this technique, you can add a layer of texture and structure to your shorts for an extra comfortable and stylish fit.
Conclusion
Knitting shorts can be a rewarding and fulfilling experience for any level of knitter. Even a beginner can create a pair of beautiful, snug-fitting shorts that look great and stand the test of time. With just a few guides and materials, anyone can create unique pieces to flatter their figure and show off their skills in the art of knitting.
It involves counting stitches and carefully considering measurements, design, patterns, and colors—ultimately providing satisfaction from both a creative and practical perspective.
At the end of the day, how to knit shorts is ultimately about ensuring comfort as well as achieving professional-looking results every time – so don’t forget to be patient with yourself throughout the process!
You Can Check It Out to Make Pajama Shorts