
Ironing burlap is a craft project that can seem daunting to many people, especially those who are just starting out with crafting or have limited experience using an iron. However, learning how to properly care for and maintain your burlap fabrics can help you create beautiful projects that will stand the test of time.

In this blog post, we’ll show you step-by-step instructions on how to iron burlap and safely iron your burlap fabric so that it looks great and lasts for years!
Not only will we provide guidance on what temperature setting to use for different types of burlap fabrics, but also helpful tips on ensuring a clean finish as well as some alternatives if iron isn’t available. So grab yourself the necessary supplies and start exploring the world of crafting with confidence today!
What You Will Need
Before we dive into the actual ironing process, let’s make sure you have everything you need to get started. Here are the supplies you’ll need:
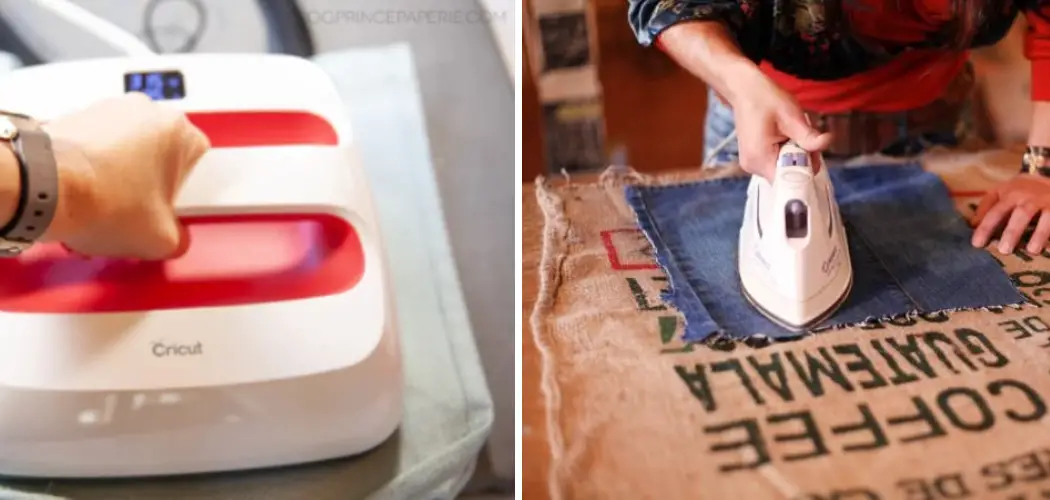
- A Steam or Dry Iron
- Ironing Board (or a Flat Surface Covered With a Towel)
- Clean and Damp Cloth
- Burlap Fabric (Pre-washed if Possible)
If you are using a new iron, make sure to read the manufacturer’s instructions and familiarize yourself with its settings before starting. It is also a good idea to test your iron on a small piece of burlap fabric first to make sure it doesn’t damage or discolor the fabric.
11 Step-by-step Guidelines on How to Iron Burlap
Step 1: Prepare Your Ironing Board
Place your ironing board on a flat, stable surface and adjust it to your preferred height. Make sure the cover is clean and free of any wrinkles, stains, or residue that may transfer onto the burlap fabric. Otherwise, you can use a towel or clean sheet to create a makeshift ironing surface.

It is important to protect both your ironing surface and burlap fabric from any damage. You may also want to use a pressing cloth or an old cotton shirt between the iron and your fabric for added protection.
Step 2: Set Your Iron
Choose the appropriate temperature setting on your iron based on the type of burlap fabric you are using. If possible, refer to the manufacturer’s instructions for specific recommendations on the type of burlap fabric, or check the label for care instructions. Generally, a medium to high heat setting is suitable for most burlap fabrics. But if you are unsure, start with a lower heat setting and gradually increase if needed.
Step 3: Mist Your Burlap Fabric
Burlap fabric can be quite stiff and difficult to iron due to its coarse texture. To make it more pliable and easier to work with, you can lightly mist the fabric with water using a spray bottle. Alternatively, you can also place a damp cloth over the fabric and iron over it. The steam will penetrate through the cloth and help to soften the burlap.
Step 4: Iron the Fabric on its Underside
Place your burlap fabric onto the ironing board, with its underside facing up. By ironing on the reverse side first, any creases or wrinkles will be smoothed out, making it easier to iron the front side later on. Gently run your iron over the fabric in a back-and-forth motion, starting at one end and working your way toward the other. Avoid pressing too hard as this may cause damage or leave visible creases.

Step 5: Turn Over Your Fabric
Once you have finished ironing the underside, flip your fabric over so that the front side is now facing up. You may be able to see some visible creases or wrinkles still present on the fabric – don’t worry, we’ll take care of those in the next few steps. It is important to iron both sides of the fabric to ensure a smooth and even finish. But be careful not to overdo it as this may flatten the natural texture of burlap.
Step 6: Handle with Care
Burlap is a delicate fabric, and its loose weave can easily snag or fray if handled roughly. So be mindful when moving your fabric around during ironing and try not to tug or pull on it too much. If you notice any loose threads or frayed edges, gently smooth them down with your fingers before ironing over them. You can also use a small amount of fabric glue to secure any loose threads.
Step 7: Tackle the Creases
Now it’s time to focus on those pesky creases and wrinkles. Using your free hand, gently pull the fabric taut in one direction while ironing over it with your other hand. This will help smooth out any stubborn creases or wrinkles. You can also use a pressing cloth or a damp towel over the fabric and iron over it for added steam and heat to help with tougher creases. It may take a few tries, but be patient and persistent.
Step 8: Repeat if Necessary
If you are not satisfied with the results after one round of ironing, don’t be afraid to repeat the process. Just remember to let your fabric cool down completely before starting again to avoid any potential damage from overheating. It is better to take your time and get it right than to rush and risk damaging your fabric. But if you are happy with the results, move on to the next step.

Step 9: Check for Any Spots or Stains
Before putting away your iron, make sure to check the burlap fabric for any lingering spots or stains. If you come across any, use a spot cleaner or a mild detergent and gently dab at the affected area with a clean cloth. Be careful not to rub the fabric too hard as this may damage it. Once you’ve successfully removed all stains, let your fabric dry completely before storing or using it.
Step 10: Store You Iron Properly
Once you have finished ironing, make sure to unplug and cool down your iron before storing it away. If possible, store your iron in an upright position to prevent water from leaking onto the soleplate or other surfaces.
It is also a good idea to regularly clean and maintain your iron according to the manufacturer’s instructions to ensure its longevity. This will save you from any unnecessary hassle and expenses in the future.
Step 11: Enjoy Your Smoothly Ironed Burlap Fabric!
Congratulations! Now that your burlap fabric is smooth and wrinkle-free, you can use it for a variety of projects such as home decor, crafting, or even clothing. Just remember to always handle it with care during ironing and to follow the recommended care instructions for your specific burlap fabric. With these step-by-step guidelines, you are now equipped with the knowledge on how to iron burlap like a pro! Happy ironing!
Do You Need to Use Professionals?
Ironing burlap can be a time-consuming and sometimes tricky process, especially if you are working with delicate or large pieces of fabric. For some people, it may be more convenient to hire professional services for ironing and handling their burlap fabric.
If you feel overwhelmed or unsure about tackling the task on your own, don’t hesitate to seek out professional help. They have the necessary equipment, skills, and experience to handle your burlap fabric with care and produce professional results.

However, if you follow our step-by-step guide carefully, we are confident that you can achieve great results at home on your own. Regardless of which route you choose, just remember to always handle your burlap with care to avoid any damage or frustration. With the right tools and techniques, you can easily keep your burlap fabric looking smooth and presentable for any occasion.
Frequently Asked Questions
Q1: Can I Use a Regular Iron to Iron Burlap?
A: Yes, a regular iron can be used to iron burlap as long as it allows for temperature control. It is important to set the appropriate heat setting for your specific burlap fabric. It is also recommended to use a pressing cloth or an old cotton shirt between the iron and fabric for added protection.
Q2: Can I Iron Burlap Without Water?
A: Yes, you can iron burlap without water by using a pressing cloth or a damp towel placed over the fabric. The steam from the pressing cloth or damp towel will help to soften the burlap and make it easier to iron.
Q3: Can I Use Starch on Burlap Fabric?
A: While starch can help to stiffen burlap fabric, it is not recommended to use on burlap as it may cause the natural texture of the fabric to become too stiff and unnatural. If necessary, a small amount of spray starch can be used sparingly on the backside of the fabric only.
Q4: Can I Wash Burlap Before Ironing?
A: Yes, you can wash burlap before ironing to remove any excess dirt or grime. It is important to dry the fabric completely before ironing as damp burlap can be difficult to work with and may cause damage if ironed while still wet.
Conclusion
To wrap up, ironing burlap is not a difficult task when done correctly. Always make sure to take your time and clean the iron frequently so that residue does not build up in between the inner workings of the machine.
Ironing burlap requires patience and attention; however, if you have followed all of these steps, you will surely impress yourself with how nicely it came out with its crisp appearance. With a few quick but careful steps on how to iron burlap, you will be able to master this craft in no time at all! Take advantage of this information today and ace ironing burlap with ease!