
Are you looking for the perfect way to refine and keep your garments secure? Look no further than an invisible zip! Whether you’re a novice or an experienced sewist, adding an invisible zip can take your handmade items to the next level. However, it may seem intimidating at first – but don’t worry!

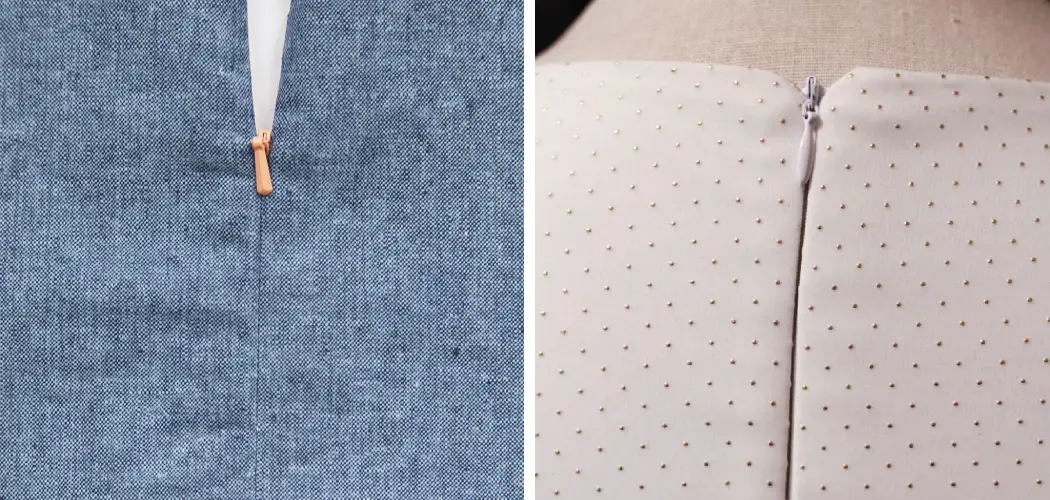
An invisible zip, also known as a concealed zip, is not visible from the outside when the garment is worn. It gives your clothing a seamless and professional finish while providing a secure closure.
This blog post will provide step-by-step instructions on how to insert an invisible zip so that you can create beautiful clothes with ease. Let’s get started and learn all about this wonderful technique!
What Will You Need?
Before we dive into the process of inserting an invisible zip, let’s take a look at what materials you will need. These include:
- Invisible zipper
- Matching thread
- Zipper foot for your sewing machine
- Pins or basting tape
- Hand-sewing needle and thread (optional)
Now that you have all the necessary materials let’s begin with inserting an invisible zip.
10 Easy Steps on How to Insert an Invisible Zip
Step 1: Prepare Your Zipper
The first step is to prepare your zipper. Lay it out on a flat surface and unzip it completely. Then, fold down both sides of the zipper tape at the top and press them with an iron. This will create a clean edge for sewing later on.
Step 2: Prepare Your Garment
Next, you need to prepare your garment. Lay it flat with the right side facing up, and mark the placement of your zipper. You can use a tailor’s chalk or fabric marker for this. Make sure that the marks are straight and parallel to each other.

Step 3: Pin the Zipper
With your garment and zipper prepared, it’s time to pin the zipper into place. Align the zipper teeth with the marked lines on your garment, ensuring that the zipper’s right side faces the fabric’s right side. Use pins or basting tape to secure it in place. Ensure the zipper stop at the bottom aligns with the bottom of your garment’s zip opening.
Step 4: Sew the First Side of the Zipper
Now that your zipper is pinned, it’s time to sew! Attach the zipper foot to your sewing machine. Start at the top of the zipper, sewing as close to the zipper teeth as possible. Remember to backstitch at the beginning and end to secure the zipper. Be careful not to sew over any pins. Once you have sewn down to the bottom stop, repeat this process on the other side of the zipper.
Step 5: Sew the Second Side of the Zipper
Having successfully sewn one side of the zipper, you will now sew the second. Repeat the same process as before, ensuring you align the zipper teeth with the marked line on your garment. Remember to sew as close as possible to the zipper teeth and backstitch at the beginning and end for a secure finish. Ensure the top of both sides of the zipper are level for a professional look.
Step 6: Check Your Zipper
After sewing both sides of the zipper, checking your work is essential. Close the zipper and try it out to ensure it’s functioning correctly. Look at your garment’s front and back to ensure the zipper is invisible and the seams are aligned perfectly. If there are any issues, use a seam ripper to carefully remove the stitching and repeat steps 3 to 5. If everything looks good, proceed to the next step.
Step 7: Finish the Seam Below the Zipper
Following a successful zipper insertion, it’s time to finish the lower part of the seam below the zipper. Start by closing the zipper and pinning the remaining open seam under the zipper. Switch back to your regular sewing machine foot and start where your zipper stitching ends.

Backstitch at the beginning and keep the seam closed until you reach the end of your garment. Backstitch again at the end to secure.
Step 8: Press the Zipper
Iron the completed seam after your zipper and seam are sewn to smooth out any wrinkles. This gives the garment a cleaner look and helps the zipper blend seamlessly into the garment. Use a low heat setting to avoid melting the zipper teeth.
Step 9: Secure the Zipper Tape
Once your zipper is pressed, you may notice the zipper tape at the top of the zipper still flaps around. To secure this, hand sews the top of the zipper tape to the seam allowance of your garment. This way, the zipper will stay in place when zipped up or down. Be careful not to sew through the top of your garment and only catch the zipper tape.
Step 10: Final Check
Lastly, do a final check of your garment. Ensure the zipper functions correctly, the seams are straight, and the zipper tape is securely sewn in. Once satisfied, you have successfully inserted an invisible zipper in your garment! Congratulations on mastering this sewing technique.
Remember, practice makes perfect. The more invisible zips you insert, the easier the process will become.
5 Additional Tips and Tricks
Tip 1: Use the Right Tools
Invest in an invisible zipper foot for your sewing machine. This particular foot has a groove underneath that accommodates the zipper teeth and allows you to stitch close to them, making the zipper truly invisible.

Tip 2: Test Your Zipper
Before you sew your zipper onto your garment, it’s a good idea to test it first. Lay out the zipper and place your garment on top of it. This will allow you to see how the finished garment will look with the zipper in place.
Tip 3: Use Matching Thread
Using matching thread for your invisible zip is essential because any exposed stitching will be visible on the finished garment. Using a different colored thread may ruin the seamless look of the invisible zip.
Tip 4: Practice Sewing Techniques
Before inserting an invisible zipper into your final garment, practice sewing straight lines and zippers on scrap fabric. This will help you get comfortable using your machine’s zipper foot and improve your stitching accuracy.
Tip 5: Use a Longer Zipper
When selecting a zipper for your garment, choose one slightly longer than the opening. This will make sewing around the zipper pull easier and create a cleaner finish. You can always trim off any excess length once the zipper is inserted.
With these tips and tricks, you can confidently insert an invisible zipper into any garment and achieve a professional finish.
5 Things You Should Avoid
Avoid 1: Skipping the Ironing Step
Avoid the temptation to skip the ironing step. This step is crucial for achieving a truly invisible zip as it helps to flatten the zipper teeth and makes them easier to sew close to.
Avoid 2: Rushing the Process
Don’t rush the process. Inserting an invisible zip requires precision and patience. Running can lead to mistakes and uneven stitching. Take your time to ensure everything is perfectly aligned before sewing.
Avoid 3: Sewing Too Close to the Zipper Teeth
Avoid sewing too close to the actual teeth of the zipper. If the stitching is too tight, the zip might get caught in the stitches, making it difficult to open and close.

Avoid 4: Neglecting to Check Your Work
Remember to check your work regularly throughout the process. Ensure the zipper functions appropriately and the seams are aligned correctly before moving on to the next step.
Avoid 5: Ignoring the Importance of Practice
Remember to underestimate the power of practice. The more you practice inserting invisible zips, the more proficient you will become. Practice makes perfect, so be reassured if your first few attempts aren’t perfect.
You can achieve flawless invisible zipper insertion in your garments by avoiding these common mistakes. Keep practicing and have fun mastering this sewing technique!
Why is My Invisible Zipper Not Invisible?
If you’ve followed all the steps and tips for inserting an invisible zipper, but it’s still not invisible, don’t worry. Here are some common reasons why your zipper may not be blending seamlessly into your garment:
- Wrong Zipper Foot: Using the wrong zipper foot can affect how close you can sew to the teeth of the zipper. Make sure you have an invisible zipper foot specifically designed for this type of zipper.
- Incorrect Stitch Length: A shorter stitch length may cause the stitching to be too close to the zipper teeth, making them visible. Adjust your stitch length accordingly.
- Uneven Seams: Uneven or bulky seams can make it challenging to sew close to the zipper teeth. Make sure your seams are straight and flat before stitching on the zipper.
- Wrong Thread Color: As mentioned earlier, using thread that doesn’t match the color of your garment can make the stitching visible. Double-check to ensure you’re using a matching thread.
- Improper Pressing: Ironing is an essential step for achieving an invisible zipper. Ensure you’re pressing the zipper tape and seam allowance flat before sewing to ensure the zipper is hidden.
You can troubleshoot and fix any problems with your invisible zipper by addressing these common issues. With practice and attention to detail, you can achieve perfectly invisible zippers every time!
Conclusion
Learning how to insert an invisible zip is a practical and satisfying skill that can save you money on alterations. Plus, you’ll have a newfound confidence in your sewing skills, knowing you can fix yourself up something special with ease. Making and wearing garments with the help of an invisible fashion-forward zip is genuinely an art form—that you are now equipped to explore!
So, if you want to give your wardrobe something extra particular, start by taking on this challenge first. Your creativity will soon take off in its unique direction once you learn how to insert it.
Despite potential difficulties or setbacks, rest assured that it is entirely possible for someone even just starting out sewing to successfully assemble a beautiful garment featuring one (or several!) of these ingenious closures.