
When it comes to customizing apparel, vinyl is an excellent option. It is easy to work with, affordable, has a wide range of colors, and can last for a very long time with proper care. However, regular vinyl designs can sometimes look dull or flat, which is where the puff vinyl comes in.

Puff vinyl is an excellent way of adding texture and depth to your designs, and it comes in various colors. Additionally, it has a unique, soft, and three-dimensional finish that makes any design stand out. However, puff vinyl application requires experience and knowledge. Worry not! In this post, we will guide you through how to do puff vinyl as a beginner.
Can You Do Puff Vinyl?
Vinyl is a versatile material that can be used for various DIY projects, and if you’re looking for a way to add some texture to your designs, puff vinyl might be just what you need. With its raised, three-dimensional appearance, puff vinyl can make your designs really pop, whether you’re adding it to a t-shirt, a tote bag, or anything in between.
But is it something you can do yourself? The answer is yes – with the right tools and techniques, you can master the art of puff vinyl and create custom designs that will surely get noticed. So, if you’re ready to take your vinyl creations to the next level, try puff vinyl and see what you can do!
Why Should You Do Puff Vinyl?
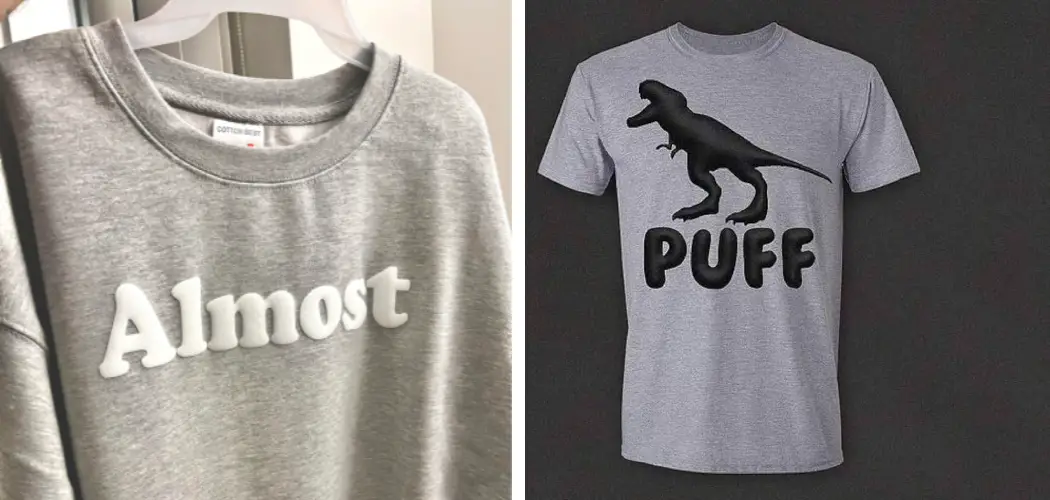
Puff vinyl is a versatile and eye-catching type of vinyl that can add texture and dimension to any project. If you want to take your designs to the next level, puff vinyl is the perfect choice. Not only does it offer a unique look and feel, but it’s also highly durable and can withstand repeated washings without fading or peeling.
With its ability to puff up when heated, puff vinyl can create a 3D effect on t-shirts, hats, bags, and other items. Whether you’re creating custom gifts or promotional items or just want to add some flair to your wardrobe, puff vinyl will make your designs stand out. So why settle for flat and boring designs when you can add some dimension with puff vinyl?
How to do Puff Vinyl: A Beginner’s Guide
1. Prepare the Vinyl
The first step to doing puff vinyl is to prepare your material. You will need puff vinyl, a heat press machine, and your design. Ensure that your design is in vector format and that the puff vinyl is clean and free from any debris. If you are cutting your vinyl using a vinyl cutter, mirror the design.

2. Cut the Vinyl
Once your design is prepared, cut out the vinyl on your vinyl cutter. Remember to remove the excess vinyl using a weeding tool to leave only the design on your transfer tape.
3. Heat Press
When doing puff vinyl, you must apply high heat and pressure to expand the vinyl and create a 3D effect. Arrange your apparel on the heat press, ensuring that it is smooth. Preheat the apparel for a few seconds to remove any moisture. Position your transfer tape carefully, making sure that the design is centered.
4. Applying Heat
Once you have your transfer tape in position, close the heat press machine. Turn up the heat to around 300°F and set the timer for about ten seconds. Apply pressure to the design area to ensure it sticks well on the apparel. After ten seconds, open the heat press and check if the vinyl has adhered to the apparel.
5. Puffing
After removing the transfer tape, you can see that the design now has a textured look. However, for a more puffy effect, you must apply higher heat for longer. Increase the temperature to around 320°F and set the timer to 10-15 seconds. A more extended puff time results in a more puffy tissue, so adjust the time for your preferred look.

6. Removing Transfer Tape
After the second heat press, remove the transfer tape carefully while still hot. This will prevent any vinyl from pulling off with the tape. If your design is not fully puffed, you can repeat steps four and five to achieve your desired look.
7. Cooling Down
Once the transfer tape is removed, allow the apparel to cool down before handling it. This will ensure that the design stays intact and that the vinyl adheres well to the fabric. Once cooled, your puff vinyl design is complete and ready to wear!
By following these tips, you can easily create unique and eye-catching designs with puff vinyl. Experiment with different colors and heat settings to achieve various effects. Puff vinyl is a fun and creative way to elevate your designs and stand out. So go ahead and try it, and see the magic of puff vinyl for yourself! See you next time to learn more about different heat transfer techniques.
5 Considerations Things When You Need to Do Puff Vinyl
1. Measure the Area
When you need to do puff vinyl, it’s important to measure the area accurately before you start. This will ensure you have enough material for your project and avoid costly mistakes. Make sure to measure the length, width, and depth of your project area so that you can purchase enough material to cover it. Additionally, consider any curves or angles in the area, as this will affect your needed material.
2. Choose a Color
The next step when doing puff vinyl is choosing a color that best suits your project. There are many different colors available, and it’s important to choose one that complements the rest of your decor.
If you’re working with a specific color scheme, remember this when choosing a color for your vinyl. Additionally, consider the light in the room, as some colors may appear darker or lighter depending on the amount of natural light present.

3. Consider Adhesive
Another important consideration when doing puff vinyl is what adhesive you should use. Some types of adhesives are better suited for certain materials than others, so make sure to pick one specifically designed for vinyl material use. Additionally, consider if you want an adhesive that is removable or permanent, as this will affect which type of adhesive you should use.
4. Prepare Surfaces
Before applying puff vinyl, it’s important to prepare the surfaces by cleaning them thoroughly and removing any dirt or debris from them. This will help ensure that the vinyl adheres properly and lasts longer without peeling or cracking over time. Make sure to use a mild detergent and warm water when cleaning, and allow all surfaces to dry completely before applying any vinyl material onto them.
5 . Cut Vinyl Accurately
The final step when doing puff vinyl is cutting the material accurately to fit perfectly onto your project surface without leaving any gaps or overlapping edges. To do this properly, use a sharp utility knife and ruler to get precise cuts each time without damaging the material. Additionally, practice on some scrap pieces first until you get comfortable with making accurate cuts before moving on to your actual project piece.
Benefits of Doing Puff Vinyl
Puff vinyl is a form of vinyl transfer that has gained popularity in the fashion industry due to its unique texture and appearance. The benefits of using puff vinyl go beyond aesthetics and can greatly impact the durability and longevity of the product. With its raised texture, puff vinyl offers a thicker, more durable design that can withstand washing and everyday wear and tear.
Additionally, the puff vinyl is flexible and stretchable, allowing for a comfortable fit that does not compromise on quality. Puff vinyl is also easy to use and can be applied to various fabrics, making it a versatile choice for designers and hobbyists alike. With its superior durability, comfort, and user-friendly nature, it’s no surprise that puff vinyl is becoming a staple material in the fashion industry.
4 Common Mistakes People Make When Trying to Do Puff Vinyl
1. Not Preheating the Vinyl
One of the most common mistakes people make when trying to do puff vinyl is not preheating it before applying it. Preheating the vinyl helps to soften it, making it easier to apply and giving you a better result. To preheat the vinyl, use a heat gun or an iron set to low heat and hold it over the area for 10-15 seconds before applying the vinyl.

2. Not Using Enough Pressure
Another mistake people often make when doing puff vinyl is not using enough pressure when applying it. It’s important to press firmly on the vinyl while you’re applying it so that it adheres properly and you get a good result. If you don’t use enough pressure, your design will look uneven or may even peel off after a few days.
3. Not Trimming Excess Vinyl
When doing puff vinyl, many forget to trim any excess material around their design or shape. This can cause problems with your finished product, as any excess material can cause puckering or bubbling in the final design. To avoid this, always trim away any excess material around your design before pressing down on the vinyl with your heat gun or iron.
4. Not Letting It Cool Down After Heating
Finally, many people forget to let their puff vinyl cool down after heating it with their heat gun or iron. If you don’t let your puff vinyl cool down after heating it, then there is a risk that it will shrink back too much and won’t adhere properly to your surface. So always remember to give your puff vinyl time to cool down after heating before pressing down on it with your heat gun or iron.
Conclusion
Puff vinyl is a fantastic and easy way to add texture and depth to your design. However, it requires precision, patience, and a lot of practice. With this guide, we hope that you have learned how to do puff vinyl as a beginner.
Remember to experiment with different temperatures, heating times, and vinyl colors to create attractive designs. Thanks for reading our post about how to do puff vinyl, and happy designing!