
Pumpkins are a staple in fall decorating. But why stick to plain old carving when you can create a stunning masterpiece with just a few supplies? Decoupaged pumpkins are a fun and easy DIY project that can add a unique touch to your autumn decor.

In this blog post, we will guide you through how to decoupage a pumpkin and show you how to make a beautiful piece of seasonal art that will impress your guests.
Can You Decoupage a Pumpkin?
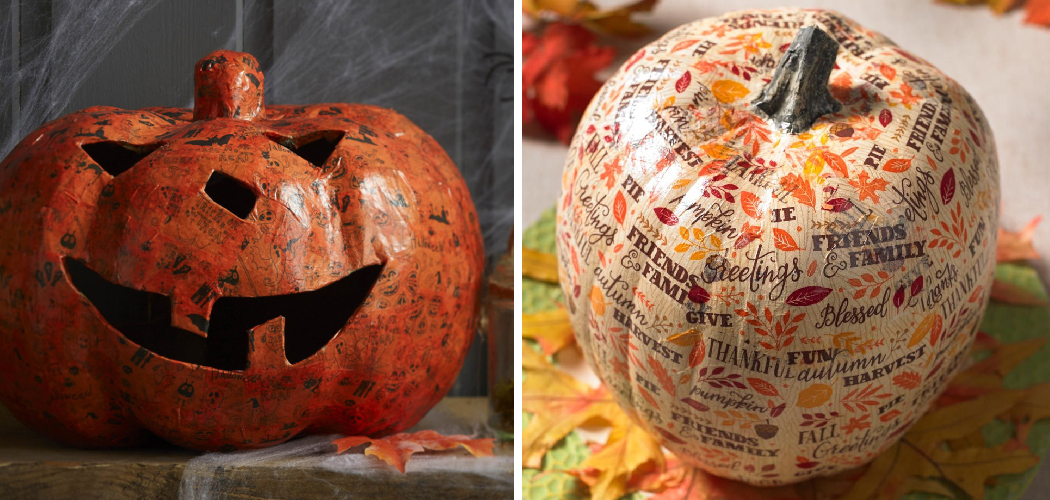
With fall in full swing, it’s time to start thinking about festive and creative ways to decorate pumpkins. One unique approach to spruce up your average orange pumpkin is decoupaging it with colorful paper or fabric. Decoupage is the art of layering materials onto a surface and sealing them with a finishing coat. This technique can transform an ordinary pumpkin into a stunning centerpiece or porch decoration.
The best part? The possibilities are endless, from intricate designs to abstract splatters of color. So, whether you want to showcase a spooky Halloween scene, a fall harvest motif, or a celebration of your favorite sports team, decoupaging a pumpkin can help bring your visions to life. Give it a try and see for yourself!
Why Should You Decoupage a Pumpkin?
With autumn just around the corner, it’s time to start thinking about the best ways to decorate for the season. One unique and creative way to add personality to your home is by decoupaging a pumpkin. Not only is it incredibly easy and affordable, but it also allows you to create a one-of-a-kind design that’s sure to impress your guests. Whether you’re looking for a subtle and elegant look or something a bit more playful and whimsical, there are endless possibilities for decoupaging pumpkins. So why not try adding some extra charm to your fall decor?
The Ultimate Guide on How to Decoupage a Pumpkin
Step 1: Gather Your Supplies
Before you start decoupaging, you will need a few supplies. Here is what you’ll need:
- A pumpkin
- Mod Podge
- Decorative paper or tissue paper
- Scissors
- Paintbrush or sponge brush
- Protective wax paper
- Optional: embellishments such as ribbon or stickers
Step 2: Prepare Your Pumpkin

Start by wiping your pumpkin clean and making sure it’s completely dry. Cut out any stems or leaves that may be in your way. Then, cover your work surface with protective wax paper to avoid making a mess.
Step 3: Choose Your Paper
Next, choose your paper. You can use decorative paper, scrapbook paper, or even tissue paper. Cut your paper into small or large pieces depending on your desired look. Be creative and mix and match different patterns and colors.
Step 4: Apply Mod Podge
Using a paintbrush or sponge brush, apply a thin layer of Mod Podge to a small section of the pumpkin. Place your paper onto the glue and gently smooth out any wrinkles or bubbles. Continue adding paper to the pumpkin, working in small sections until you’ve covered the entire surface. You can use as much or as little paper as you want. Make sure to let each layer dry for a few minutes.
Step 5: Add Embellishments
If you want to add some extra flair to your pumpkin, now is the time. You can use ribbon, stickers, or any other embellishments to decorate your decoupaged pumpkin. Simply apply a small amount of Mod Podge onto the back of the embellishment and place it onto the pumpkin.
Step 6: Seal the Pumpkin
Once your pumpkin is completely covered and any embellishments are added, let it dry for at least an hour. Then, apply a final layer of Mod Podge over the entire pumpkin to seal everything in. This will help protect your design and give it a glossy finish.
Step 7: Display Your Masterpiece
After the final layer of Mod Podge has dried, your decoupaged pumpkin is ready to be displayed. You can use it as a fall decoration on your mantel or front porch or even as a centerpiece for your Thanksgiving table.

Now that you know how to decoupage a pumpkin, the possibilities are endless. You can decoupage different types of pumpkins in various sizes and designs to fit any occasion or theme. So go ahead and get creative with your decoupage skills! Your unique and beautiful pumpkin creations will impress your friends and family.
5 Considerations Things When You Need to Decoupage a Pumpkin
1. Choose the Right Pumpkin
When decoupaging a pumpkin, the most important thing is to choose the right one. The best pumpkins for this project are those free from blemishes and have a smooth surface. If you can find a white pumpkin, this will give you an even better canvas to work with. Additionally, pick a pumpkin that is the right size for your project.
2. Prep Your Pumpkin
Once you’ve chosen your pumpkin, it’s time to prep it for decoupage. Clean any dirt or debris from the pumpkin’s surface with a damp cloth. Next, use sandpaper to lightly scuff up the pumpkin’s surface to make it easier for the glue and paper to adhere. Finally, wipe down the surface of the pumpkin one more time with a damp cloth to remove any dust or debris created by sanding.
3. Gather Your Supplies

Before you begin decoupaging your pumpkin, ensure you have all your supplies on hand and ready to go. You will need decoupage glue, tissue paper or other decorative paper of your choice, scissors or an X-acto knife, paintbrush (optional), and acrylic sealer (optional). Make sure that all of these supplies are within easy reach before starting your project so that you don’t have to stop in the middle and search for something!
4. Cut Out Your Paper Pieces
Now it’s time to start cutting out pieces of paper for your design! If you’re using tissue paper, make sure that each piece is slightly larger than what you want it to cover on the pumpkin so that there won’t be any gaps when they are applied. For other types of decorative paper, cut out pieces in whatever shape or design you desire – just make sure they fit together nicely when placed on top of each other!
5. Apply Your Design
Using either a paintbrush or your fingers (depending on which type of glue you chose), apply a thin layer of decoupage glue onto both sides of each piece before attaching them to your pumpkin one at a time. Once all pieces are attached securely, apply another thin layer of glue over the top to seal everything together and create an even look across all surfaces. If desired, once dry, you can apply an acrylic sealer overtop to protect against moisture and wear and tear over time.
5 Benefits of Decoupage a Pumpkin
1. Fun and Easy Activity

Decoupage a pumpkin is a fun and easy activity that can be done with family and friends. You only need some pumpkins, decoupage glue, paint, and paper or fabric scraps. You can also use other materials, such as buttons, beads, ribbons, and glitter, to make your pumpkin extra special. This is a great way to get creative and express yourself while also having fun!
2. Great for All Ages
Decoupage a pumpkin is suitable for all ages; from toddlers to adults, you can enjoy this activity together. It’s a great way to spend quality time with the family during the fall season. Younger children will enjoy creating their own designs with the supplies provided, while older children may want to challenge themselves by creating more intricate designs.
3. Can Be Used as Decorations
Once you have finished decoupaging your pumpkin, you can use it to decorate your home or office space. The possibilities are endless; you can create abstract designs or even recreate famous works of art on your pumpkin! These pumpkins will add a bit of flair to any room and will impress your guests.
4. Cost-Effective
Decoupaging a pumpkin is also cost-effective because you don’t need expensive supplies or tools to complete this project. Most of the materials needed can be found around the house or at local craft stores for very little money. This makes it a great activity for those on a budget but still want something fun and creative!
5. Great Way To Express Creativity
Decoupaging a pumpkin is also an excellent way to express creativity, as there are no rules for design; anything goes! You can mix different colors, patterns, textures, and shapes to create something unique that reflects your style. This activity gives you the freedom to be creative without limits!
Conclusion
Decoupaging a pumpkin is a great way to show off your creativity and spice up your home decor this fall. With just a few materials, you can transform an ordinary pumpkin into a unique and beautiful piece of art. We hope this guide has helped you learn how to decoupage a pumpkin step by step. Don’t be afraid to experiment with different papers, colors, and embellishments to make your pumpkin truly unique. Happy crafting!