
It is a creative and fun way to express yourself. You can use various materials, such as paint, fabric, glitter, feathers, beads, and ribbons, to add color and texture to your skull. Decorating a skull allows you to customize it according to your style and preferences.

Decorating a skull is a great way to express one’s creativity. It can be an interesting and artistic project for adults and children. It allows you to unleash your inner artist, and several advantages come with decorating a skull. You can find step-by-step instructions on how to decorate a skull in this blog article.
Step-by-step Instructions for How to Decorate a Skull
Step 1: Inspect the Skull
Before you start decorating the skull, it is important to inspect it for any damage or imperfections. If there are any, consider whether they should be covered with paint or decorations. Once you’ve inspected the skull, it’s time to clean it well. This will help remove dust and dirt on the surface and make it easier to work with.
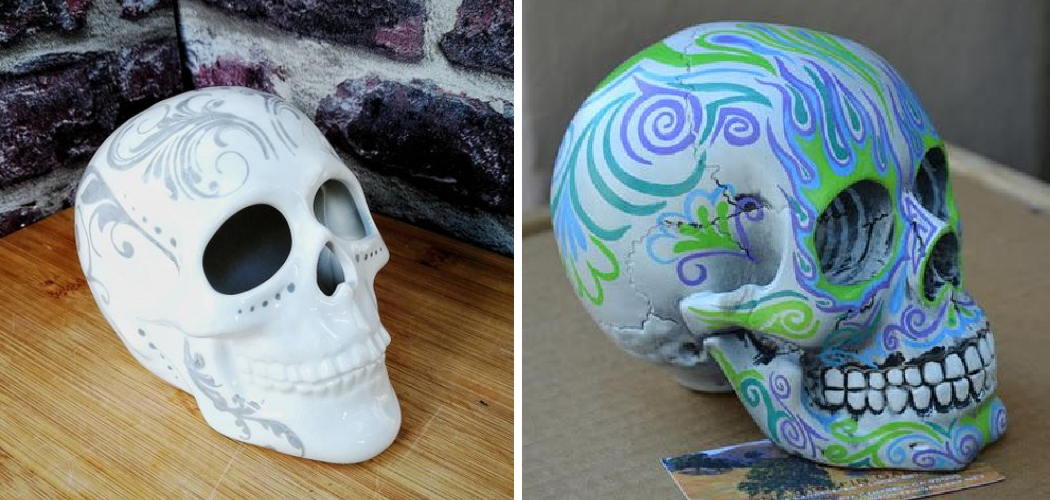
Step 2: Prime and Paint the Skull
Priming and painting is a great way to give your skull an interesting look. You can use spray paint or acrylic paints, depending on the type of design you’re looking for. Adding glitter and bling to your skull will give it a more glamorous look. You can use glue to attach gems, rhinestones, and other sparkly items onto the surface of the skull.
Step 3: Add Feathers or Faux Fur
Another way to add texture and color to your decorated skull is by adding feathers or faux fur. This will make it look more interesting and give your skull a unique appearance. You can further customize the look of your skull by adding embellishments such as beads, charms, ribbons, and other decorative items.

Step 4: Seal the Skull
You may want to apply a sealant to help protect and preserve your decorated skull. This will also help keep the paint and decorations from fading. Adding fun accessories, like hats or masks, can add a layer of personality to your skull.
Step 5: Hang Up Your Skull
If you want your skull to be displayed in your home or office, make sure you hang it up securely. You can use a sturdy hook and strong string or wire to keep it in place. Now that your skull is decorated, you can enjoy looking at it and showing it to your friends and family.
Safety Tips for How to Decorate a Skull
- Wear protective gear such as gloves and safety goggles when handling materials that may contain hazardous chemicals, dust, or sharp pieces.
- Select a well-ventilated area for decorating your skull so you don’t breathe in any hazardous fumes using glue or paint with strong odors.
- Make sure to clean the surface of the skull before you start decorating. This will help the material (paint, glue, etc.) adhere better and give the decorations a smoother finish.
- Paint in thin layers. If you apply paint too thickly, it can cause cracking or bubbling of the paint surface.
- Be aware that some materials used to decorate skulls may be flammable, so take the proper precautions when working near an open flame.
- Keep decorations away from small children and pets who may be tempted to touch or eat them.
- When finished decorating, allow your skull to dry completely before displaying it. This will ensure the best results and help prevent damage over time.

Following these simple safety tips can help you enjoy the creative process of decorating a skull without any worries or concerns.
What Supplies Do You Need to Decorate a Skull?
The supplies you need to decorate a skull depends on what type of decoration you intend to do. Generally, you’ll want some paint or adhesive craft material, such as gems and beads, for applying color and texture.
You may also use markers, decoupage materials, glitter, feathers, faux fur, and other decorative items. Other tools that may be necessary include brushes, scissors, and tweezers. Additionally, you may use a sealant or fixative for your work, depending on what type of decoration you’re doing.
Once you have all the supplies gathered together, it’s important to ensure the skull is properly cleaned and prepared before beginning your project. You’ll need to remove any dirt and residue from the skull, which can affect the finished look and color.
You’ll also want to ensure you have a flat surface to work on, such as a table or countertop. Finally, remember that some decorative materials may require special techniques or tools for application and should be researched before starting your project.
How Do You Prepare Your Skull for Decoration?
Before you can begin decorating your skull, it is important to prepare the surface. The best way to do this is to ensure the skull is clean and free of dirt or debris. Start by wiping down the skull with a damp cloth or paper towel. Once completely dry, you can remove any remaining dirt with an old toothbrush or soft-bristle brush. This will give you a clean and smooth surface to work with.

Once the skull is cleaned, it is time to start decorating! You can choose from several different methods for decorating your skull. One popular option is to use acrylic paints or spray paint to create colorful designs and patterns.
Another way to decorate your skull is to use decorative paper, fabric, or feathers. You can have your skull engraved by an expert carver for a more permanent option. Whichever method you choose to decorate your skull with, make sure that the adhesives and products used are safe for your skull’s material and non-toxic.
Is There a Preferred Method of Displaying Decorated Skulls Once They’re Completed?
Once a skull is decorated, there are several ways to display it. Sometimes, the skull may be mounted on a plaque or an altar. Alternatively, the skull can be hung on a wall, set atop a shelf, or placed in any type of cubby or alcove. Try adding a skull to an outdoor altar or garden when displaying it outdoors.
Another option is to weave the skull into a wreath for a unique and seasonal display. No matter how you display your decorated skull, always remember to treat skulls with respect and reverence. They are powerful symbols of life and death and should be given the proper respect and care.
Are There Any Common Mistakes People Make When Decorating Skulls?
Yes, there are several common mistakes people make when decorating skulls. One of the most common is improperly preparing the skull before adding decorations. If a skull is prepped and cleaned correctly, the decorations cannot adhere as intended. This can lead to uneven coverage or even chipping or peeling of paint or other materials used for decorating.
Another mistake people make when decorating skulls is not taking enough time to plan the design they want to use. With a good plan, it can be easier to get the desired result. Taking time to measure and sketch out ideas allows for better accuracy and more realistic expectations – so you are satisfied with how the final piece looks.
What Are the Most Important Things to Remember When Decorating a Skull?
Decorating a skull can be a fun and creative way to express yourself. Whether you’re planning to decorate a real or faux skull, there are some things to keep in mind before you get started. Here are some of the most important tips for decorating your skull:

- Choose the Right Type of Skull: Before starting any type of decoration, you must decide which type of skull you will use. If you’re using a real skull, it’s important to ensure it is properly cleaned and preserved before adding any decorations. Faux skulls can be found in many different materials, including plastic or resin and are ideal for applying permanent decorations such as paint or glues.
- Make Sure the Base of Your Skull is Secure: If you’re working with a real skull, it’s important to ensure it is securely mounted and ready for decoration. If you’re using a faux skull, this step is less important, but still, take the time to make sure the base of your skull is secure so that your decorations stay put during transport.
- Prepare the Surface of the Skull: Before adding any decorations, it’s important to ensure your skull is clean and free from dust or debris. This will ensure that all of your decorations adhere properly and last long. If you’re working with a real skull, use a damp cloth to wipe the surface before adding anything else.
- Choose Your Decoration: Once you have your skull securely mounted and the surface prepared, it’s time to choose what kind of decoration you would like to add. You can opt for something simple like paint, glitters or something more elaborate such as rhinestones or charms. Make sure that whatever decorations you choose are appropriate for the material of your skull.
- Apply the Decoration: Depending on the type of decoration you choose, there are many different ways to apply it. If you choose to paint or glue, make sure that they are appropriate for the material of your skull, and follow any instructions included with the product before applying. Use an adhesive such as hot glue or epoxy to secure them in place for rhinestones and charms.

By keeping these tips in mind when decorating your skull, you can be sure it will last for a long time and make a great addition to any space.
Conclusion
In conclusion, decorating a skull can be an enjoyable, creative, and unique craft project. There are many different ways to do it, from painting to adding fabric or jewels to re-creating the look of a sugar skull. Depending on how much time and effort you’re willing to put in, you can make your unique decorative skull that will last for years.
Whether you choose a traditional look or something more modern and eye-catching, there’s no limit to what you can do when decorating a skull. This article has been beneficial for learning how to decorate a skull. Make Sure the preventive measures are followed chronologically.