
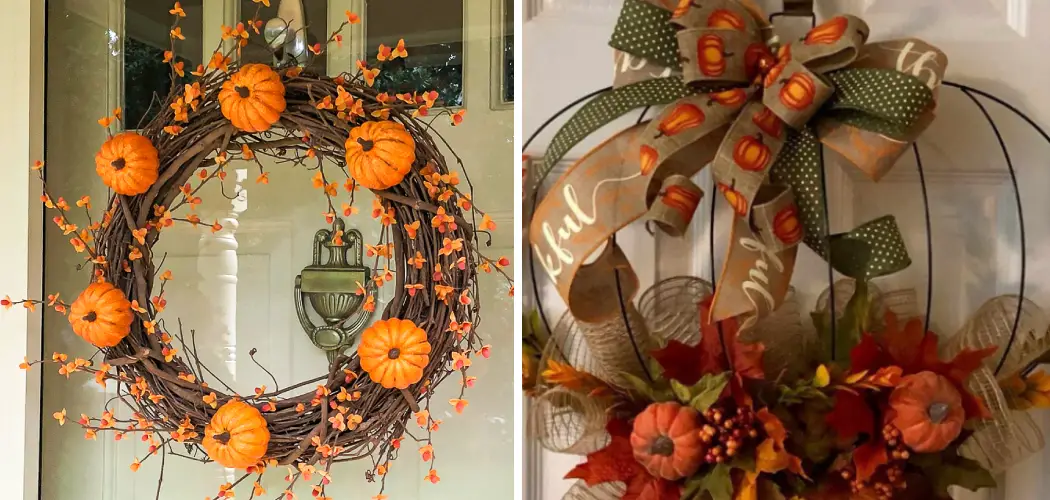
Halloween is quickly approaching, and if you’re like many families, you’re gearing up for pumpkin carving, costume parties, trick-or-treating, and everything else that comes with the spookiest season of the year. As you start planning your Halloween decorations, remember to decking the front door with a festive pumpkin wreath.

A handcrafted pumpkin wreath is a fun and colorful way to welcome trick-or-treaters while getting into the Halloween spirit yourself. However, with so many options for materials, designs, and additions, it can take time to figure out where to start. This blog post walks through the entire process of how to decorate a pumpkin wreath.
By the end, you’ll have a show-stopping wreath with all the neighbors talking about your Halloween décor prowess for weeks to come. Let’s get started!
What Will You Need?
Before you dive into decorating your pumpkin wreath, it’s essential to gather all the necessary materials. While a basic grapevine or wire wreath form is the foundation of this project, there are endless possibilities for embellishing and personalizing it. Here are some ideas to get you started:
- Artificial mini pumpkins
- Fall-colored ribbons
- Halloween-themed ornaments
- Faux fall leaves or flowers
- Small plastic spiders or other creepy crawlies
- Hot glue gun and glue sticks
- Floral wire
- Scissors
Once you have all your supplies ready, it’s time to start decorating!
10 Easy Steps on How to Decorate a Pumpkin Wreath
Step 1: Prepare the Base
The first step in any wreath-making process is preparing the base. If using a grapevine wreath form, make sure it is clean and free of any debris or excess twigs. Next, use floral wire to attach artificial mini pumpkins around the edges of the wreath form.

Step 2: Add Fall-colored Ribbons
Next, take your fall-colored ribbons and create a bow or cut and tie them in various lengths around the wreath. This will add color and texture to your finished pumpkin wreath.
Step 3: Incorporate Halloween-themed Ornaments
To further personalize your pumpkin wreath, incorporate some Halloween-themed ornaments. Whether it’s a mini broomstick, a ghost, or a bat, these ornaments can be hot glued onto the wreath at various points to add that spooky Halloween feel. Remember, it’s your wreath, so feel free to get creative and add whatever ornaments make you feel festive.
Step 4: Attach Faux Fall Leaves or Flowers
Now, it’s time to bring some natural elements into your wreath. Take your faux fall leaves or flowers and attach them to the wreath. You can nestle them between the mini pumpkins and ribbons or glue them onto the front of the wreath. This infusion of fall colors helps create a seasonal look perfect for Halloween and beyond.
Step 5: Bring in Some Creepy Crawlies
No Halloween decoration is complete without some creepy crawlies. Use tiny plastic spiders or other insects to add a touch of spookiness. You can glue them directly onto the wreath or attach them with floral wire for added dimension.
Step 6: Add a Personal Touch
To make your pumpkin wreath genuinely unique, consider adding some personal touches. This could be a laminated family photo, a small wooden sign with your family’s name, or even Halloween-themed charms representing each family member’s favorite Halloween character.

Remember, the goal is to create a wreath that celebrates the season and reflects your family’s personality and style. Attach your elements securely with hot glue or floral wire, ensuring they’re well-placed for maximum visibility.
Step 7: Finalize with a Hanger
Every wreath needs a way to be displayed. For this, you can create a hanger using a length of sturdy ribbon, twine, or even a metal wreath hanger. If you’re using ribbon or twine, simply loop it around the top of the wreath and secure it with a knot or bow. If using a metal hanger, attach it according to the manufacturer’s instructions. Ensure the hanger is secure before you try to hang your wreath.
Step 8: Display Your Pumpkin Wreath
The final step is to display your pumpkin wreath for all to see. Find a spot on your front door or any other space that will do justice to your handcrafted Halloween decor. Ensure the site you choose to hang your wreath is sturdy enough to support its weight and is visible to passersby.
Once you’ve found the perfect place, hang your wreath securely using the hanger you’ve attached. Step back and admire your handiwork. Congratulations, you’ve just successfully decorated a pumpkin wreath!
Step 9: Maintenance and Storage
Maintaining your pumpkin wreath is critical to ensuring its longevity. Keep it looking fresh by dusting it lightly from time to time. Avoid direct sunlight and harsh weather conditions to help preserve the colors and materials.
Store your wreath in a cool, dry place when Halloween is over. Wrap it in a plastic or cloth cover to protect it from dust and pests. You can reuse your festive pumpkin wreath for many upcoming Halloweens with proper care.

Step 10: Time to Celebrate!
Now that your pumpkin wreath is proudly displayed and you have a maintenance plan, it’s time to celebrate! Share your creation with family, friends, and neighbors. Seeing their reactions and compliments will surely make the effort worthwhile. Remember, the best part of crafting is the end product and the fun and fulfillment that comes during the process.
So, pat yourself, step back, and admire your handiwork. You’ve successfully decorated a pumpkin wreath and added your personal touch to the Halloween festivities. Let the spookiness begin!
By following these simple steps, you can create a gorgeous pumpkin wreath that will envy your neighborhood.
5 Additional Tips and Tricks
- Experiment with Colors: Don’t limit yourself to the traditional orange pumpkins. Use white, green, or striped mini pumpkins for a unique touch.
- Add Texture: Incorporate elements like pine cones, faux berries, or even small pieces of driftwood to make the wreath visually exciting and add a touch of nature.
- Use Durable Materials: If your wreath is exposed to the elements, make sure the materials you use are weather-resistant. This includes the faux pumpkins, any ribbons, and the wreath itself.
- Try Different Sizes: Mix and match different sizes of pumpkins. The variety will add depth and visual interest to your wreath.
- Light It Up: Consider adding a string of battery-operated LED lights to your wreath. This will make your pumpkin wreath stand out, especially during the evening.
With these additional tips and tricks, you can take your pumpkin wreath decorating to the next level.
5 Things You Should Avoid
- Avoid Overcrowding: Too many elements can make your pumpkin wreath look cluttered and chaotic. Keep it simple and elegant by not overcrowding the wreath with too many pumpkins or decorations.
- Don’t Neglect the Wreath Base: While the pumpkins are the show’s star, the wreath base should be addressed. Ensure it complements the overall design rather than detracting from it.
- Avoid Delicate Materials: Even if you’re hanging your wreath indoors, it’s best to avoid delicate materials that can easily break or deteriorate over time.
- Don’t Use Real Pumpkins: While real pumpkins may seem appealing, they can rot and attract pests. Stick to faux pumpkins that can last season after season.
- Avoid Bright, Harsh Lighting: If you add lights to your wreath, opt for warm, soft lighting rather than bright, harsh sunlight. It will complement the autumnal theme and create a welcoming ambiance.

By avoiding these mistakes, you can ensure your pumpkin wreath looks stunning and lasts long.
5 Different Design Ideas
- Traditional: Stick to the classic look of a pumpkin wreath by using orange and white mini pumpkins, burlap ribbon, and dried leaves as accents.
- Elegant: Create a sleek pumpkin wreath using metallic faux pumpkins, silk flowers, and a luxurious velvet ribbon.
- Rustic: Incorporate twine, cotton stems, and a wooden sign with a handwritten greeting to create a rustic pumpkin wreath.
- Whimsical: Add fun and whimsy to your pumpkin wreath by using brightly colored mini pumpkins, glitter accents, and unconventional ribbon choices.
- Monochromatic: Create a visually striking pumpkin wreath by using all white or black faux pumpkins and adding accents like feathers, pearls, or lace.
You can customize your pumpkin wreath with these different design ideas to match your style and taste.
Conclusion
In conclusion, how to decorate a pumpkin wreath is a fun and creative way to add some festive flair to your fall decor. Following the steps outlined in this blog post, you can easily create a gorgeous wreath that will impress all your friends and family. Whether you choose to use real pumpkins or faux ones, there are endless possibilities for personalization and customization. So don’t be afraid to get creative and make it your own!
And if you’re feeling adventurous, try experimenting with different color schemes or adding in other autumn elements like leaves or acorns. The important thing is to have fun and enjoy the process of creating a unique and beautiful decoration for your home. As the holiday season approaches, I hope this post has inspired you to get crafty and liven up your front door with a stunning pumpkin wreath.
So go ahead, grab some supplies, and let your imagination run wild – you will be satisfied with the result! Happy decorating!
Expertise:
Crafting expert with a focus on innovative techniques and diverse materials.
Specialization:
- Textile arts (weaving, embroidery, and fabric dyeing)
- Woodworking and furniture design
- Mixed media and upcycling projects
Recognition:
- Featured in local art exhibits showcasing innovative craft projects
- Collaborated with community organizations to promote crafting workshops
- Received accolades for contributions to sustainable crafting initiatives
Mission:
- To inspire and empower crafters of all levels to discover their creative potential
- Encourages experimentation and self-expression through hands-on projects