
There are many reasons why you might want to cut glitter vinyl with Cricut Maker. Glitter vinyl is a fun and versatile material that can be used for a variety of projects, from home decor to fashion accessories. And the Cricut Maker is the perfect tool to help you bring your glitter vinyl creations to life.

The main advantage of using a Cricut Maker to cut glitter vinyl is its precision and accuracy. Unlike manual cutting methods, the Cricut Maker uses advanced technology to ensure clean and precise cuts every time. Another advantage is the ease of use.
The Cricut Maker has a user-friendly interface and comes with pre-made designs that can be easily customized or you can create your own designs using the software. In this blog post, You will learn in detail how to cut glitter vinyl with cricut maker.
Materials You Will Need
- Cricut Maker
- Glitter Vinyl
- StandardGrip Mat
- Weeding Tool
- Transfer Tape Sheet
- Scissors
- Scraper Tool
- Printable Glossy Sticker Paper or Clear Sticker Paper
- Light Grip Mat (Optional)
- Cricut Brayer (Optional)
The Cricut Maker machine is the ultimate cutting tool for any DIY project, and with its powerful cutting abilities, it makes cutting glitter vinyl a breeze.
Step by Step Processes for How to Cut Glitter Vinyl With Cricut Maker
Step 1: Inspect the Materials
Before diving into cutting glitter vinyl with your Cricut Maker, it is important to inspect all the materials you will be using. This includes the vinyl itself, transfer tape, and any tools or accessories that may be necessary for precision cutting. Next, choose a design that you would like to cut from the glitter vinyl. This can be a pre-made design or one that you have created yourself using a software such as Design Space.

Step 2: Prepare the File
If you are using a pre-made design, make sure to upload it into Design Space and resize it to fit your desired project. If you have created your own design, ensure that all elements are properly aligned and sized for cutting. Now it’s time to set up your Cricut Maker for cutting glitter vinyl. Make sure the fine-point blade is inserted, and adjust the pressure and speed settings according to the material you will be cutting.
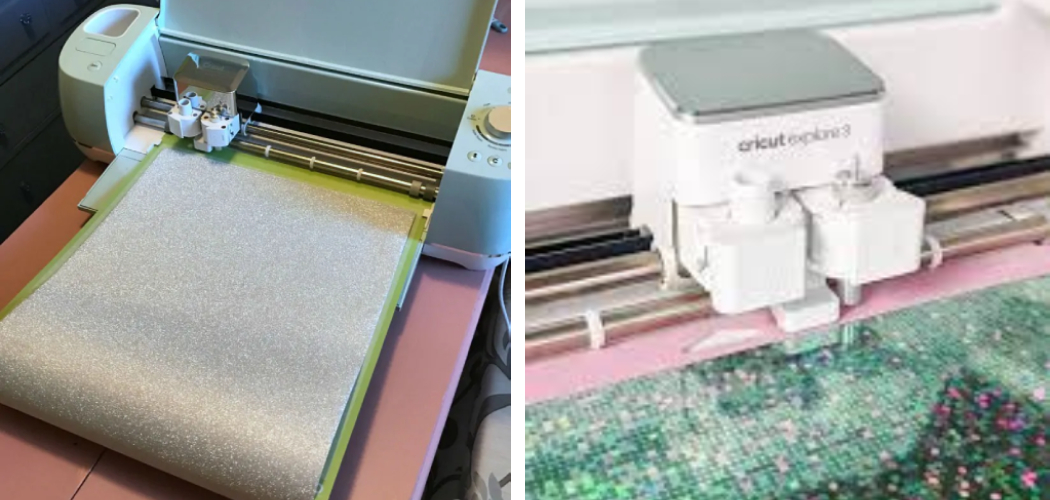
Step 3: Load the Vinyl Onto a Cutting Mat
Place the glitter vinyl onto a cutting mat with the shiny side facing down. Make sure the vinyl is smooth and free of any wrinkles or bubbles. Follow the prompts on Design Space to cut your chosen design from the glitter vinyl using your Cricut Maker. This may take a few minutes depending on the complexity of your design.
Step 4: Weed the Excess Vinyl
Once the cutting is complete, remove the vinyl from the cutting mat and carefully weed out any excess pieces using a weeding tool or tweezers. After weeding, apply transfer tape over your design. This will help to keep all the individual pieces in place when transferring them onto your desired surface.

Step 5: Transfer the Design
Carefully peel the backing off the transfer tape and place it onto your desired surface. Use a scraper tool to firmly press down on the design and ensure it adheres properly. Finally, carefully peel off the transfer tape, leaving behind your perfectly cut glitter vinyl design. Voila! You have successfully learned how to cut glitter vinyl with your Cricut Maker.
By following these simple steps, you can create beautiful and intricate designs using glitter vinyl that will add a touch of sparkle to any project. With the Cricut Maker’s precision cutting capabilities and your creativity, the possibilities are endless.
Tips for How to Cut Glitter Vinyl With Cricut Maker
- When working with glitter vinyl, always wear protective eyewear and gloves to prevent irritation from the small glitters.
- Use a cutting mat specifically designed for use with Cricut Maker machine. This will provide the necessary stability and ensure proper cutting.
- Make sure to properly clean your Cricut Maker machine before starting the cutting process. Any debris or leftover scraps can affect the accuracy and quality of the cut.
- Adjust the blade depth and pressure settings according to the type and thickness of your glitter vinyl. This will ensure a clean and precise cut without damaging the material.
- When loading the glitter vinyl into the machine, make sure it is securely attached to the mat to prevent shifting or sliding during cutting.
- Avoid using dull or worn out blades as they can tear or snag the glitter vinyl, resulting in an uneven cut.
- Always do a test cut before starting your project to ensure that the settings and blade are properly adjusted for the type of glitter vinyl you are using.

Common Issues While Cutting Glitter Vinyl
When working with any new material, it’s not uncommon to encounter a few hiccups along the way. The same is true when cutting glitter vinyl with your Cricut Maker. But fear not, troubleshooting these issues is usually fairly simple. Here are some of the most common problems you may face while cutting glitter vinyl and how to solve them:
1. Material not Cutting Through
If your machine seems to be having trouble cutting all the way through the glitter vinyl, it could be due to a few reasons. First, make sure that you have selected the correct material setting in Design Space.
Glitter vinyl should be cut on the “Iron-on” or “Heat Transfer Vinyl” setting. If that doesn’t solve the issue, try increasing the pressure setting on your machine by turning the knob on the right side of the machine. You can also try using a fresh blade or double cutting the material.
2. Difficulty Weeding
Glitter vinyl can be a bit trickier to weed than regular vinyl due to its textured surface. To make this process easier, you can use a weeding tool or tweezers to help peel away the excess material. You can also try using a warm iron to gently press over the vinyl, which can help loosen the adhesive and make it easier to weed.

3. Tears or Bubbles in Vinyl
If you notice any tears or bubbles in your glitter vinyl after cutting, this is most likely due to not enough pressure being applied during the cutting process. Again, try increasing the pressure setting on your machine or double cutting the material to ensure it cuts all the way through. You can also try using a brayer or scraper tool to firmly press the vinyl onto your cutting mat before cutting.
4. Poor Quality Cut
If your glitter vinyl is not being cut cleanly or accurately, this could be due to a few factors. First, make sure your blade is sharp and clean. If it’s dull or dirty, it can affect the precision of the cut. You can also try using a new cutting mat, as an old or worn out mat can cause the vinyl to shift during cutting. Finally, make sure your machine is properly calibrated by going through the calibration process in Design Space.
By following these troubleshooting tips, you should be able to cut glitter vinyl with ease using your Cricut Maker. Remember to always test your settings on a small piece of scrap material before cutting your final project, and don’t be afraid to experiment with different pressure and blade settings to achieve the perfect cut.
How Do You Clean Your Machine After Cutting Glitter Vinyl to Prevent Any Residue Buildup?
In addition to troubleshooting any cutting issues, it’s also important to properly clean your machine after working with glitter vinyl. The textured surface of glitter vinyl can cause small pieces and residue to stick to the blade and cutting mat, which can affect future cuts.

To clean your Cricut Maker after cutting glitter vinyl, start by removing the material from the machine and wiping down the cutting mat with a lint roller or baby wipe. You can also use a small amount of rubbing alcohol on a cloth to remove any remaining residue.
Next, gently remove the blade from the housing using the quick swap tool and wipe it clean with a dry cloth or cotton swab. If there is still glitter residue stuck to the blade, you can soak it in warm soapy water for a few minutes before drying it completely and placing it back in the housing.
Finally, use a dry lint-free cloth to wipe down the inside of your Cricut Maker and remove any remaining glitter particles. By keeping your machine clean after cutting glitter vinyl, you’ll ensure that it continues to perform at its best for all of your future crafting projects.
How Long Does It Typically Take to Cut Glitter Vinyl With a Cricut Maker?
The time it takes to cut glitter vinyl with your Cricut Maker can vary depending on factors such as the complexity of your design, the settings used, and the speed of your machine. However, a simple design can typically be cut in just a few minutes. Larger or more intricate designs may take longer, but the precision and accuracy of the Cricut Maker will ensure a perfect cut every time.
Additionally, the more familiar you become with your machine and its settings, the faster and more efficient you will be at cutting glitter vinyl. So don’t be discouraged if it takes a bit longer at first, with practice and patience, you’ll be cutting glitter vinyl like a pro in no time. Overall, using a Cricut Maker to cut glitter vinyl is a quick and easy process, making it the perfect tool for all your crafting needs.
Are There Any Special Techniques or Designs That Work Best When Cutting Glitter Vinyl With a Cricut Maker?
While there are no specific techniques or designs that work best for cutting glitter vinyl with a Cricut Maker, there are some things to keep in mind when working with this material. First, it’s important to select the correct material setting in Design Space as mentioned before.

Additionally, when designing your project, try to avoid very intricate or small details, as these can be difficult to cut and weed with glitter vinyl. It’s also helpful to use a thicker font or bold designs for best results.
Finally, make sure to always use a sharp blade and increase the pressure setting if needed for a clean and precise cut. With these tips in mind, you’ll be able to create beautiful projects with glitter vinyl using your Cricut Maker. Overall, cutting glitter vinyl with a Cricut Maker is a fun and rewarding process that allows you to add some sparkle to all your crafting projects.
Conclusion
In conclusion, cutting glitter vinyl with Cricut Maker is a fun and creative way to add some sparkle to your projects. Whether you are a beginner or an experienced crafter, this process is simple and easy to follow. By following the steps outlined in this blog, you can achieve clean and precise cuts on your glitter vinyl every time. Not only does using the Cricut Maker make the cutting process quicker and more efficient, but it also allows for a greater level of customization.
Additionally, with proper care and maintenance of your machine, you can ensure that it will last for many projects to come. From custom t-shirts to personalized home decor, the possibilities are endless when it comes to using glitter vinyl with your Cricut Maker. I hope this article has been beneficial for learning how to cut glitter vinyl with cricut maker. Make Sure the precautionary measures are followed chronologically.