
Are you looking to add a bit of seasonal spookiness to your home decor? Or maybe you need the perfect Halloween costume accessory? Then look no further than this easy-to-follow tutorial on how to crochet witch hat!

Whether you’re just starting crochet or already have some experience – this craft project is great for anyone who wants to get creative and make something special with their own hands. In no time at all, you can transform simple materials into an eye-catching witch hat that will bring plenty of smiles during any fall holiday celebration!
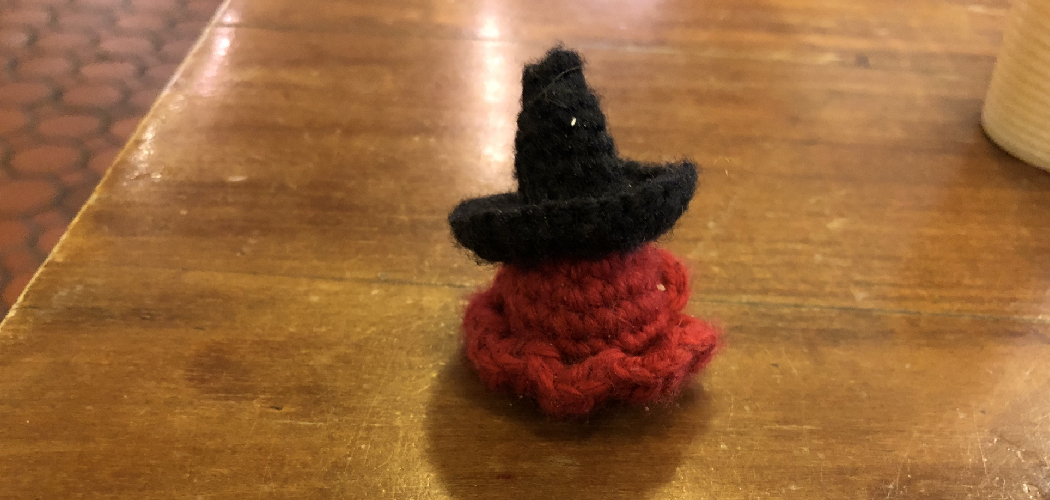
What Color Witch Hat Is Best for All Festivals?
The color of the witch hat is one of the most important elements when creating a festive and fun costume. While traditional Halloween colors, such as black and orange, may be associated with witches, they are not your only options! There are many different colors that you can use to create a unique and eye-catching witch hat.
For a classic, spooky look, you can choose traditional colors like grey and purple. These provide the perfect backdrop to create an eerie feel while still being stylish. If you’re looking for something more vibrant, you can use bright yellows and reds that stand out in any setting.
If your witch hat is for a costume party, you can use bolder colors like green and blue. These will create an eye-catching look that is sure to turn heads. You can also choose lighter shades, such as pastels or even white, if you’re going for a softer, more whimsical look.

No matter what color you choose, making your own witch hat is sure to be a fun and creative project. With so many colors available, you’re sure to find the perfect shade for your one-of-a-kind design. So pick out your favorite colors and get started on making your own special witch hat!
10 Methods How to Crochet Witch Hat
1. Choose the Right Yarn.
The type of yarn you use will determine how your hat turns out. For a stiffer hat that keeps its shape well, choose a wool or acrylic yarn. For a softer, drapier hat, choose cotton or bamboo yarn. If you are making a hat for someone with sensitive skin, opt for 100% cotton yarn. Be sure to choose a color that goes with the rest of your costume.
While bright orange, purple or black are popular choices for a witch hat, any color will work. Although the pattern calls for worsted-weight yarn, you can always go up or down a weight if desired.
2. Choose the Right Crochet Hook.
The size of the crochet hook you use will also affect the final product. A smaller hook will result in a tighter stitch and a denser fabric, while a larger hook will create a looser stitch and a lighter fabric. Choose the size of hook that best suits the yarn you’ve chosen.
Although it might be tempting to use a large hook for speedy crocheting, the final product will not look as neat and won’t hold its shape as well during wear. While it is possible to use needles other than the one recommended on the yarn label, you may not get the right tension in your crochet.
3. Start with a Magic Ring.
A magic ring is a way to start crocheting in the round without leaving a hole in the center of your work. To make a magic ring, wrap the yarn around your index finger and hold it in place with your thumb. Insert your hook into the loop and pull up a loop of yarn.

Continue to do this until you have the desired number of stitches for your project. If you are making a simple witch’s hat, you will need to start with six single crochet stitches in your magic ring. Try to keep the stitches tight so that your hat doesn’t have a big hole in the center.
4. Crochet in the Round.
Once you have your magic ring, you’ll need to crochet in the round in order to create a circular piece of fabric. To do this, simply insert your hook into the first stitch and pull up a loop of yarn. Insert your hook into the next stitch and repeat until you’ve gone all the way around the circle.
At the end of your round, pull up a loop of yarn and chain one to close off the stitch. Then, you’ll begin another round by inserting your hook into the same stitch and repeating. Keep crocheting until you reach the desired size for your hat.
5. Make Increase Stitches as Needed.
If you want your hat to be wider, you’ll need to make increased stitches as you go along. To do this, simply insert your hook into the stitch, pull up a loop of yarn, and then insert your hook into the same stitch again and pull up another loop of yarn before completing the stitch (you should now have three loops on your hook). Finish the stitch as normal (by pulling through all three loops) and continue around the circle until you have reached the desired width for your hat.
6. Make Decrease Stitches as Needed.
If you want your hat to be narrower, you’ll need to make decreased stitches as you go along. To do this, simply insert your hook into two stitches at once and pull up a loop of yarn before finishing the stitch as normal (by pulling through all three loops).

Continue around the circle until you have reached the desired width for your hat. If you are making a pointed hat, you will most likely need to make several rows of decreased stitches. For a flat-topped witch hat, one decreased stitch row may be enough.
7. Switch Colors as Desired.
If you want to add stripes or other design elements to your hat, you can easily switch colors in the middle of the round by simply dropping the first color and picking up the new color. Make sure to always keep the yarns on opposite sides of your work so that they don’t get tangled. When you are finished with a color, leave a long tail of yarn so that you can weave it in later. You can also join new colors by using a loop stitch, which creates an invisible join between colors.
8. Finish off and Weave in the Ends.
Once you have reached the desired size for your hat, finish off by cutting the yarn and pulling it through the last stitch to secure it. Then weave in any remaining ends so that they don’t show on the outside of your work. While you are weaving in the ends, you can also shape the hat a bit by pulling and pinching sections. This will help it to take on the shape of a witch hat. Now your crochet witch hat is ready to wear! Have fun and be creative with the decorations if you choose to add any.
9. Block Your Hat.
To ensure that your hat is a perfect fit and shape, it’s best to block it before you wear it. To do this, simply lay your hat out flat on a blocking mat or foam board and pin it in place using T-pins or regular sewing pins. Then take a spray bottle filled with water and lightly spritz the hat until it’s damp but not dripping.
Allow the hat to dry completely before unpinning. If you have time, you can even give it a light steam with iron for extra crispness. Once the hat is fully blocked and dry, you can sew the final piece on, attach a pin or ribbon, and enjoy your handiwork!
10. Enjoy Your Finished Creation!
Your new witch hat is now ready for its debut! Put on your masterpiece and show off your handmade work of art with pride! With a little practice, you’ll be able to make all sorts of unique and stylish hatted creations with ease. Although witch hats are great for Halloween, they can also be worn year-round when crocheted in a variety of fabrics and colors. Your witch hat will be sure to turn heads and make you the envy of all your friends! Have fun with it and make some magic.

Some Common Mistakes When Crocheting Witch Hat
1. Not Using the Right Crochet Hook:
When crocheting a witch hat, it’s important to choose the correct crochet hook size. If the hook is too large, it may make your hat look baggy and will be more difficult to work with.
2. Not Gauging the Width of the Hat:
When crocheting a witch hat, you must be aware of how wide it is. If you make your hat too narrow, it won’t fit properly and will give an uneven shape. It’s best to use a ruler or tape measure to ensure that your hat has the right width.
3. Not Picking the Right Yarn:
Choosing the right type of yarn for witchcraft that is important. Choose a yarn that isn’t too heavy but also has enough texture and strength to give your hat shape and volume. This will help ensure that your witch hat stands out and looks great.
Conclusion
Now that you know how to crochet a basic witch hat, it’s time to get creative! Try using different colors of yarn for a festive touch. You can also add ribbon or other decorations to personalize your hat. Have fun and be safe this Halloween season! We hope this guide on how to crochet witch hat was helpful. Please share it with your friends on social media if you find it useful. And be sure to check back here soon for more informative guides like this one.
You Can Check It Out to Make Chunky Yarn