
Are you feeling that festive spirit with the holidays just around the corner? Looking for a fun and creative way to get ready for the season? How about crocheting your own unique Christmas ornaments? By using materials you already may have, such as scraps of yarn and crochet hooks, it’s now easier than ever to make personalized decorations that will truly bring joy to your home.

In this blog post on how to crochet christmas ornaments, we’ll guide you step-by-step on how to take advantage of this wonderful holiday craft. Soon enough, your living space will be warmed with homemade woolen creations full of character and charm – one only needs a little bit of know-how! So grab some supplies from around the house, cozy up in front of your favorite show or album in preparation and let’s start creating together!
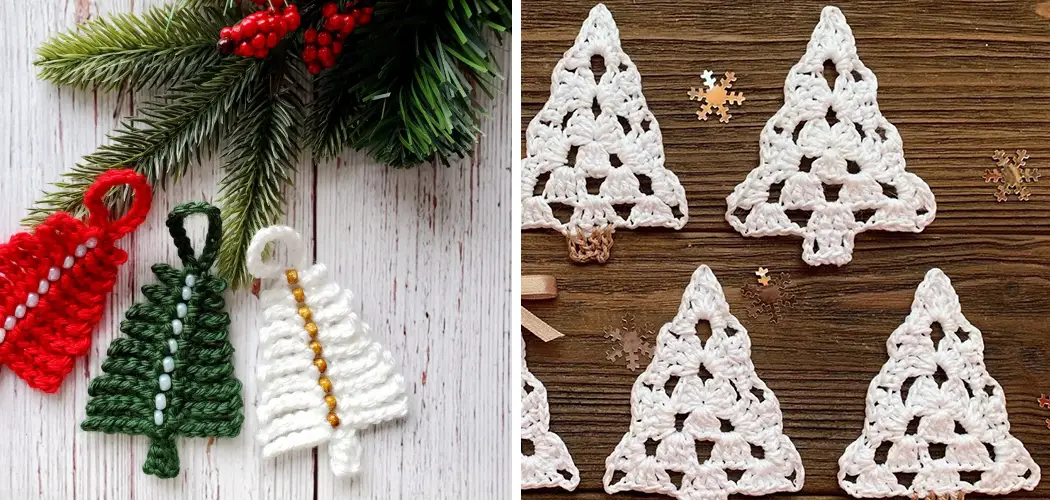
Why Do You Need to Crochet Christmas Ornaments?
Christmas decorations are unique to each person – there’s no one-size-fits-all solution. Through crocheting, you can make something perfectly suited for your space and add a little touch of personality too. Whether it’s to spruce up that tree or hang from the mantle, you will be able to create creative pieces of art with just a few simple steps.
Also, crocheting can be an incredibly relaxing and enjoyable activity – it’s like taking a mini vacation from the day-to-day hustle. So why not take advantage of your next free evening to make something special?
12 Step-by-step Guides on How to Crochet Christmas Ornaments
Step 1: Gather Supplies
Before you begin, it is important to make sure you have all the necessary supplies. You will need:
- Yarn
- Crochet Hooks
- Scissors
- Stitch Markers or Pins (Optional)
Once you have all the supplies ready, you can begin your project!

Step 2: Choose a Design
There are countless designs to choose from when it comes to crocheting Christmas ornaments. You can choose a classic shape such as a star or a snowflake, or you can get creative and design your own. Once you have chosen a design, you can search online for a pattern or create one yourself.
It’s up to you! But remember, whatever you choose, the pattern should be thin enough to fit on your crochet hook. It should also be simple enough that you can follow it easily.
Step 3: Make a Slipknot
To begin crocheting, you will first need to create a slipknot. To do this, create a loop with your yarn and place the end of the loop over the main strand. Insert your crochet hook into the loop and pull the end of the loop through, forming a slipknot.
You can then pull the end of the yarn to make sure it’s secure. It is important to make sure the slipknot isn’t too tight or it will be difficult to work with later. But don’t make it too loose either, as your stitches may come undone.
Step 4: Chain Stitch
The next step is to create a chain stitch, which is a basic crochet stitch used to create a foundation for your ornament. To create a chain stitch, loop your yarn over the hook, then pull the yarn through the slipknot. Repeat this process until you have your desired length.
It is important to make sure you are not pulling the chain stitches too tightly, as this will make it difficult to work with later. You can use a stitch marker or pin to keep track of the stitches if needed.

Step 5: Single Crochet
The single crochet stitch is another basic stitch that is commonly used in crocheting. To do this, insert your crochet hook into the second chain stitch from the hook. Then, loop your yarn over the hook and pull it through the stitch. Loop the yarn over the hook again and pull it through both loops on your hook.
You have now completed your first single crochet stitch! Continue this process until you reach the end of your chain. It is important to make sure your stitches are even, so be sure to count them as you go.
Step 6: Double Crochet
The double crochet stitch is similar to the single crochet stitch but creates a taller stitch. To do this, loop your yarn over the hook and insert it into the stitch. Loop the yarn over the hook again and pull it through the stitch. Loop the yarn over the hook once more and pull it through two of the loops on your hook.
Repeat this until you have one loop left on your hook. You have now completed a double crochet stitch! It’s important to make sure you are not pulling your stitches too tightly.
Step 7: Joining
Once you have completed your desired number of stitches, you will need to join the last stitch to the first stitch. To do this, insert your hook into the first stitch and loop the yarn over the hook. Then, pull the yarn through both the first and last stitch to create a seamless connection.
But don’t pull too tightly or your stitches may come undone. However, don’t pull too loosely either, as this will make your ornament look sloppy. It’s important to find a balance between the two.

Step 8: Adding Embellishments
After you have completed your basic crochet work, you can add any embellishments you like. This is where you can get creative and personalize your ornament. You can add beads, buttons, or even some glitter for some extra sparkle. If you don’t have any extra supplies, try using scraps of yarn for a unique look. This is completely up to you – the possibilities are endless!
Step 9: Finishing
Once you have added your embellishments, it is time to finish off your ornament. Cut the yarn, leaving a tail of a few inches. Thread the tail through the loop on your hook and pull tight. This will secure your work and prevent it from unraveling. It is important not to pull too tightly or your ornament may not be able to hang properly. You can also use some thread or yarn to create a loop for hanging your ornament.
Step 10: Blocking
Blocking is the process of shaping your crochet work to ensure it lays flat and has a professional finish. To do this, dampen your finished ornament, and then pin it to a flat surface, such as a towel. Gently stretch and pull the ornament until it is the desired shape and size, then let it dry completely. You can also use steaming or ironing to help the blocking process. It is important to be careful when blocking your ornament, as it can easily become misshapen.
Step 11: Attaching Hanger
Finally, attach a hanger to your ornament so it can be hung on your tree. You can use a ribbon, string, or even a small piece of yarn. Simply loop it through the top of your ornament and tie it in a knot. Although it may seem unimportant, the hanger is an integral part of your ornament and can make a big difference in how it looks. It is important to make sure the hanger is secure and won’t slip off over time.

Step 12: Displaying Your Ornaments
Congratulations! You have successfully crocheted your own Christmas ornaments. Now, it’s time to display them on your tree and enjoy the fruits of your labor. You can choose to make several of the same design or mix and match different shapes and colors for a unique and festive display. It doesn’t matter what route you take – your tree will be sure to sparkle with a touch of handmade love.
Following these steps can help you create beautiful, unique Christmas ornaments that will be sure to bring a smile to your face each time you look at them. We hope this guide helps you start on your crocheting journey and have fun with it. Don’t forget to share the love and gift handmade Christmas ornaments to friends and family!
If you have any questions about how to crochet Christmas ornaments, feel free to reach out and contact us. We’d love to hear from you! Happy Crocheting!
Bonus Tips
- Try Using Different Colors for Each Ornament for a Festive Look.
- Use Different Textures and Types of Yarn for Unique Results.
- Create a Variety of Shapes and Sizes for a More Eye-catching Display.
- Have Fun With It! Crocheting Can Be a Great Way to Relax and Express Your Creativity.
- If You’re New to Crocheting, We Recommend Starting With Simple Shapes and Designs.
- When You’re Finished, Give Your Ornament a Good Brushing to Help It Look Its Best.
- Take Some Time to Appreciate the Beautiful Craftsmanship That Goes Into Each Handmade Piece. It Will Make for a Festive Season Indeed!
- Visit Yarn Stores and Craft Fairs for Unique Ornaments and Supplies.
- Use Safety Pins to Secure Your Stitches Before You Start Crocheting. This Will Help Keep Them in Place and Prevent Mistakes.
- If Possible, Use Wooden or Bamboo Crochet Hooks for a More Comfortable Grip.
- Have Patience! Crocheting Can Be Time-consuming, but the Results Are Worth It in the End.
- Invest in Good Quality Yarn and Supplies for the Best Results.
- Don’t Forget to Take a Break Now and Then! Crocheting Should Be Fun, Not Stressful.
- Have Fun Trying Out New Patterns and Experimenting With Different Designs.
- Make Sure You Have Everything You Need Before Starting Your Project So You Don’t Run Into Any Unexpected Hiccups Along the Way.
- You Can Also Use Crochet to Create Decorations, Garlands, and Other Festive Items. Just Use Your Imagination!
- Don’t Forget to Share Your Creations With Us on Social Media and Tag Us So We Can See What You’ve Made! We’d Love to See How You Express Yourself Through Crocheting This Holiday Season.

Frequently Asked Questions
Q1: What Materials Do I Need to Crochet a Christmas Ornament?
A1: You will need yarn, a crochet hook, and any decorations or embellishments you’d like to add. It is also helpful to have scissors, a measuring tape, and safety pins.
Q2: What Is the Difference Between Single and Double Crochet Stitches?
A2: The single crochet stitch is a basic stitch that creates a flat, dense fabric, while the double crochet stitch creates a taller, more open stitch. Both stitches are commonly used in crocheting and can be used to create a variety of designs.
Q3: How Long Does It Take to Crochet an Ornament?
A3.: The amount of time it takes to crochet an ornament depends on the complexity and size of the design. Generally speaking, a simple ornament can be crocheted in about an hour or two, but more complex designs may take longer.
Q4: How Can I Store My Christmas Ornaments?
A4: To store your crochet ornaments, you will need a sturdy box with dividers to keep them organized and protected. If possible, avoid keeping the ornaments in direct sunlight as this can cause them to fade over time. You can also line the box with a soft material to help prevent it from getting scratched or damaged.

Conclusion
With all of the ideas and tips given on how to crochet christmas ornaments, you should be ready to embark on your own homemade Christmas ornament journey. Making these one-of-a-kind crochet decorations is so much fun and brings a real sense of pride to those who make them. Use your creativity to make something unique and special this year.
Complete your bounty by making up some sentimental tags or cards that bring an extra special memory of the holiday season to come. And, if you find yourself stumped or starting over multiple times, don’t get discouraged! Crafting takes practice and trial and error – it may not always turn out perfectly but that’s part of the experience. Most importantly, have a good time creating unique crochet pieces for your tree this season!