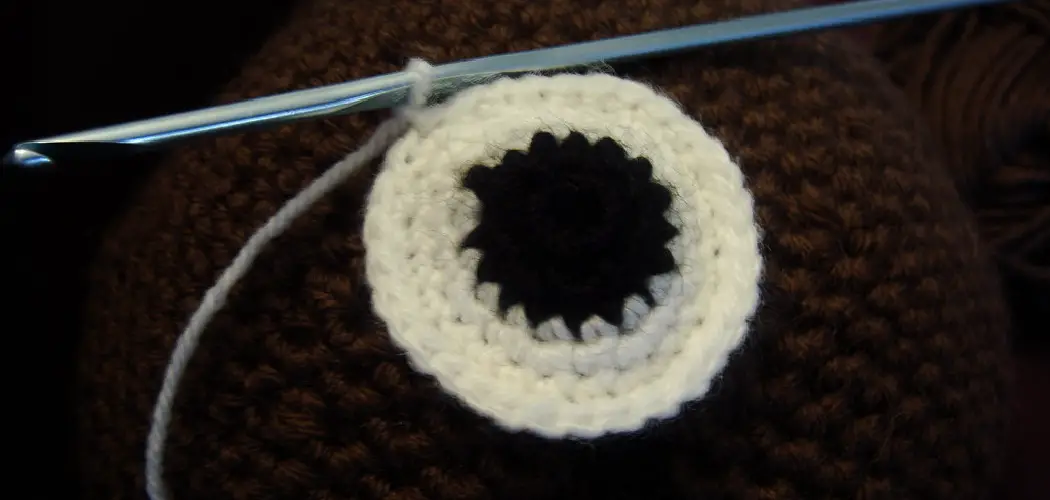
If ghastly Halloween decorations are your thing, look no further than this tutorial for how to crochet an eyeball! While crocheting anatomical details may seem unusual, creating spooky accessories is a fun way to get into the Halloween spirit. Eyeball amigurumi can be used to decorate your home for Halloween or even worn as a quirky accessory.
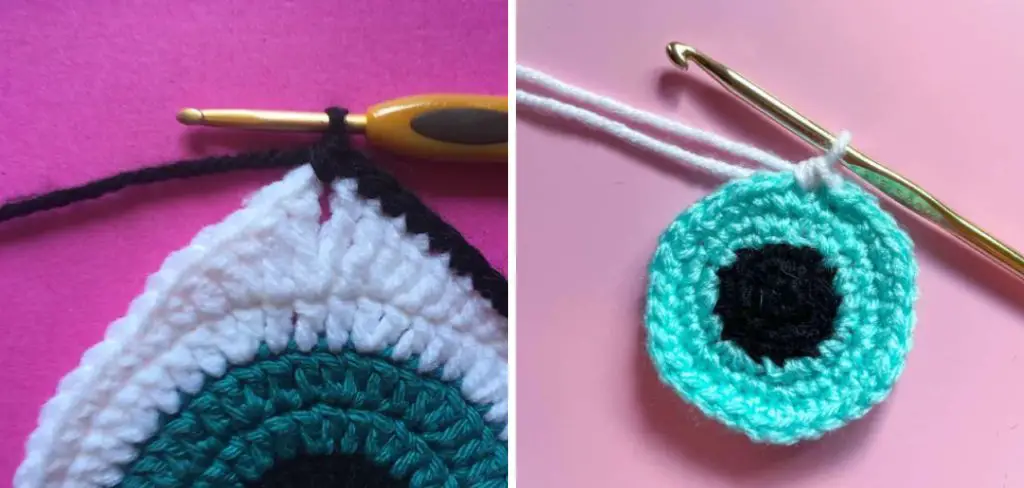
In this post, I’ll walk you through crafting a disturbingly delightful eyeball amigurumi step-by-step using basic crochet stitches. When you’ve finished your stitched sphere and attached the googly eyes, you’ll have a unique creepy-cool decoration perfect for dressing up your home or handing it out as a treat this Halloween season.
Read on to learn how to crochet this eerie eyeball and add an extra eye-catching element to your haunting holiday decor!
What Will You Need?
Before we get started, let’s gather the supplies you’ll need for this project. Don’t worry if you’re new to crocheting – this tutorial uses basic stitches that are easy to master. Here’s what you’ll need:
- Yarn in white and any additional colors of your choosing (for veins or iris details)
- Crochet hook (size will depend on your yarn weight)
- Fiberfill stuffing
- Two small googly eyes
- Yarn needle
- Scissors
Once you have all your supplies, it’s time to start creating your creepy crochet eyeball!
10 Easy Steps on How to Crochet an Eyeball
Step 1: Start with a Magic Circle
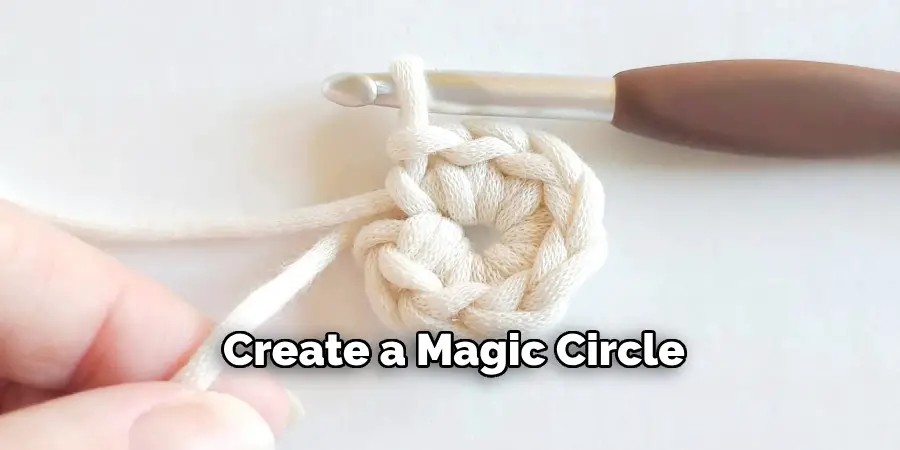
To begin, we’ll create a magic circle. This is an easy and popular way to start crocheting in the round, resulting in a tight center for our eyeball amigurumi.
Here’s how to make a magic circle:
- Hold the end of the yarn in your hand and wrap the string around your fingers to create a loop.
- Slip your crochet hook through the loop, hook the yarn, and draw it through it.
- Make a chain stitch to secure the loop.
You have now created a magic circle! You’ll crochet the first round of stitches into this circle.
Step 2: Crochet the First Round
Now that you have your magic circle, it’s time to crochet the first round. We’ll be creating the base of the eyeball in this step. Here’s how to do it:
- Crochet 6 single crochet stitches (sc) into the magic circle.
- Once you’ve completed these stitches, pull the tail of the yarn tight to close the circle.
- Join the last stitch to the first with a slip stitch (sl st).
You’ve now completed the first round! Your work should look like a small circle with six stitches.
Step 3: Increase Your Stitches
We’ll need to increase the number of stitches in each round to make the eyeball shape. In the second round, you’ll be increasing to 12 stitches. Here’s how:
- Make two single crochet stitches in each stitch from the first round.
- Join the last stitch to the first with a slip stitch.
You should now have a circle with 12 stitches, double the number from your first round.
Step 4: Continue Increasing Your Stitches
For the third round, you’ll increase to 18 stitches, following the pattern of 1 single crochet in the first stitch, then 2 single crochets in the next stitch. Repeat this pattern around the circle.
- Single crochet in the first stitch.
- Two single crochets in the next stitch.
- Repeat this pattern until you’ve completed the round.
- Join the last stitch to the first with a slip stitch.
Your circle should now have 18 stitches. This gradual increase will help you achieve the round shape for your crochet eyeball.
The next steps will guide you in adding the necessary colors and details to your eyeball to make it eerie and eye-catching!
Step 5: Add Color to Your Eyeball
Now that you have the base of your eyeball, it’s time to add some color! We’ll start by adding the color of the iris. Here’s how to do it:
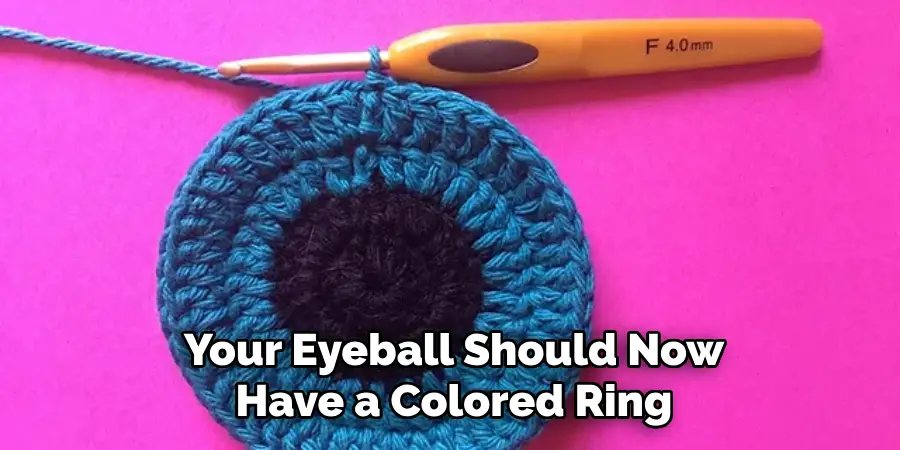
- Choose the color you want for the iris of your eyeball and join it to your working yarn.
- Crochet one round in this color, following the same pattern of increasing you’ve been using. You should end with 24 stitches.
- Join the last stitch to the first with a slip stitch.
Your eyeball should now have a colored ring, which will serve as the iris. The following steps will take you through creating the pupil and adding the finishing touches to your spooky eyeball!
Step 6: Create the Pupil
The next step is to create the pupil for your crochet eyeball. For this, we will use black yarn. Here’s how to do it:
- Join the black yarn to your working yarn.
- Crochet one round in black, following the same pattern of increasing. You should end with 30 stitches.
- Join the last stitch to the first with a slip stitch.
Your eyeball should have a distinct black pupil surrounded by the colored iris. The subsequent steps will guide you in completing the white part of the eyeball and adding the veins for an even more realistic effect.
Step 7: Finish the Eyeball’s White Part
The following step involves creating the eyeball’s white part, contrasting the colorful iris and dark pupil. Here’s how:
- Rejoin the white yarn to your working yarn.
- Crochet three more rounds in white, following the same pattern of increasing each game. Your stitch count should end at 48 stitches.
- Join the last stitch to the first with a slip stitch after each round.
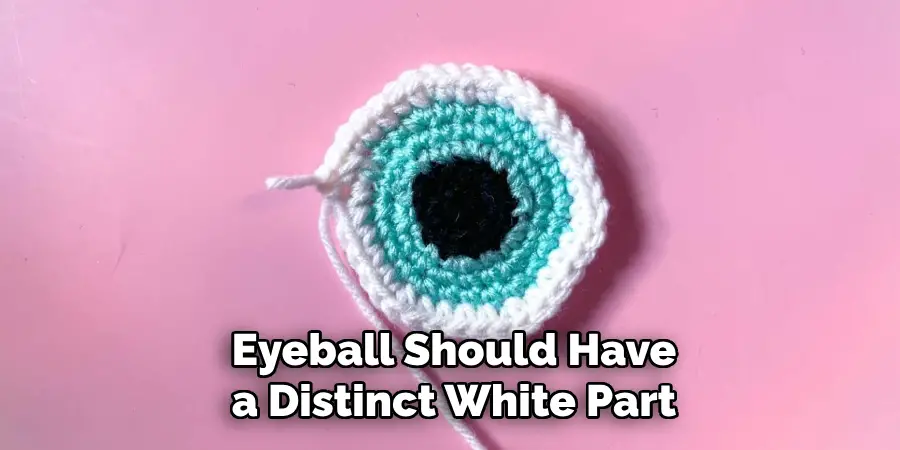
Now, your crochet eyeball should have a distinct white part. The next step will guide you on adding veins to make the eyeball even more spooky!
Step 8: Add Veins to Your Eyeball
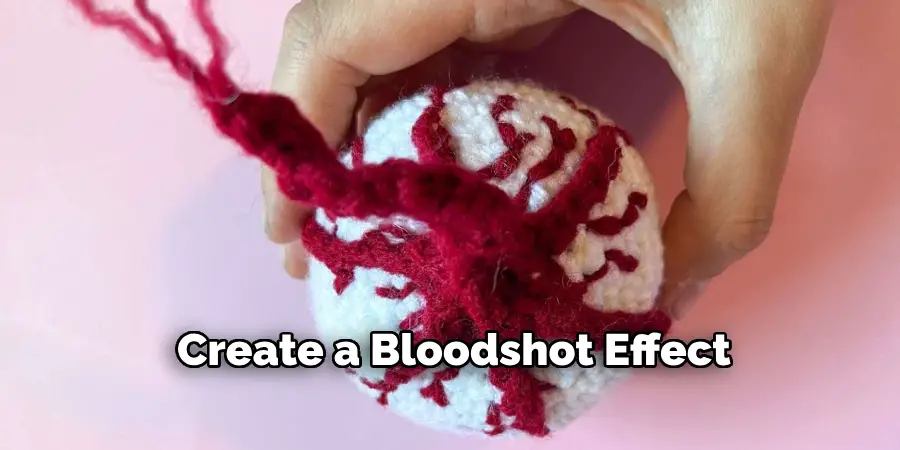
Adding veins will give your crochet eyeball a spooky, realistic touch. Here’s how to do it:
- Choose a yarn color for the veins (red or purple works well for a realistic effect).
- Starting from the outer edge of the eyeball, make loose stitches that wiggle towards the center and back out again, creating a vein-like pattern.
- Use the yarn needle to weave these stitches in and out of the white part of the eyeball.
- Repeat this process until you’re satisfied with the number and placement of the veins.
Remember, veins are irregular and branching, so be creative with your stitches! Now that you’ve added your veins, you can move on to creating your crochet eyeball.
Step 9: Create the Back of the Eyeball
Next, we need to create the back of your crochet eyeball. This will give your eyeball a lovely 3D effect and allow it to stand independently. Join the back of your eyeball by following these steps:
- Crochet a flat circle in white that is slightly smaller than your eye.
- Use a slip stitch to join this circle to the back of your eyeball.
- Stuff the space between the front and back of your eyeball with stuffing material.
- Join any remaining open stitches with a slip stitch to close up the back of your eyeball.
- Weave in any remaining loose ends and trim excess yarn.
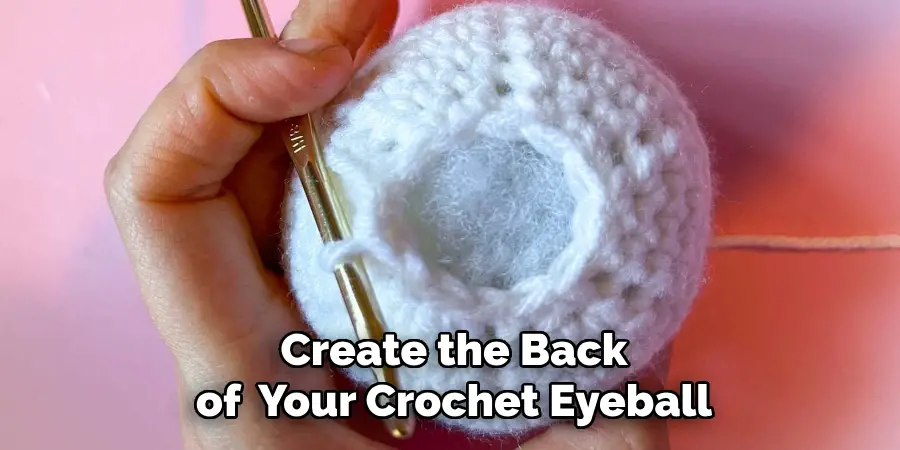
Your crochet eyeball is now complete! You can use it as a decoration, keychain, or even as part of a costume. Feel free to experiment with different colors and designs to make each eyeball unique.
Step 10: Variations and Ideas
Now that you have mastered how to crochet an eyeball, there are myriad ways to get creative with this pattern.
- Size Variation: By adjusting the size of your crochet hook and the weight of your yarn, you can create crochet eyeballs of different sizes. Miniature crochet eyeballs could make quirky earrings or necklace pendants, while larger ones could serve as unique throw pillows.
- Color Variation: Don’t feel limited to natural eye colors! A green or purple iris could add an alien touch, while a red or black iris could lend a more demonic feel.
- Glow-In-The-Dark Yarn: For a real wow factor, consider using glow-in-the-dark yarn for the white part of the eyeball. It will make your crochet eyeball a hit at Halloween parties or other night events.
Have fun experimenting and seeing how many types of crochet eyeballs you can create!
5 Additional Tips and Tricks
- Maintain Tension: Keeping your stitches consistent in size is crucial in crochet, especially for a project like the eyeball that requires a spherical shape. Try to maintain an even tension throughout to ensure a symmetrical final product.
- Add Eyelashes: Add some eyelashes using black embroidery thread or thin yarn to add a feminine touch to your crochet eyeball. You can attach them around the edge of your eyeball using a yarn needle.
- Add Bloodshot Effect: For an even spookier look, use red or pink yarn to create a bloodshot effect on the white part of the eyeball. Simply crochet small circles or ovals and attach them to the white piece using a slip stitch.
- Experiment with Shapes: While traditional crochet eyeballs are round, feel free to experiment with different shapes and sizes. You could create a hexagon-shaped eyeball or make one that is elongated for a more cartoonish effect.
- Make a Set: Crochet multiple eyeballs in different colors and sizes to create a fun set! You can display them in a jar or use them as stress balls for a quirky desk decoration. The possibilities are endless!
Congratulations, you’ve now learned how to crochet an eyeball and have plenty of ideas for variations and creative projects.
5 Things You Should Avoid
- Overstuffing the Eyeball: While giving your crochet eyeball a 3D look is essential, overstuffing might cause the eyeball to lose its spherical shape and distort the overall design. Always use the stuffing material sparingly and evenly.
- Using Too Many Colors: An eyeball, although it can be colorful, should not be a rainbow. Use a maximum of three colors per eye (pupil, iris, and sclera), and remember that the vein color should be realistic (usually red or purple).
- Loose Ends: Loose ends of yarn can make your crochet eyeball look messy and can cause it to unravel over time. Ensure you weave in all loose ends and trim excessive thread after each step.
- Ignoring Tension: Inconsistent tension can drastically change the eyeball’s shape, making it look uneven or misshapen. Remember to maintain consistent pressure throughout the project for the best result.
- Skipped Stitches: Skipping stitches can cause holes in your crochet eyeball. Count your stitches after each round to ensure you have caught all of them. If you have, go back and rectify the mistake.
By avoiding these common mistakes, you can ensure that your crochet eyeball turns out perfectly and is ready to spook everyone who sees it!
What Type of Yarn Should You Use?
When choosing yarn for your crochet eyeball, the possibilities are endless. However, there are a few things to keep in mind:
- Weight: Thicker yarn will create a giant eyeball, while thinner yarn will result in a smaller one. Choose the weight of your adventure based on the size you want your finished product to be.
- Texture: The texture of the yarn will affect the overall look of your crochet eyeball. For a smooth, realistic eye, choose a soft and silky yarn. Opt for a yarn with some fuzz or character for a more cartoonish or textured look.
- Color: As mentioned before, you should use no more than three colors per eye (pupil, iris, and sclera), with the vein color being realistic (usually red or purple). Choose colors that contrast well together to make your crochet eyeball stand out.
Remember, you can always experiment with different types of yarn to see what works best for you. Just have fun and be creative!
Conclusion
In conclusion, how to crochet an eyeball is a fun and unique way to add spunky and spooky decor to your home or Halloween festivities. From the materials needed to the step-by-step process, we have covered everything you need to know to create your crochet eyeball. So what are you waiting for? Grab your hook and yarn, and give it a try!
Feel free to get creative and add your own personal touch, whether it’s adding embellishments or experimenting with different colors. And remember to share your creations with us on social media using the hashtag #crocheteyeball. We can’t wait to see all of the imaginative and quirky designs our readers come up with. This may even become a new tradition for every spooky season!
So go ahead, give it a go, and have some cruel fun with crocheting an eyeball. Your home will thank you for the little whimsy this handmade decoration brings during this time of year. Happy crafting!
Expertise:
Crafting expert with a focus on innovative techniques and diverse materials.
Specialization:
- Textile arts (weaving, embroidery, and fabric dyeing)
- Woodworking and furniture design
- Mixed media and upcycling projects
Recognition:
- Featured in local art exhibits showcasing innovative craft projects
- Collaborated with community organizations to promote crafting workshops
- Received accolades for contributions to sustainable crafting initiatives
Mission:
- To inspire and empower crafters of all levels to discover their creative potential
- Encourages experimentation and self-expression through hands-on projects

