
Are you looking to learn a new craft? Crochet is an enjoyable and fulfilling skill to develop, and making a twist headband is the perfect project for beginners.

After just a few simple steps, you’ll be able to create your very own beautiful twisted headband! With some yarn, some hooks and crochet needles, plus our easy-to-follow instructions in this blog post, you can quickly get started on creating your beautiful craft. So don’t waste any time — let’s get started learning how to crochet a twist headband!
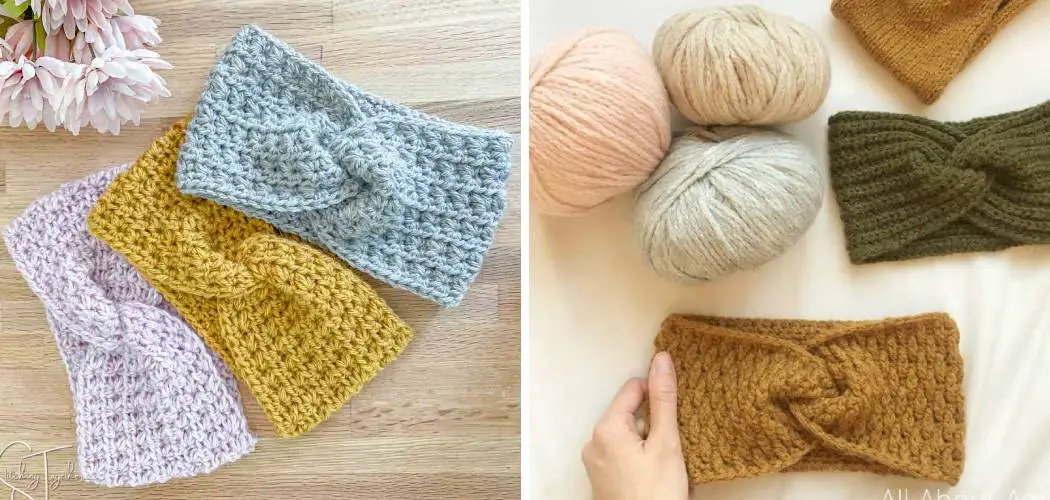
Crochet is a great way to make beautiful and unique handmade crafts from home. In this tutorial, we will show you how to make an eye-catching twist headband with crochet techniques.
Whether you’re new to crocheting or an experienced pro looking for something fun, we’ll guide you through the steps of creating this stylish accessory project. By the end of it, you’ll have a comfy new headband that looks amazing—it’s sure to become a wardrobe staple!
Why May You Want to Crochet a Twist Headband?
There are many reasons why you may want to crochet a twist headband. Such as:
1. To Keep Your Hair Back on Windy Days
One of the most popular reasons to crochet a twisted headband is to keep your hair back on windy days. The twist design helps the headband stay securely in place, making it ideal for keeping your hair away from your face and out of your eyes when you’re outdoors.
2. To Add Style to Any Outfit
Twist headbands are a great way to add some style and color to your outfit without overdoing it. You can crochet them in any color or combination of colors you desire, making them the perfect accessory for any wardrobe.
3. To Make a Great Gift
If you’re looking for something special to give as a gift, then crocheting a twist headband is a great idea. They’re quick to make, easy to customize, and always appreciated by the recipient. Also, they’re a great way to show someone you care—and that you took the time to make something special.
Now that you know why you may want to crochet a twisted headband, let’s move on to how! Start by gathering your materials and continue following the steps outlined in this article. Good luck!
How to Crochet a Twist Headband in 6 Easy Steps
Step 1: Gather Your Supplies
The very first step is to gather all the necessary supplies. This includes a crochet hook size G, some yarn in your chosen color, and scissors. Also make sure to have a measuring tape handy.

This is very important because you need to measure the length of your headband accurately.
Step 2: Measure Your Head
Using the measuring tape, measure around your head where the headband will be placed. This measurement is how long your crochet chain needs to be for a perfect fit. Make sure to record this number.
Step 3: Create a Chain
Using the crochet hook and yarn, create a chain using the number of stitches that you recorded from Step 2. Make sure to leave about an inch or two for extra length at the end. You will have to ensure that all your stitches are even and tight.
Step 4: Create the Twist
Once you have completed creating the chain, it’s time to create the twist. To do this, take one side of the chain and cross it over the other side. Then take the original side and place it behind the crossed piece. Take your crochet hook and pull the yarn through to create the twist.

Step 5: Attach Ends
Once you have created the twist, attaching the ends together is time. To do this, simply place one end of the chain on top of the other and use your crochet hook to pull a stitch through both pieces. Continue to pull stitches through until the ends are secure.
Step 6: Finish Up
The final step is to make sure your headband looks nice and neat. To do this, review each stitch with the crochet hook and ensure they’re all even and tight. Once you are satisfied with how it looks, cut off any excess yarn and your headband is ready to wear!
With these 6 easy steps, you will have a beautiful twist headband that you can show off. These are perfect for any occasion, so get creative with your choice of colors and materials! Enjoy crocheting!
Some Tips to Crochet a Twist Headband
1. Use a Size G or H Crochet Hook
This is very important as you want to ensure the size of your crochet hook is appropriate for the yarn you use. Different yarns require different sizes for proper stitches and tension.
So check the label on your yarn and match it up with a crochet hook.
2. Use the Right Stitch
The most commonly used stitch for a twist headband is a half double crochet (hdc). This type of stitch is perfect for creating an even, uniform look that won’t be too bulky or loose. Also, you can use this stitch to create a lovely, attractive texture.

3. Pay Attention to Your Gauge
Gauge is the number of stitches and rows within any given measurement. It’s important to pay attention to your gauge when working on this project, as you want it to look uniform and even throughout. Make sure to count your stitches after each row and adjust accordingly if necessary.
4. How to Attach the Ends
When you’re done crocheting, you will need to attach the ends of your twist headband together. This is easily done by using a single crochet stitch (sc). Simply insert your hook into both sides, pull up a loop, and then pull it through both loops on your hook.
Frequently Asked Questions
What Precautions Should I Take When Crocheting a Twist Headband?
Ensuring that your tension remains consistent throughout the project is important when crocheting a twisted headband. This will help ensure even stitching and a professional-looking finished product. Additionally, make sure to double-check your pattern for any special instructions or techniques you need to keep in mind. Finally, always read the yarn label carefully to ensure that you are using the correct type and weight of yarn for your project.
What Supplies Do I Need to Crochet a Twist Headband?
To crochet a twisted headband, you’ll need a few basic supplies. These include a crochet hook (preferably in size recommended on the yarn label), a pair of scissors, and a tapestry needle. You’ll also need to select a suitable yarn for your project – make sure to check the yarn label for any special instructions or requirements.
Are There Any Special Techniques Involved in Crocheting a Twist Headband?
Yes – the most important technique used in crocheting a twisted headband is making sure to keep your tension consistent throughout the project. Additionally, take special care to ensure that any stitches you make are evenly spaced and have even tension when pulled. Finally, some patterns may require special techniques such as slip stitching, single crochet stitches, or post stitches. Be sure to read the instructions carefully and follow them closely.
What Is the Best Way to Finish Crocheting a Twist Headband?
The best way to finish crocheting a twisted headband is by weaving in all of your loose ends. This can be done by carefully threading a tapestry needle with your yarn and sewing all of the loose ends into the back of your work. Once you’ve completed this step, give your finished project a light steam blocking to ensure that all of the stitches are even and consistent.

How Can I Tell If My Twist Headband Is Successfully Crocheted?
Once you’ve finished crocheting your twist headband, you can assess the quality of your work by comparing it to the pattern instructions. Make sure that the stitch count and tension are consistent with what is outlined in the pattern, and ensure that all of your stitches look even and neat. Additionally, if any special techniques are used in a particular pattern (such as post stitches), double-check that these have been completed correctly.
Finally, if you’re happy with the look of your headband, give it a light steam block and enjoy wearing your handmade accessory.
Conclusion
Now you know how to crochet a twist headband, you can make them in different colors and sizes to match your outfits. With this tutorial, you now have the basic knowledge of how to crochet a twist headband. Once you’ve mastered the basics, you can start experimenting with more advanced versions, like adding extra twists or making it wider or thinner. Have fun, and enjoy crocheting!
Crochet twist headbands are a unique and stylish project that can be easily manipulated to create your signature look. With a little creativity and patience, you can personalize the design however you like and make beautiful finished pieces that will turn heads. From selecting colors to adding embellishments, there are many possibilities for making attractive pieces with varying difficulty levels.